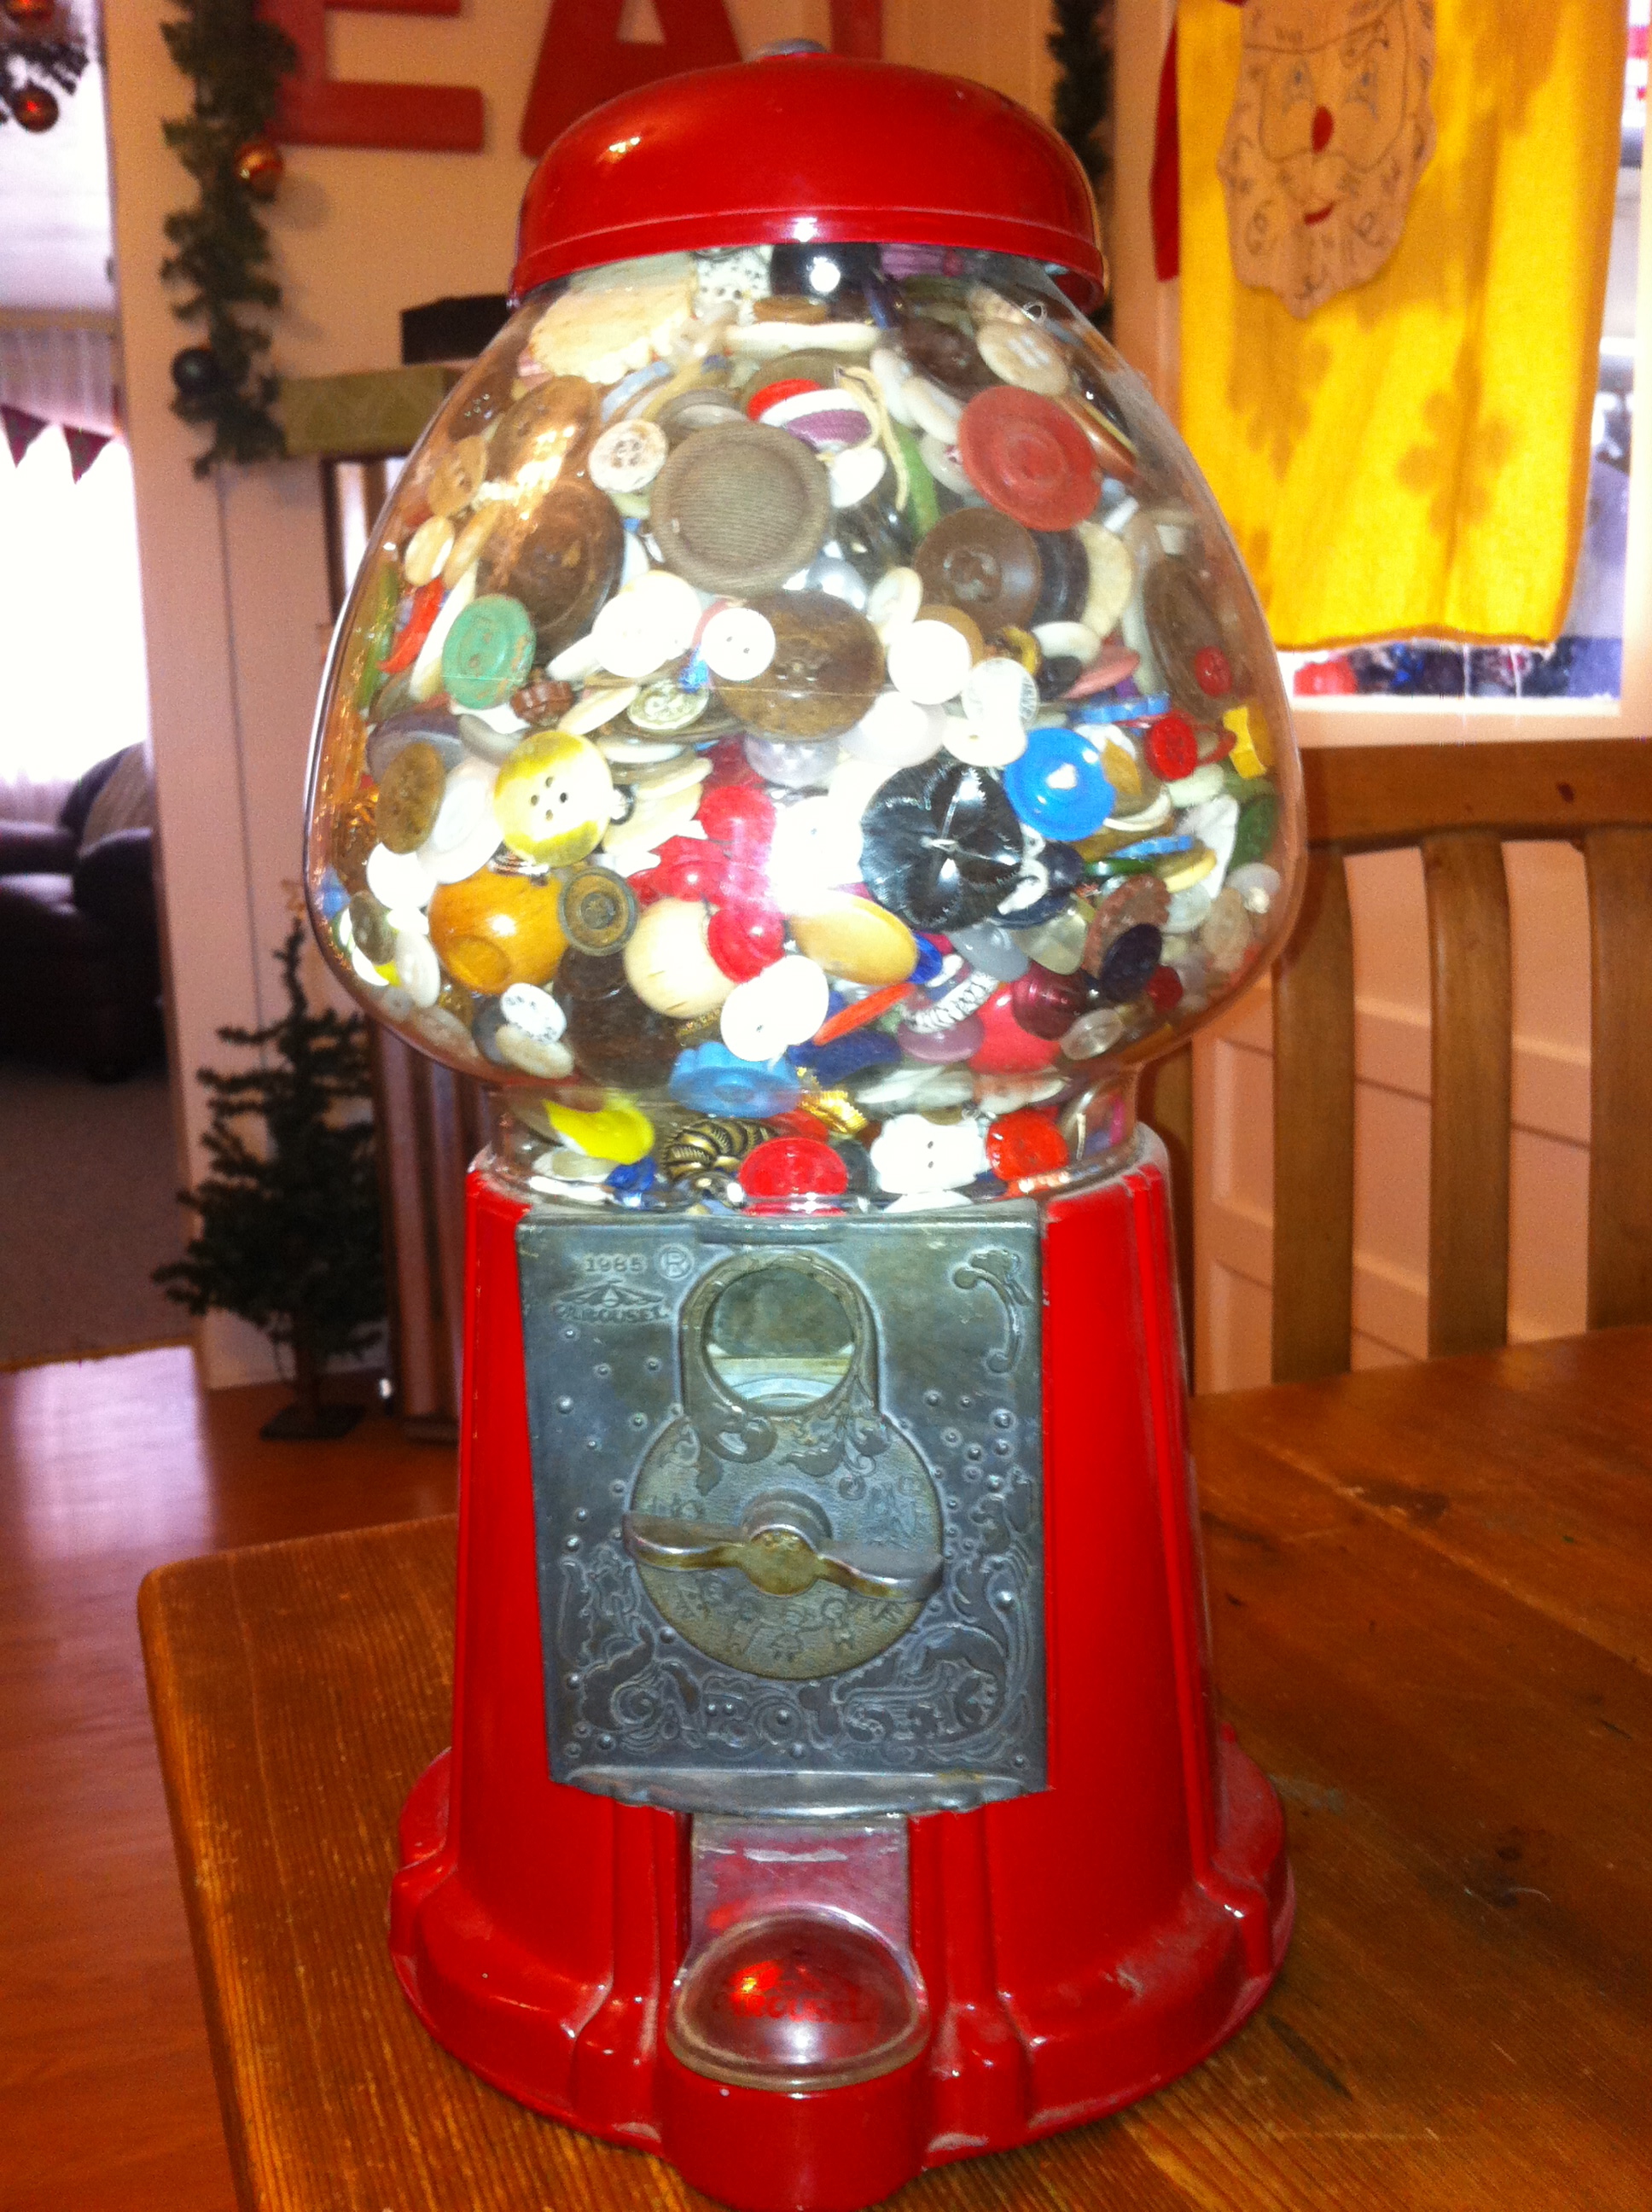
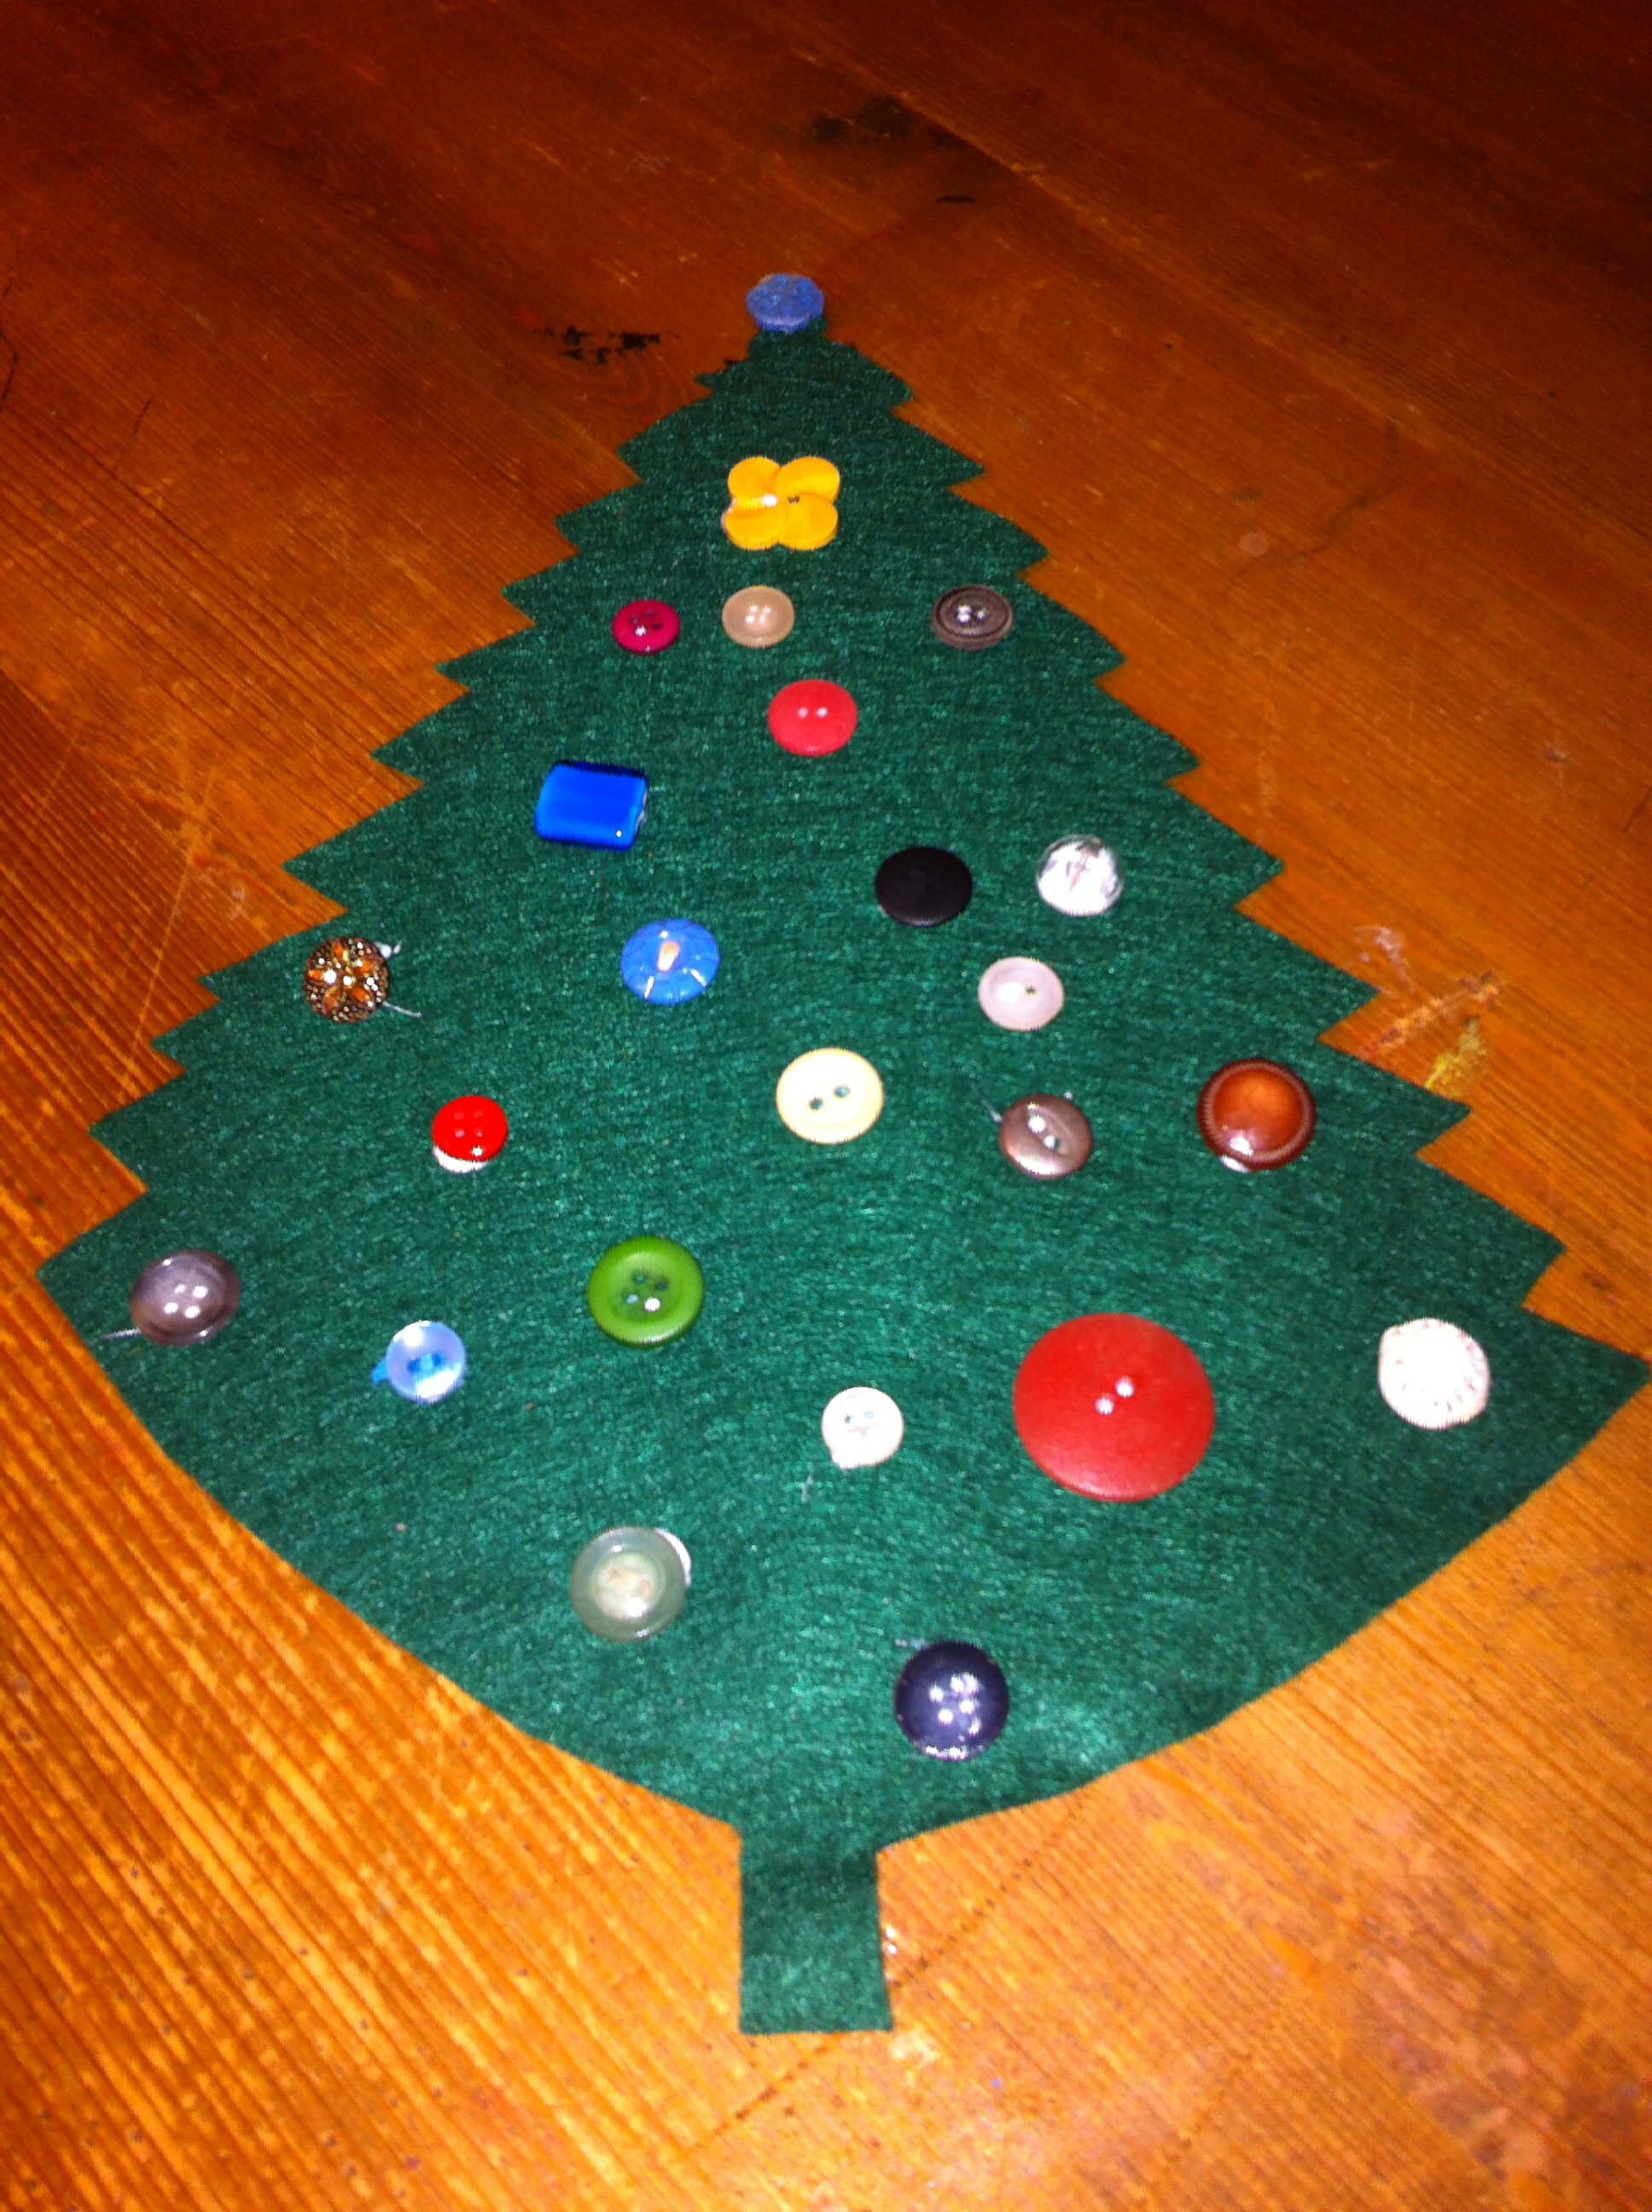
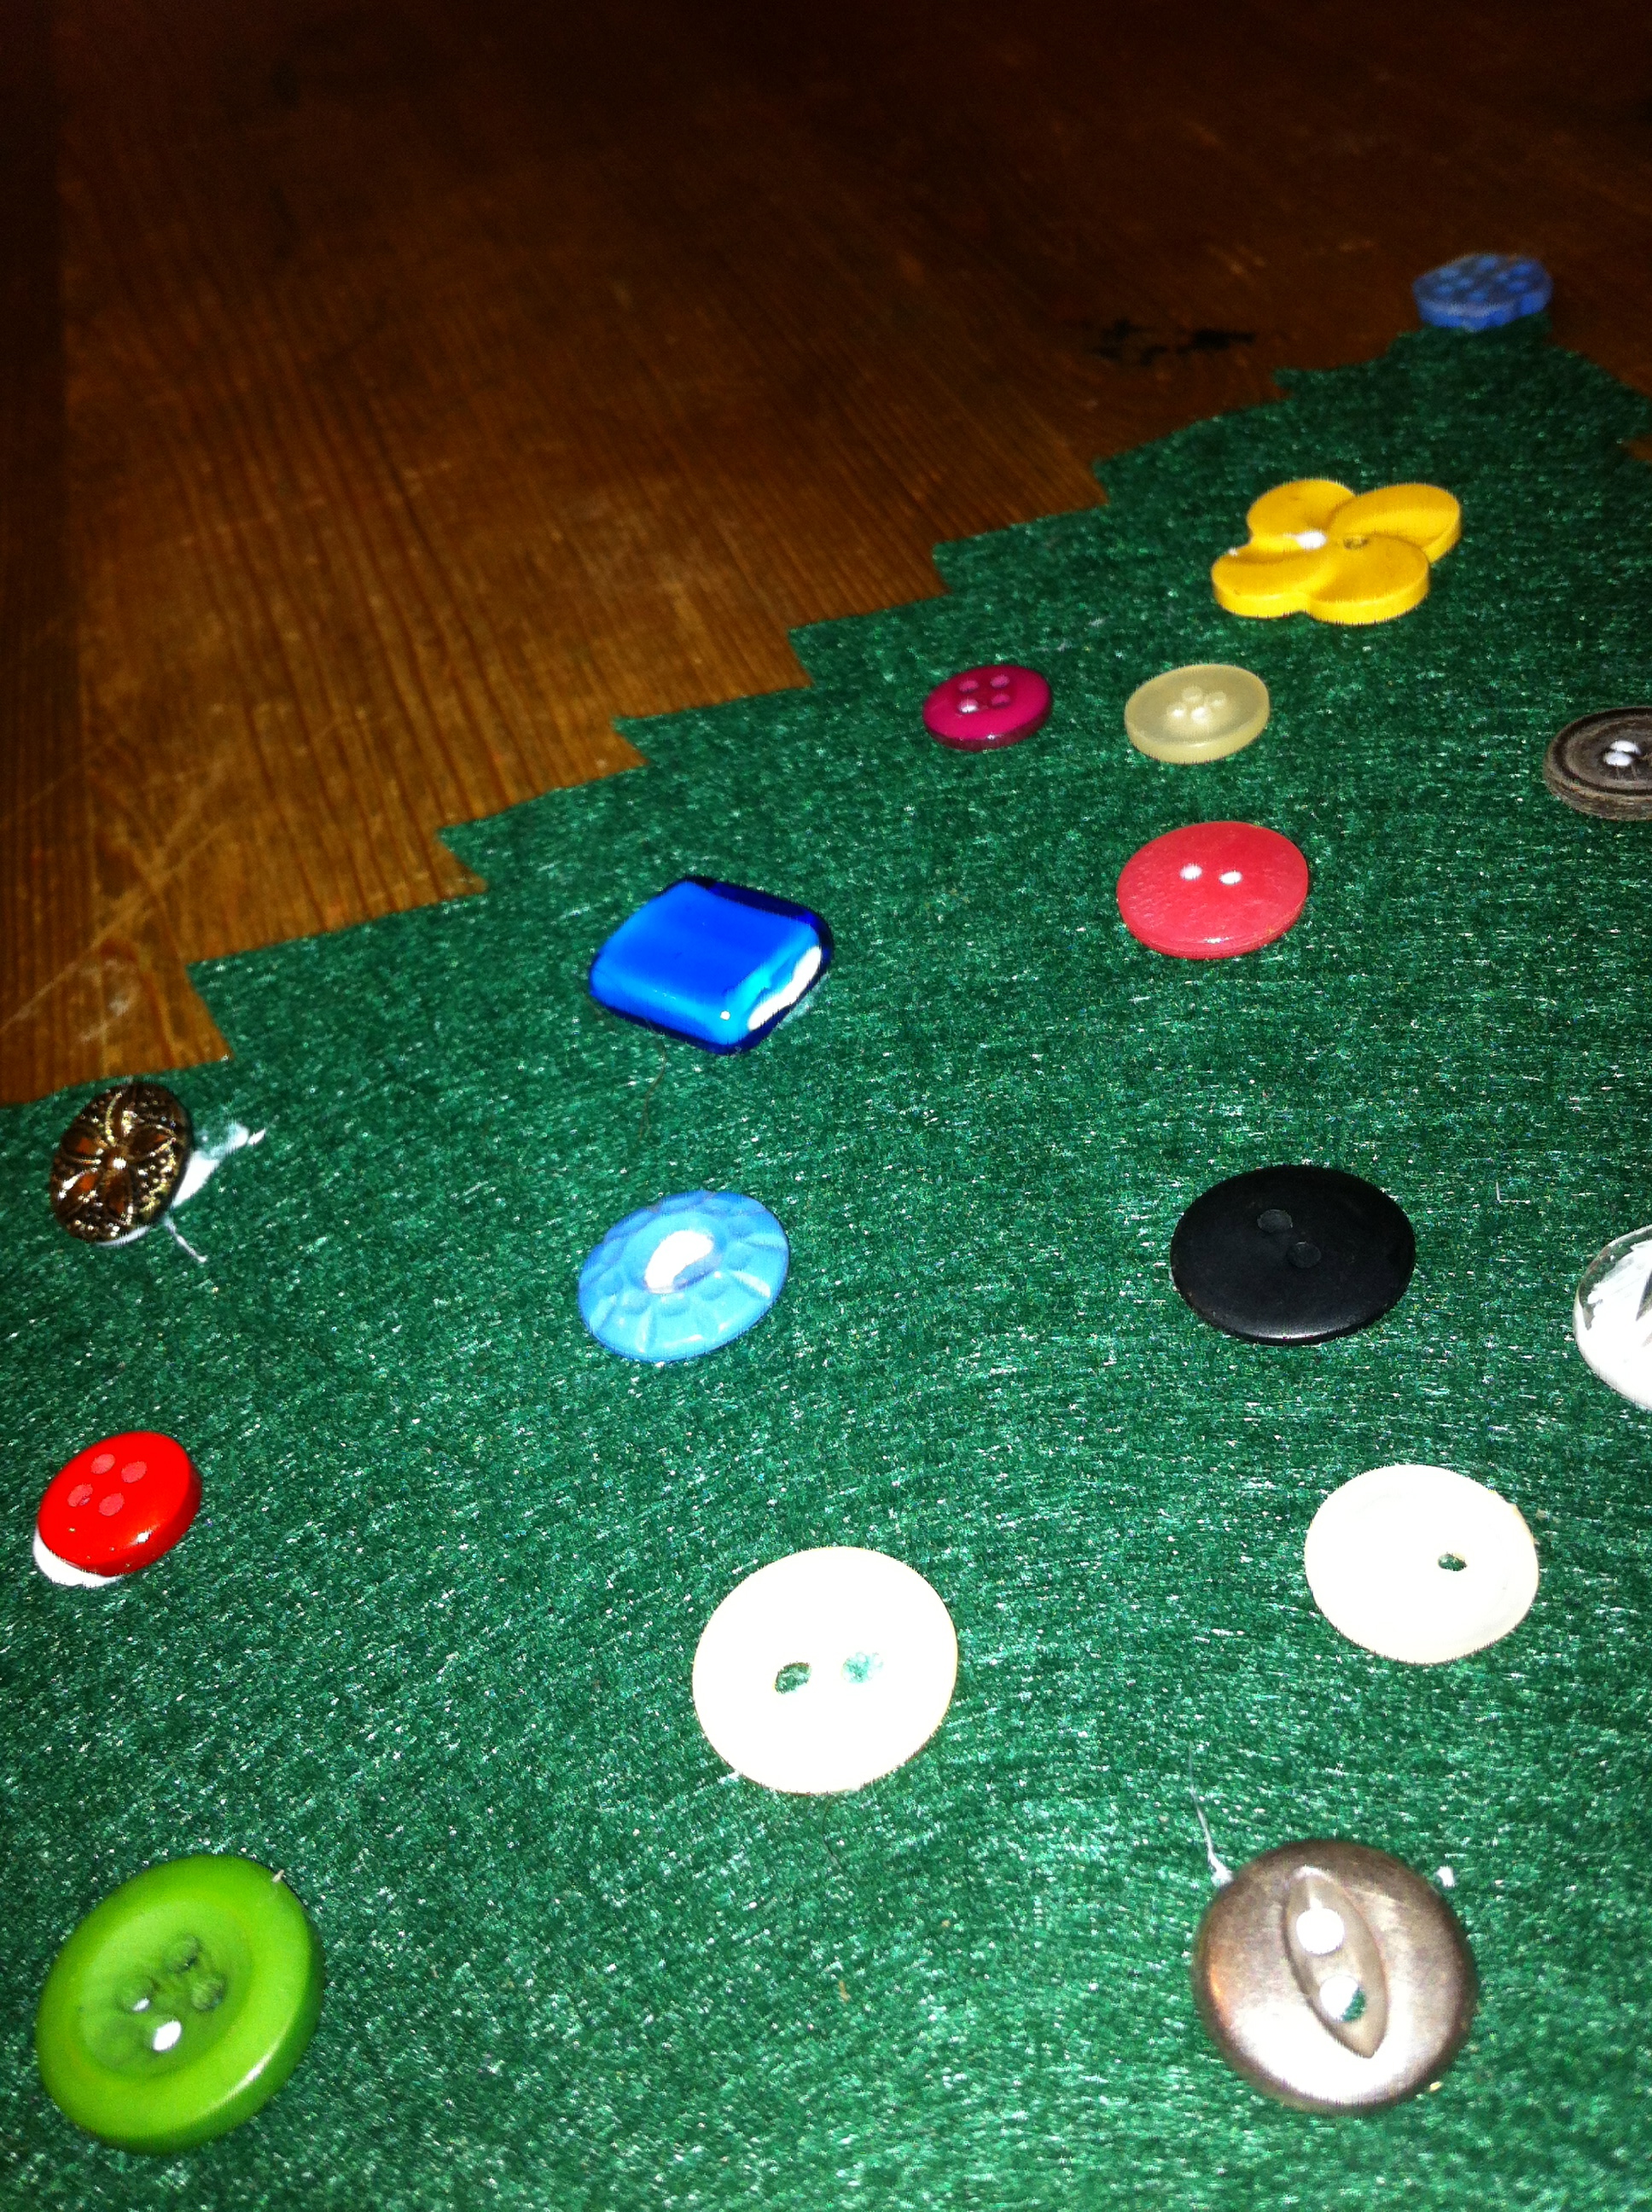
I remember my grandma having a huge canister full of buttons that I would sort through and play with when I was younger. It was one of my favorite things to do at her house, as silly as that seems.
Wrex has bought most of these for me from auctions or thrifts. He’s cool like that.
For decor purposes only – do not eat 😉
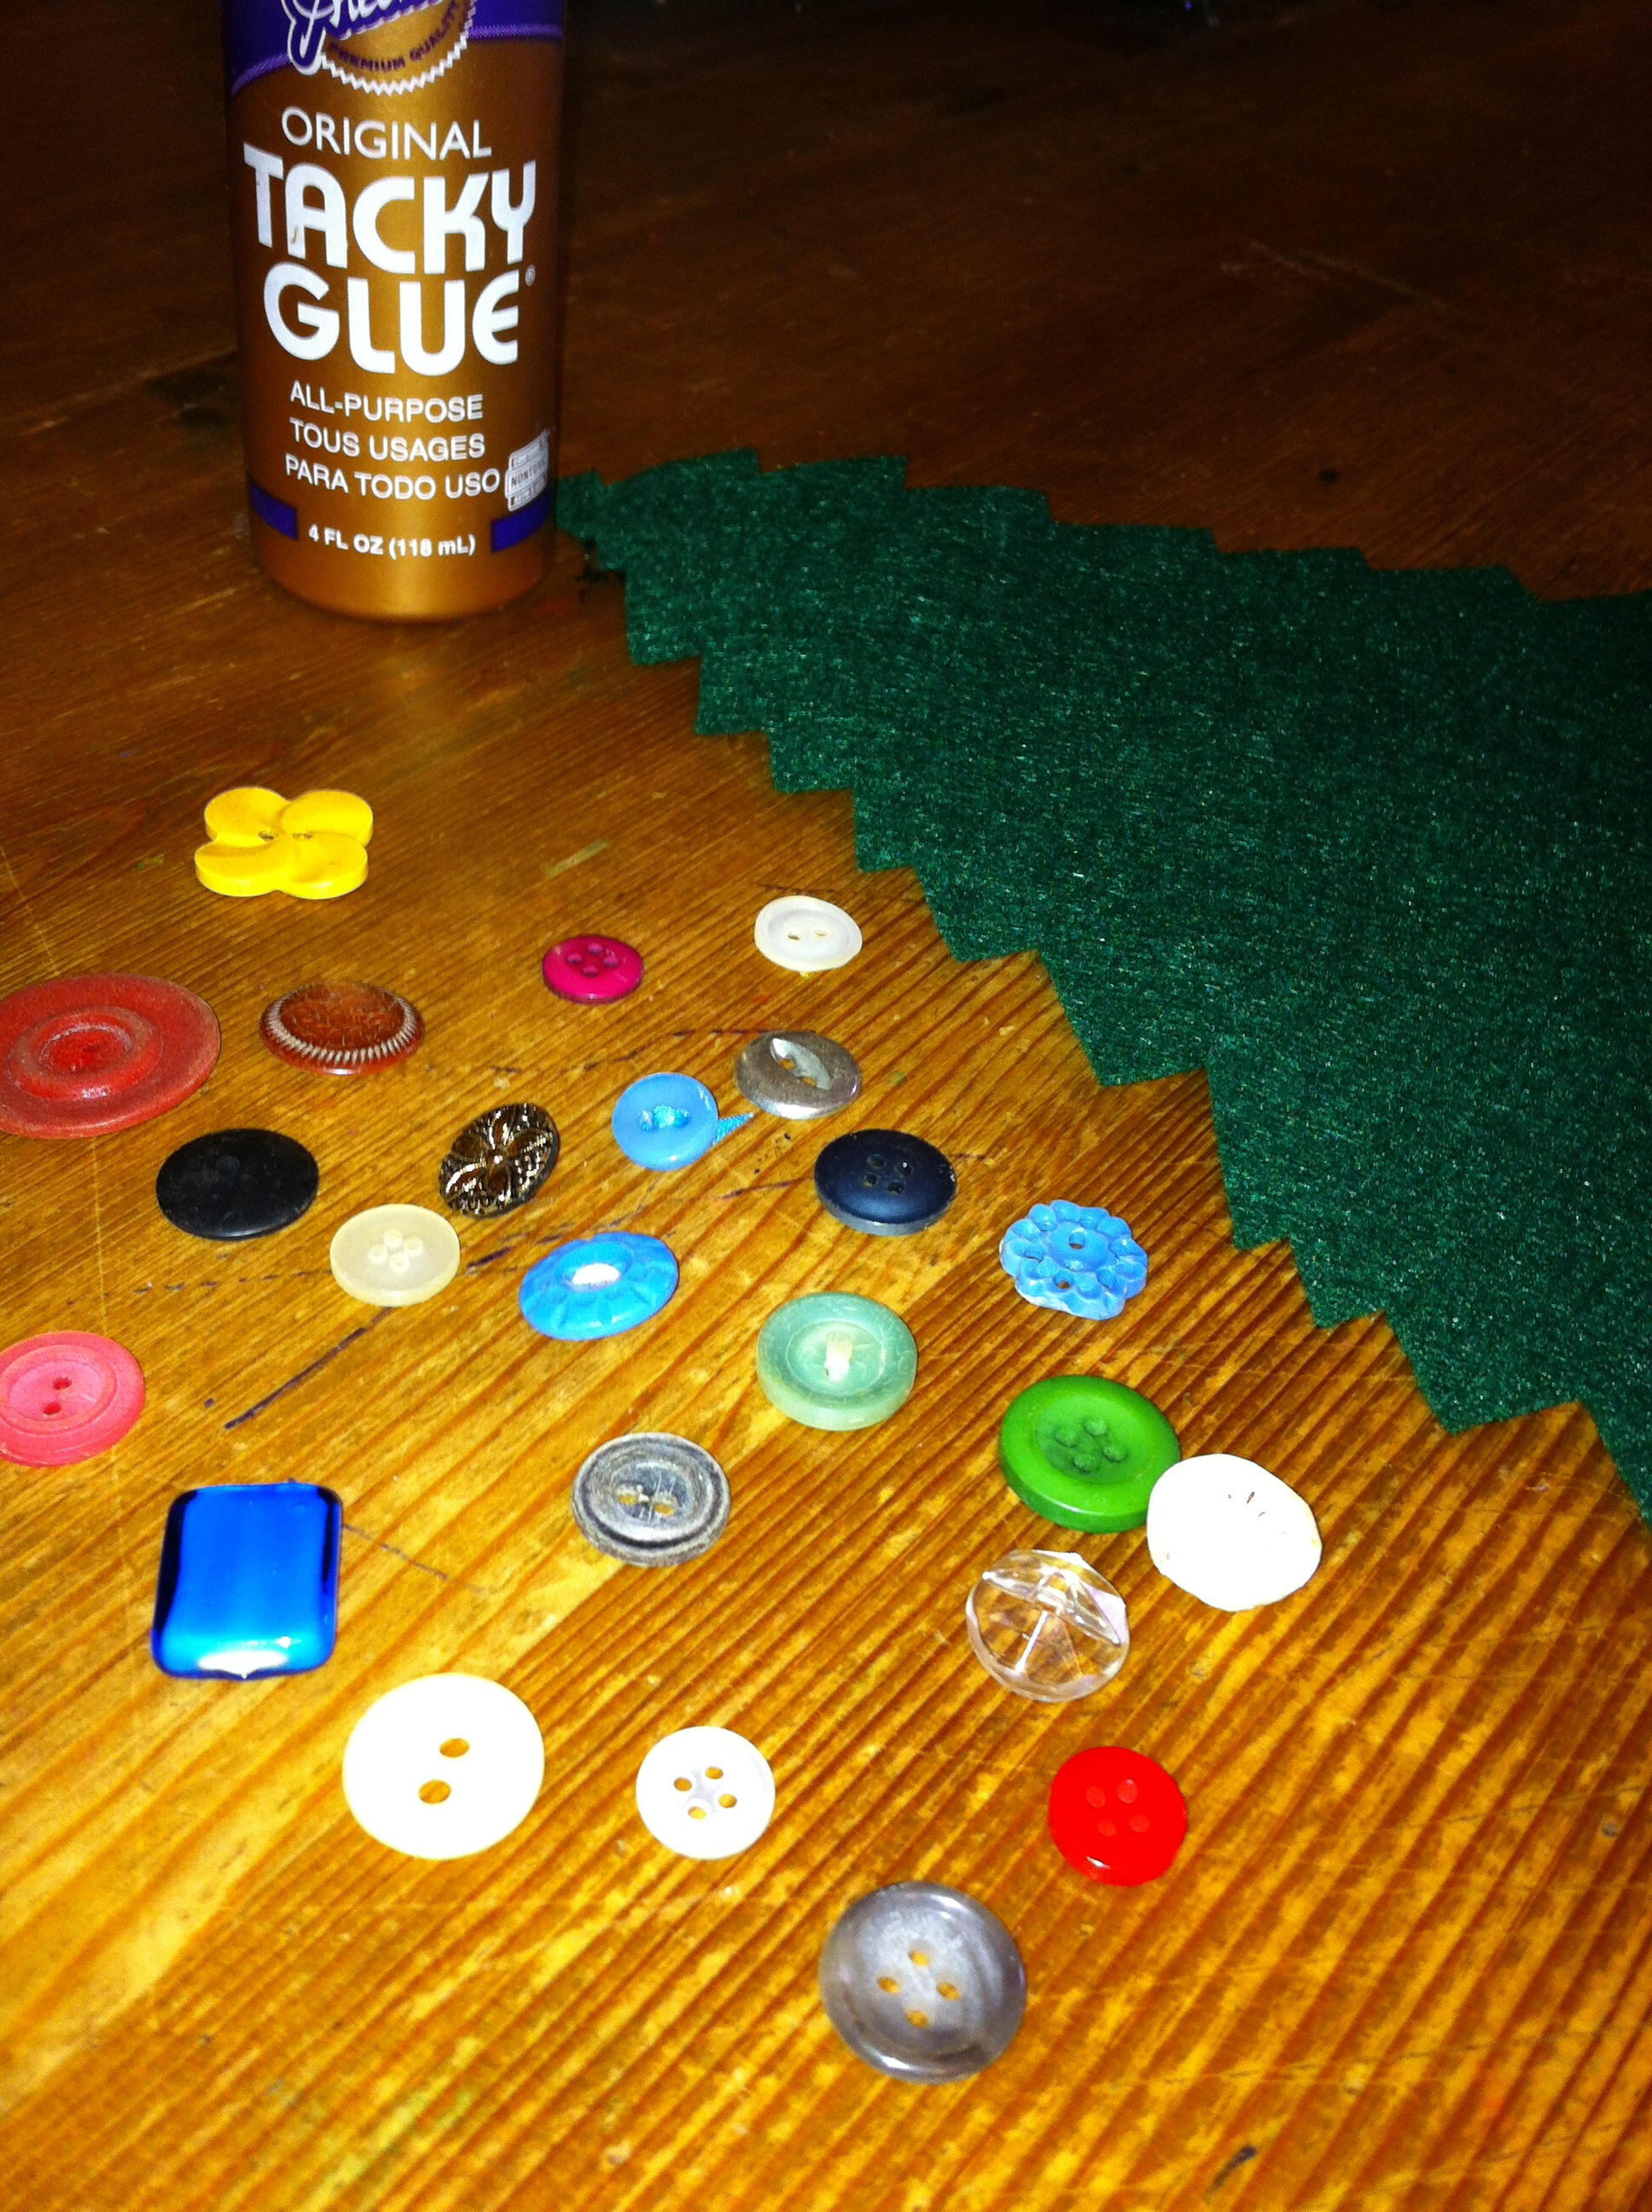
Today, we put some to use on a fun, easy, Christmas craft! You’ll need…
tacky glue
a felt Christmas tree
buttons of your choice
I like Allene’s tacky glue for something like this.
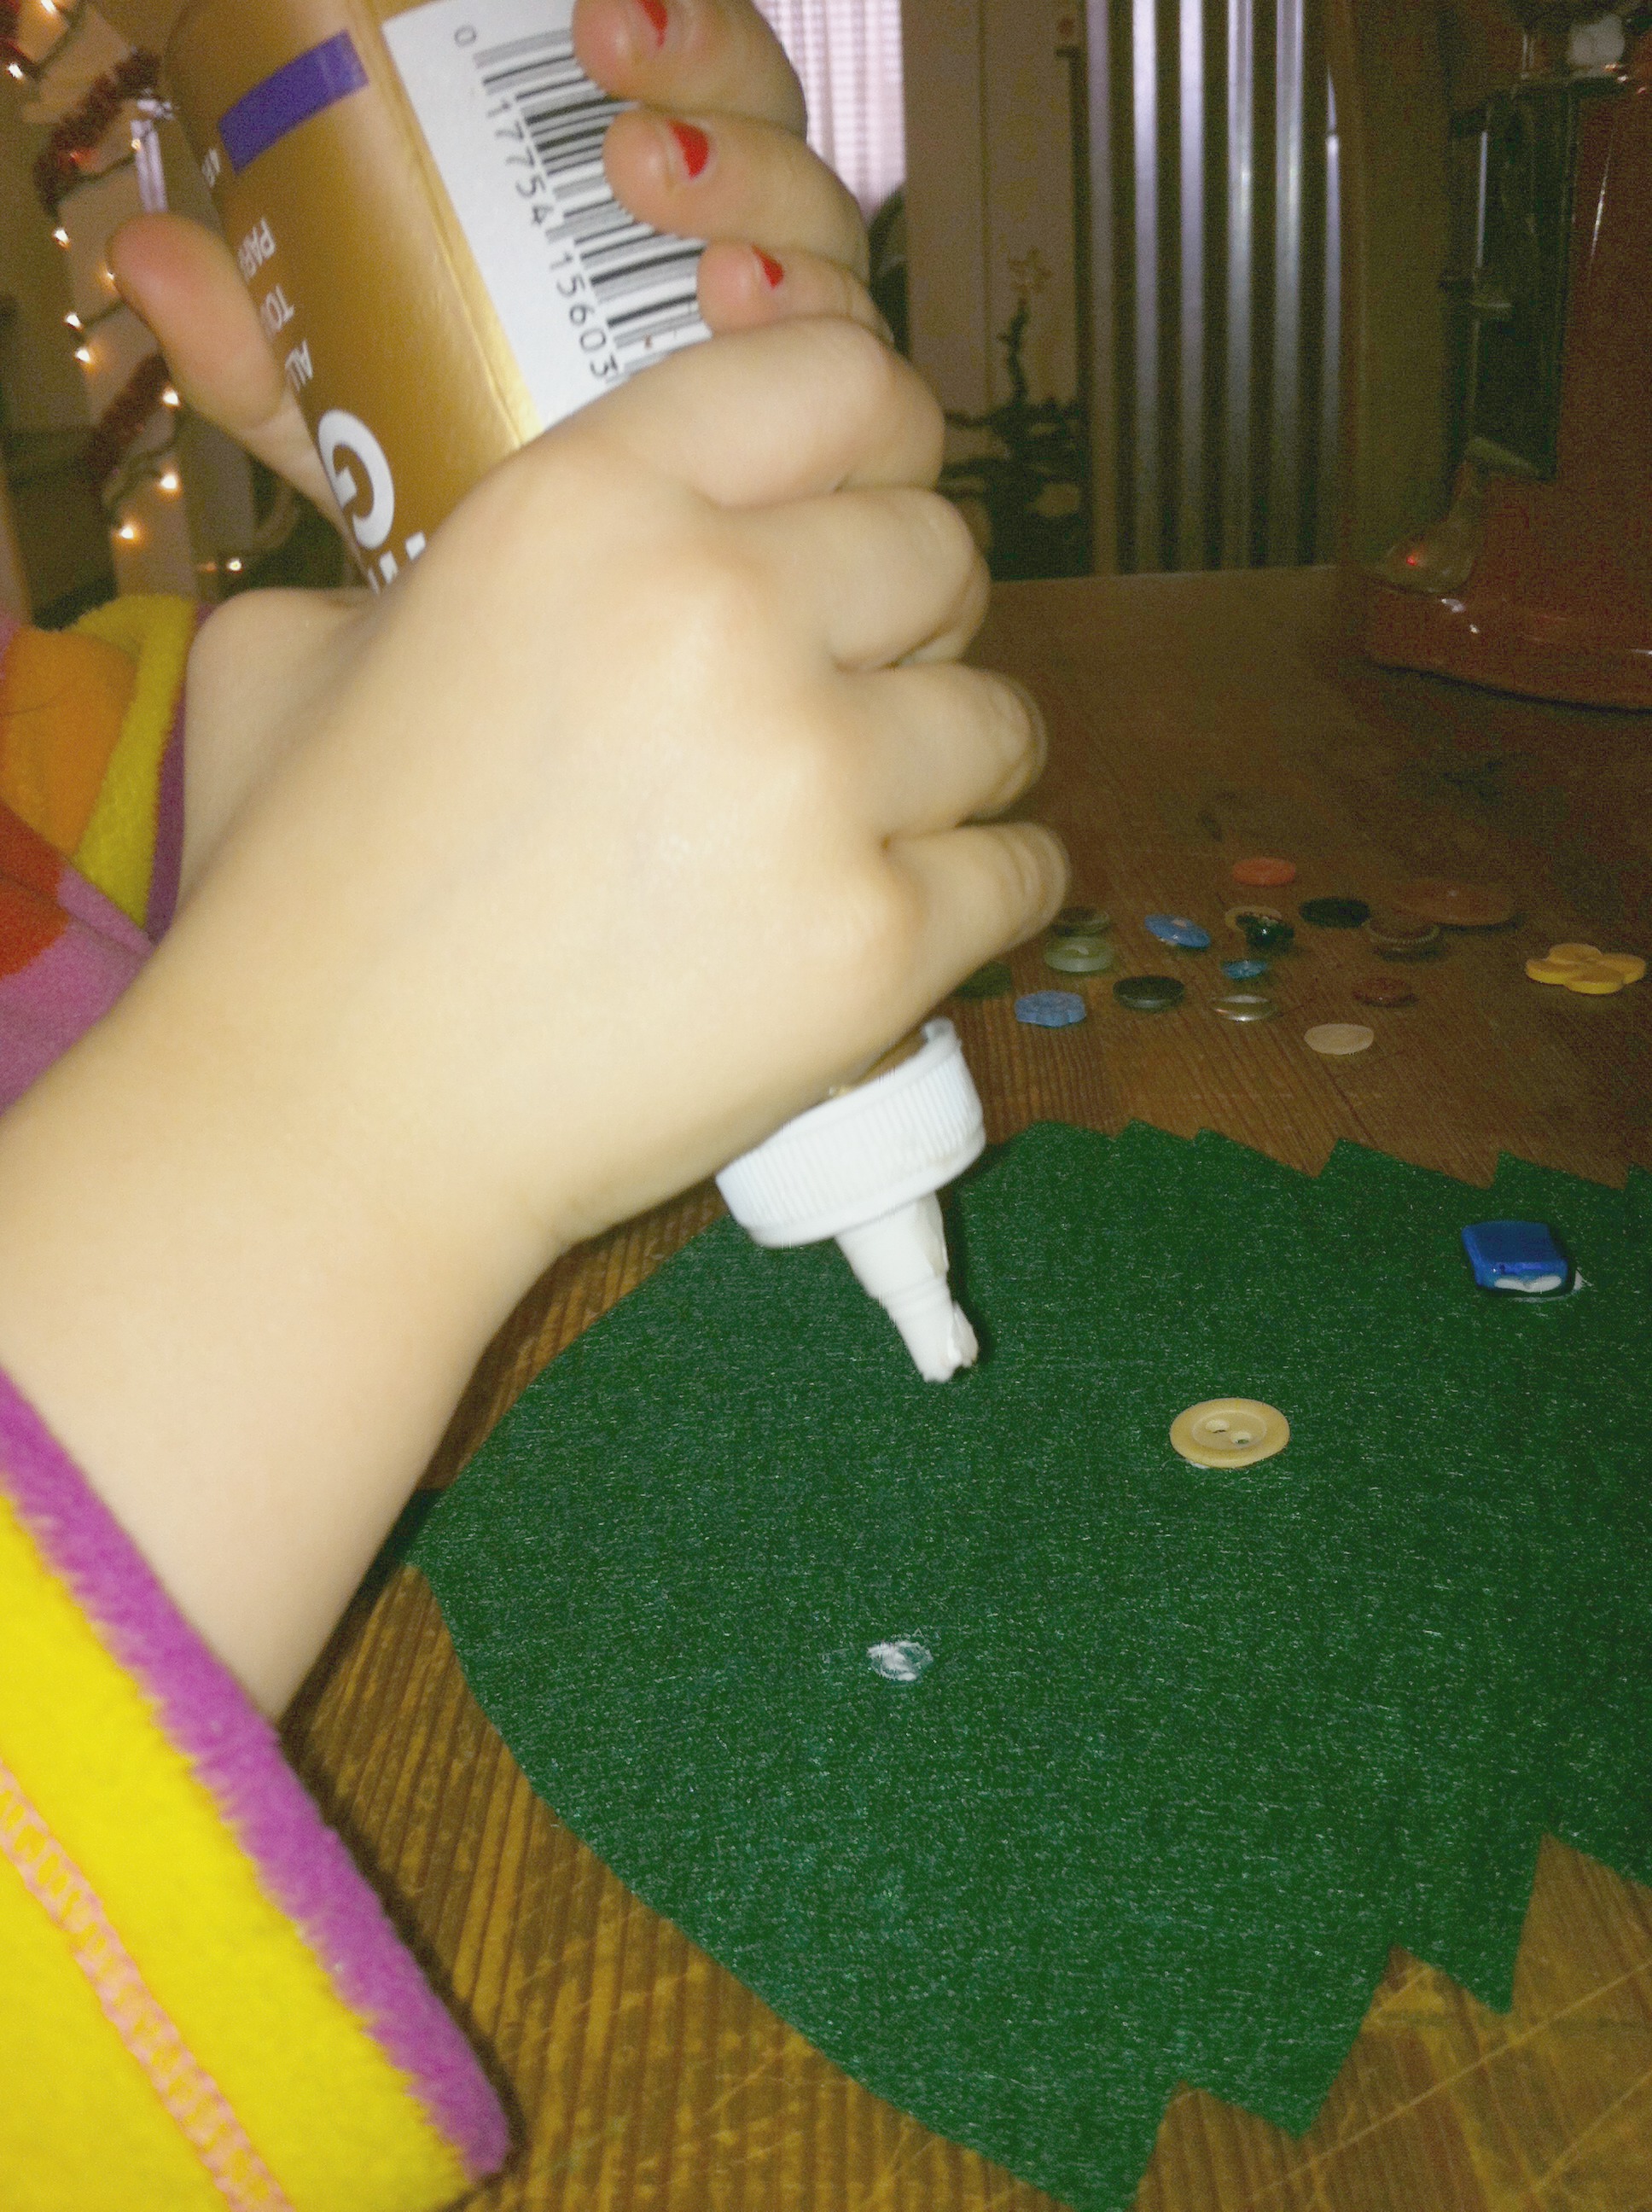
Then, just get gluing!
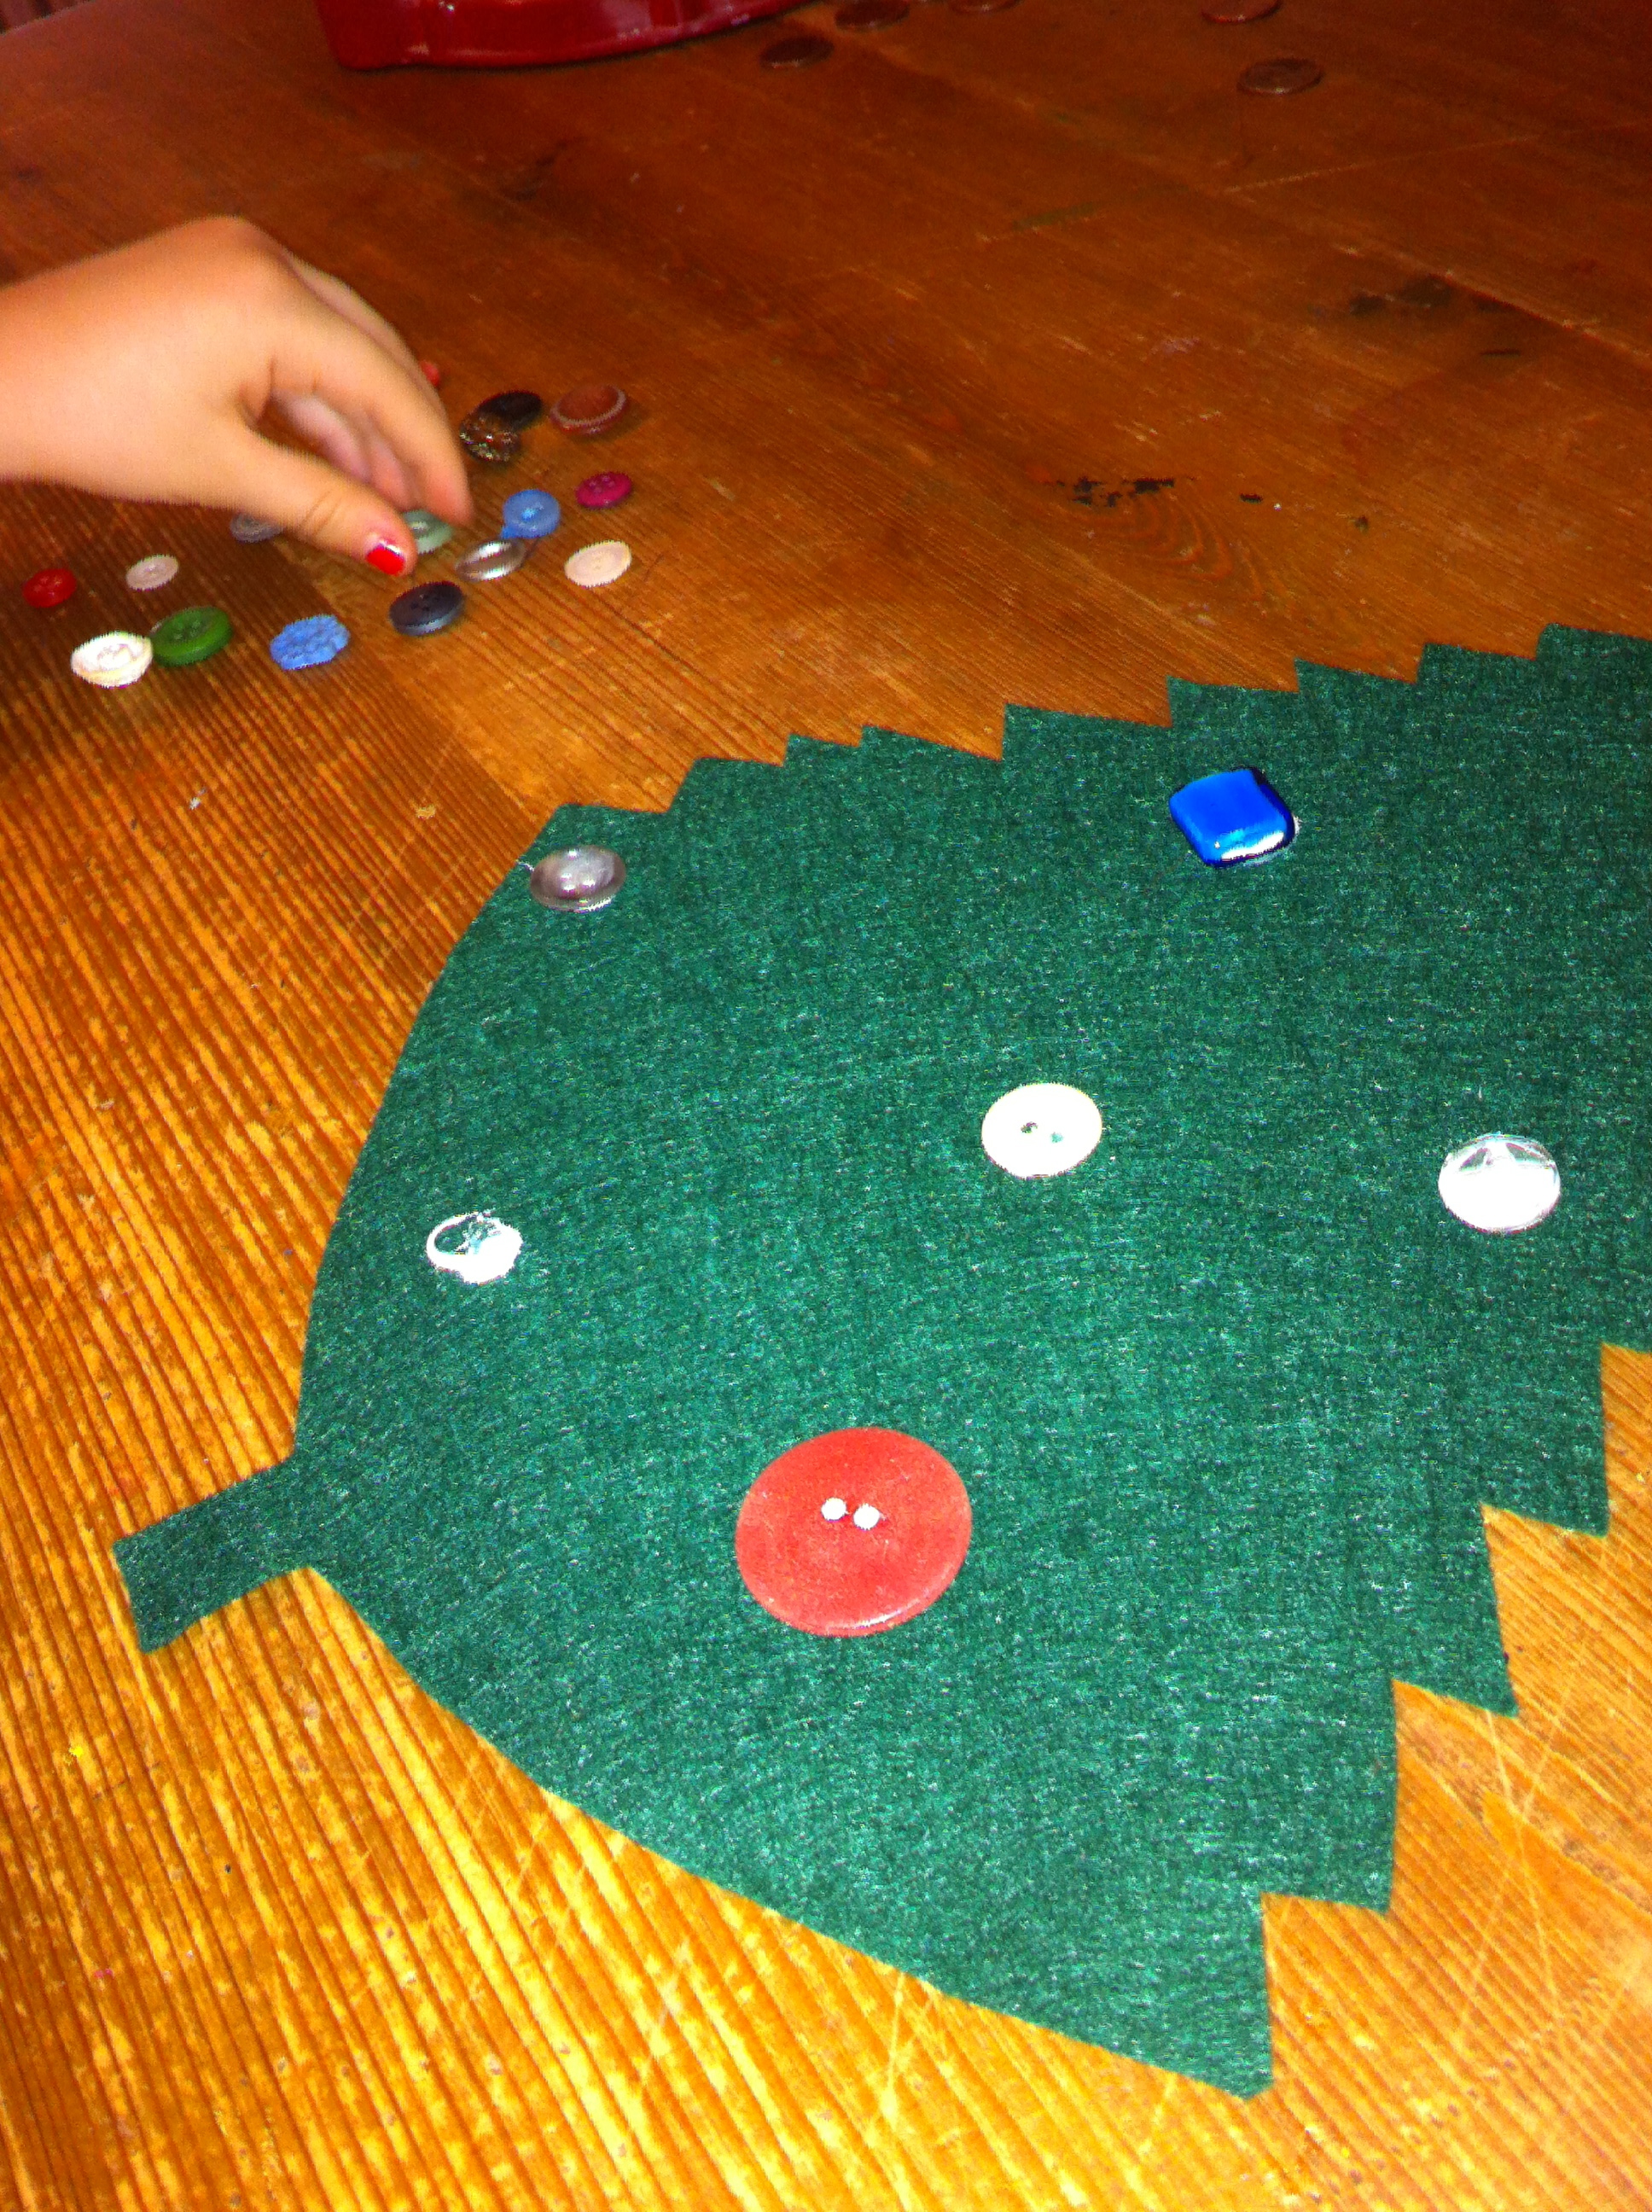
The two-handed squeeze!Pick and choose…The finished product!Super cute, yes?!
When it’s 10 degrees outside and baby brother is asleep in the toy room, you’ve got to have lots to keep you busy indoors! Sawyer loved sorting through the buttons and picking out what to put where. I made two more trees that we’ll save to do on another day and then I’m going to figure out something fun to do with the trio.
Anybody else have a button collection!? Please share!
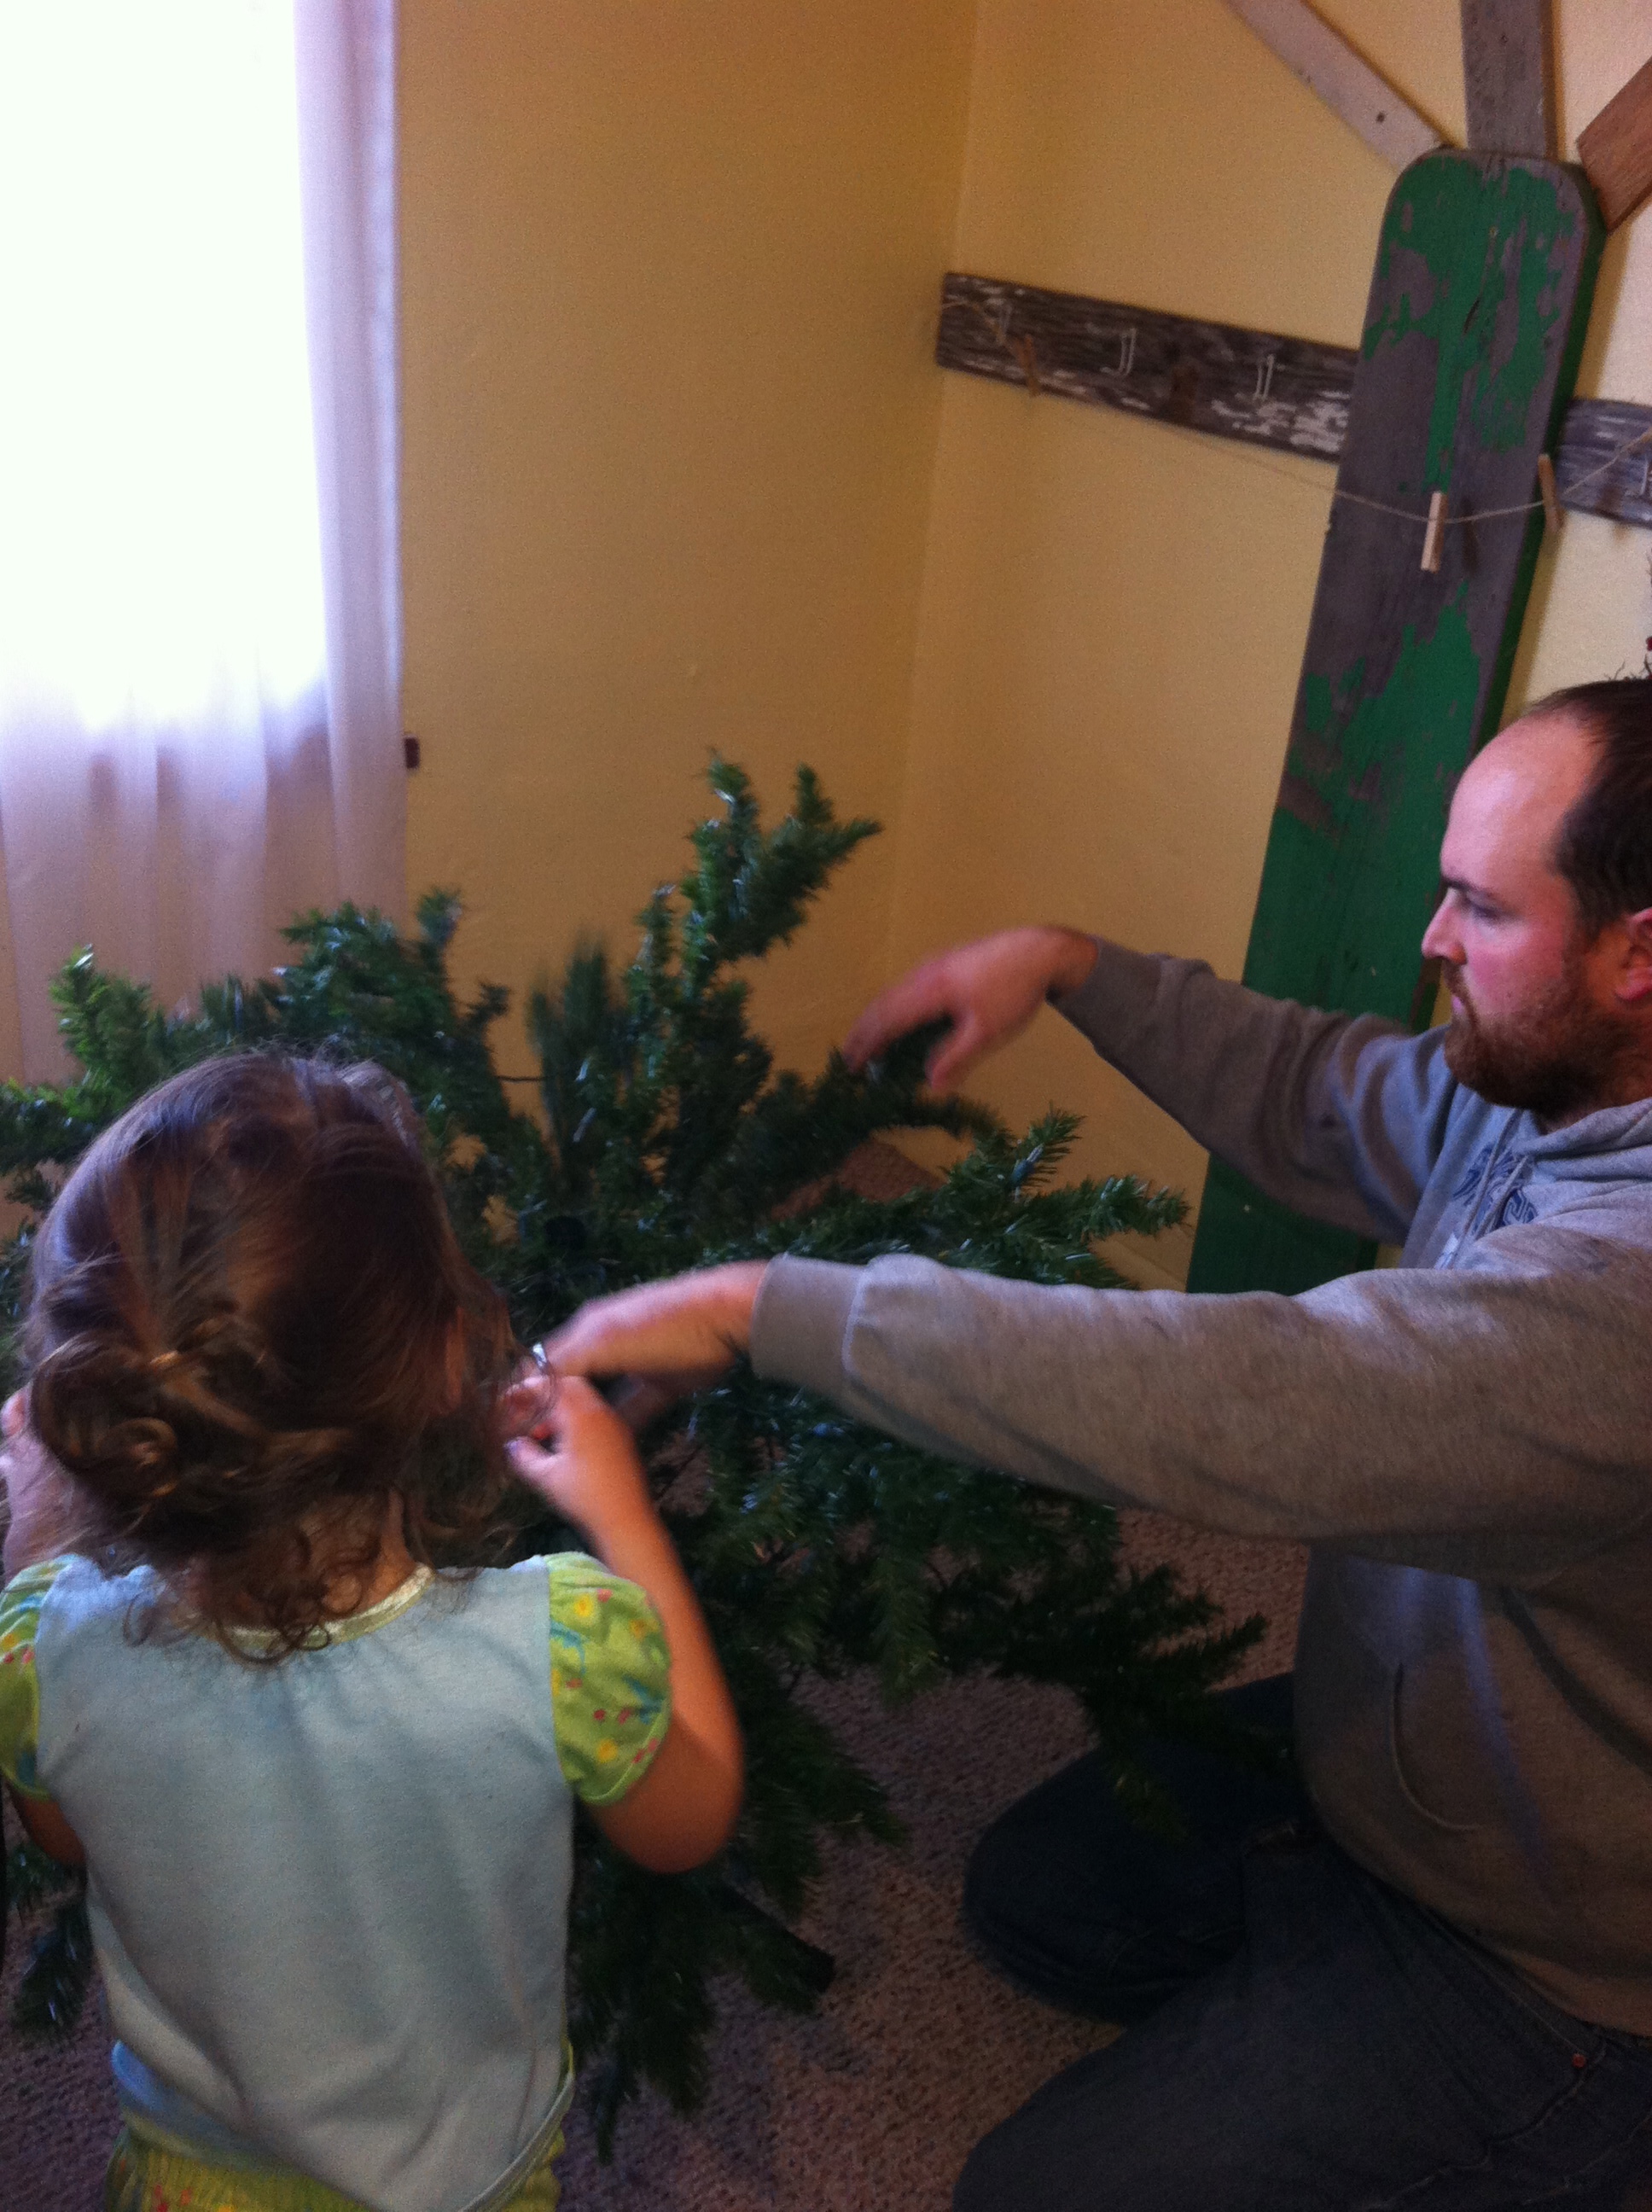
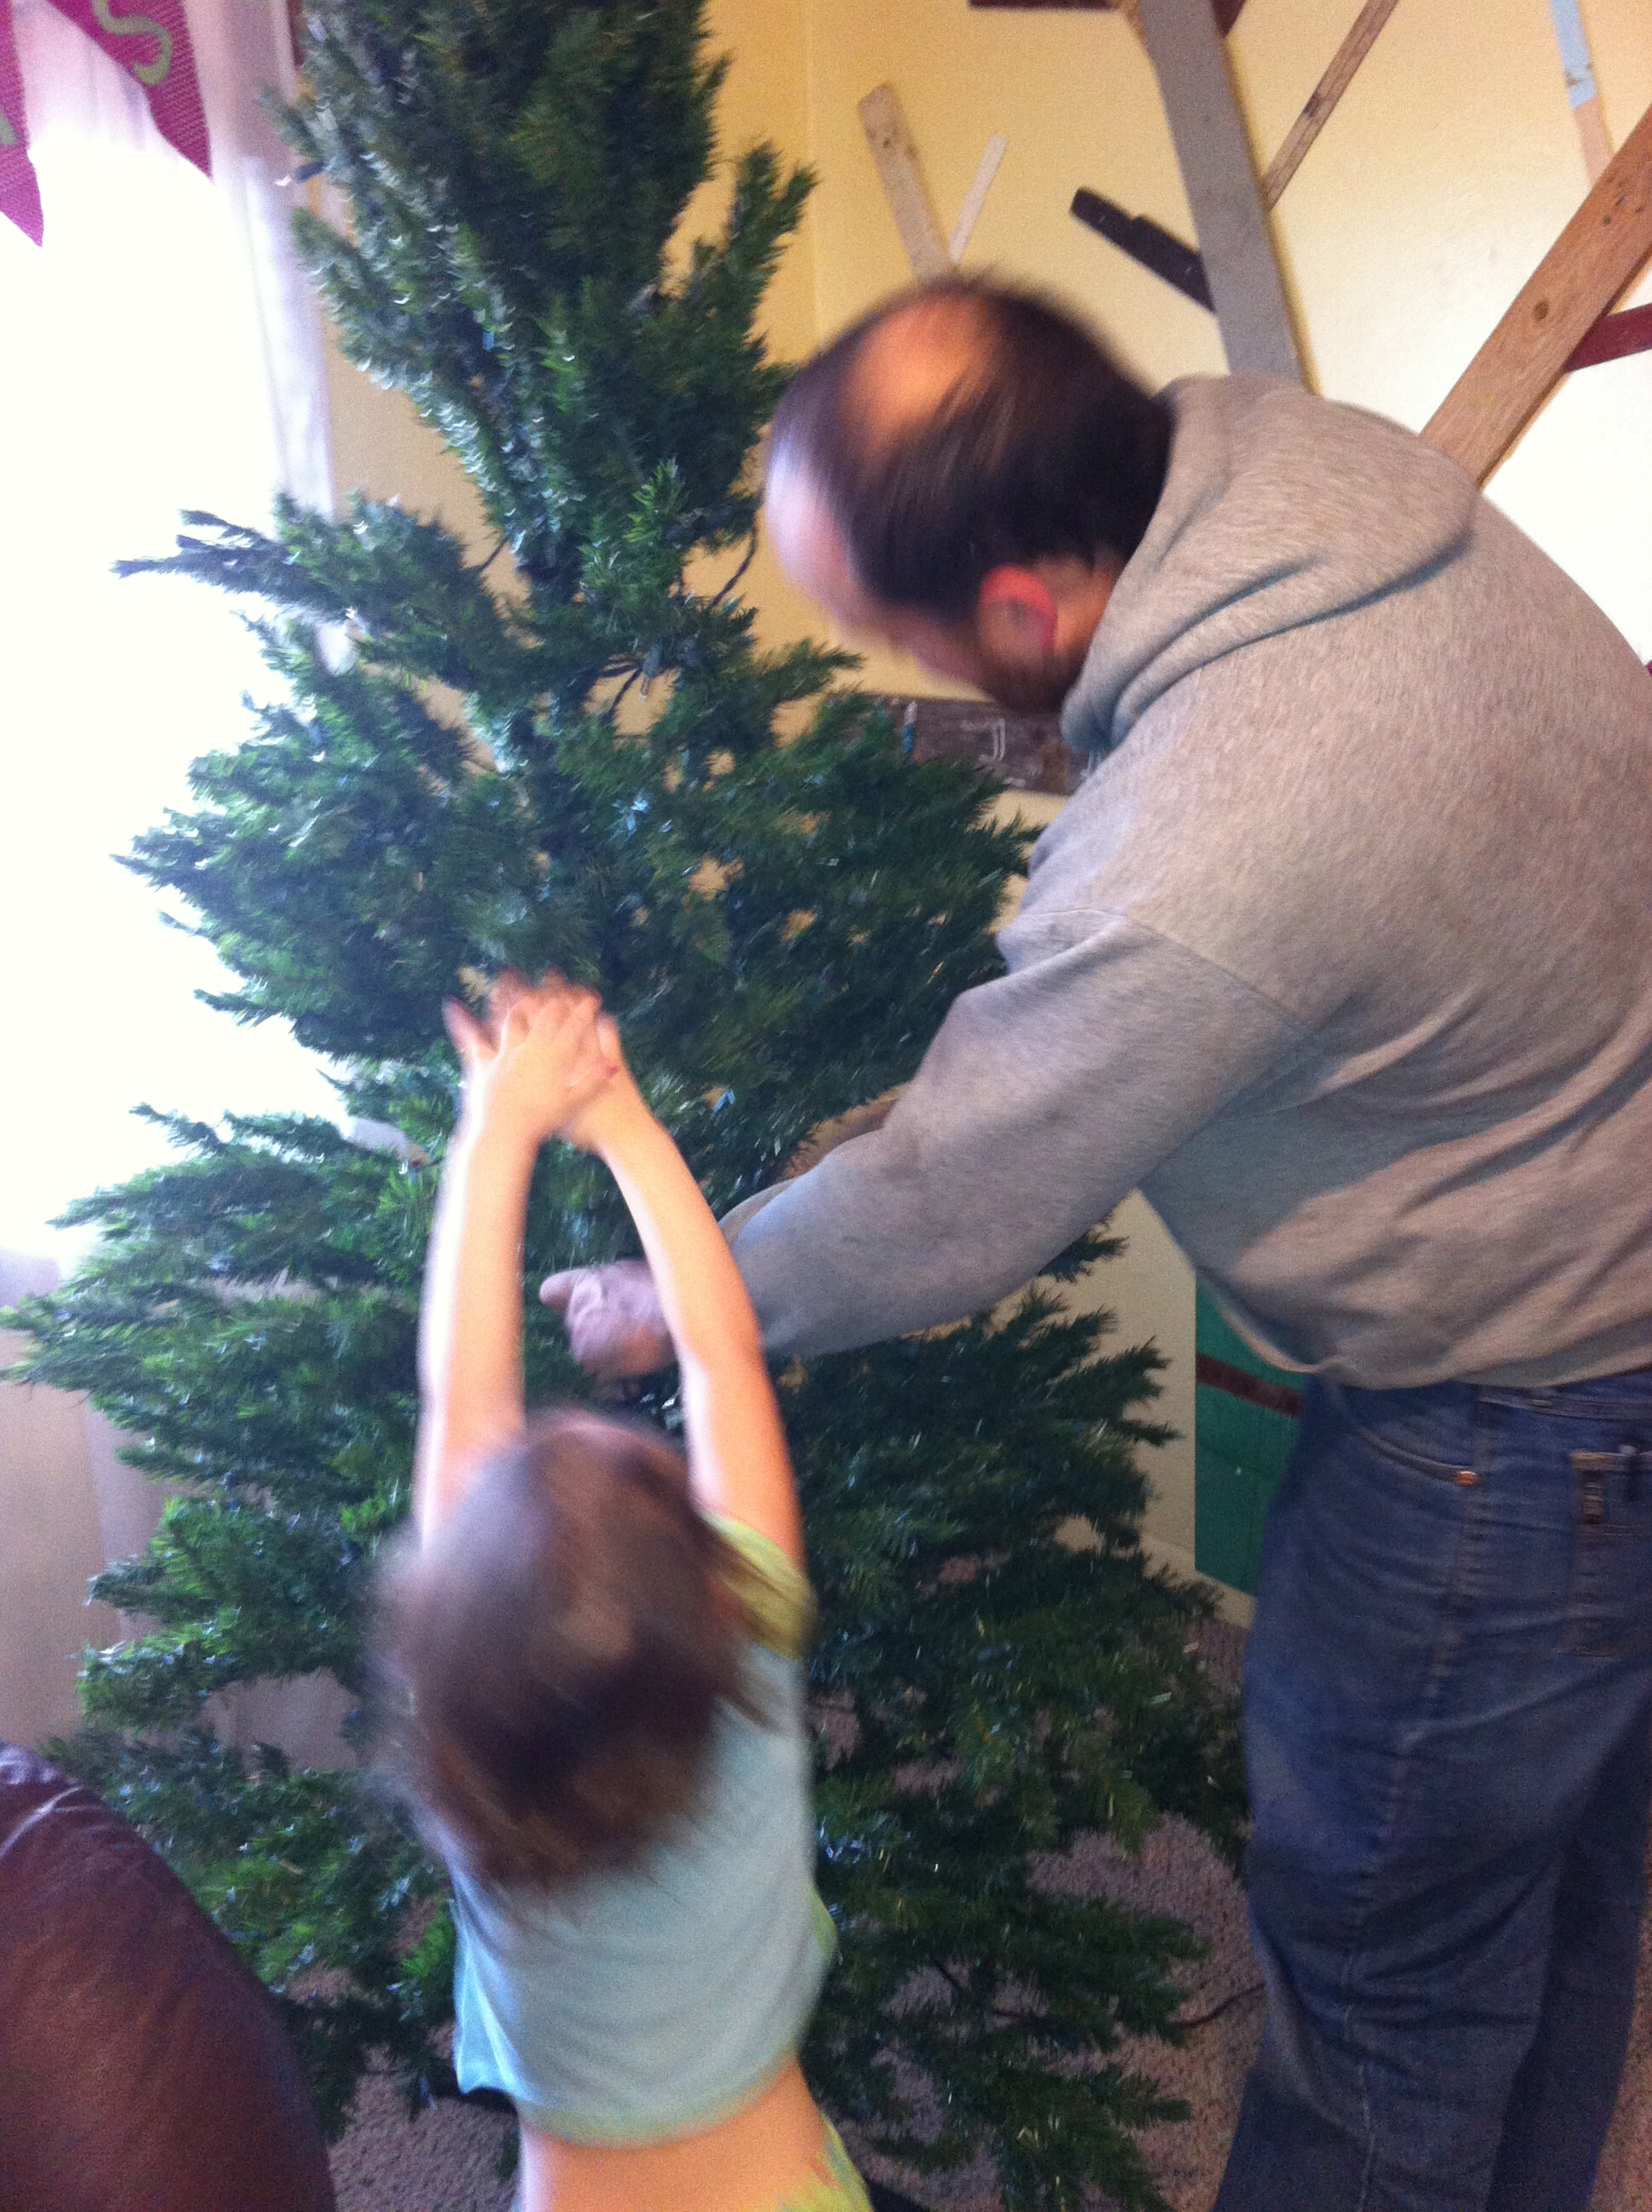
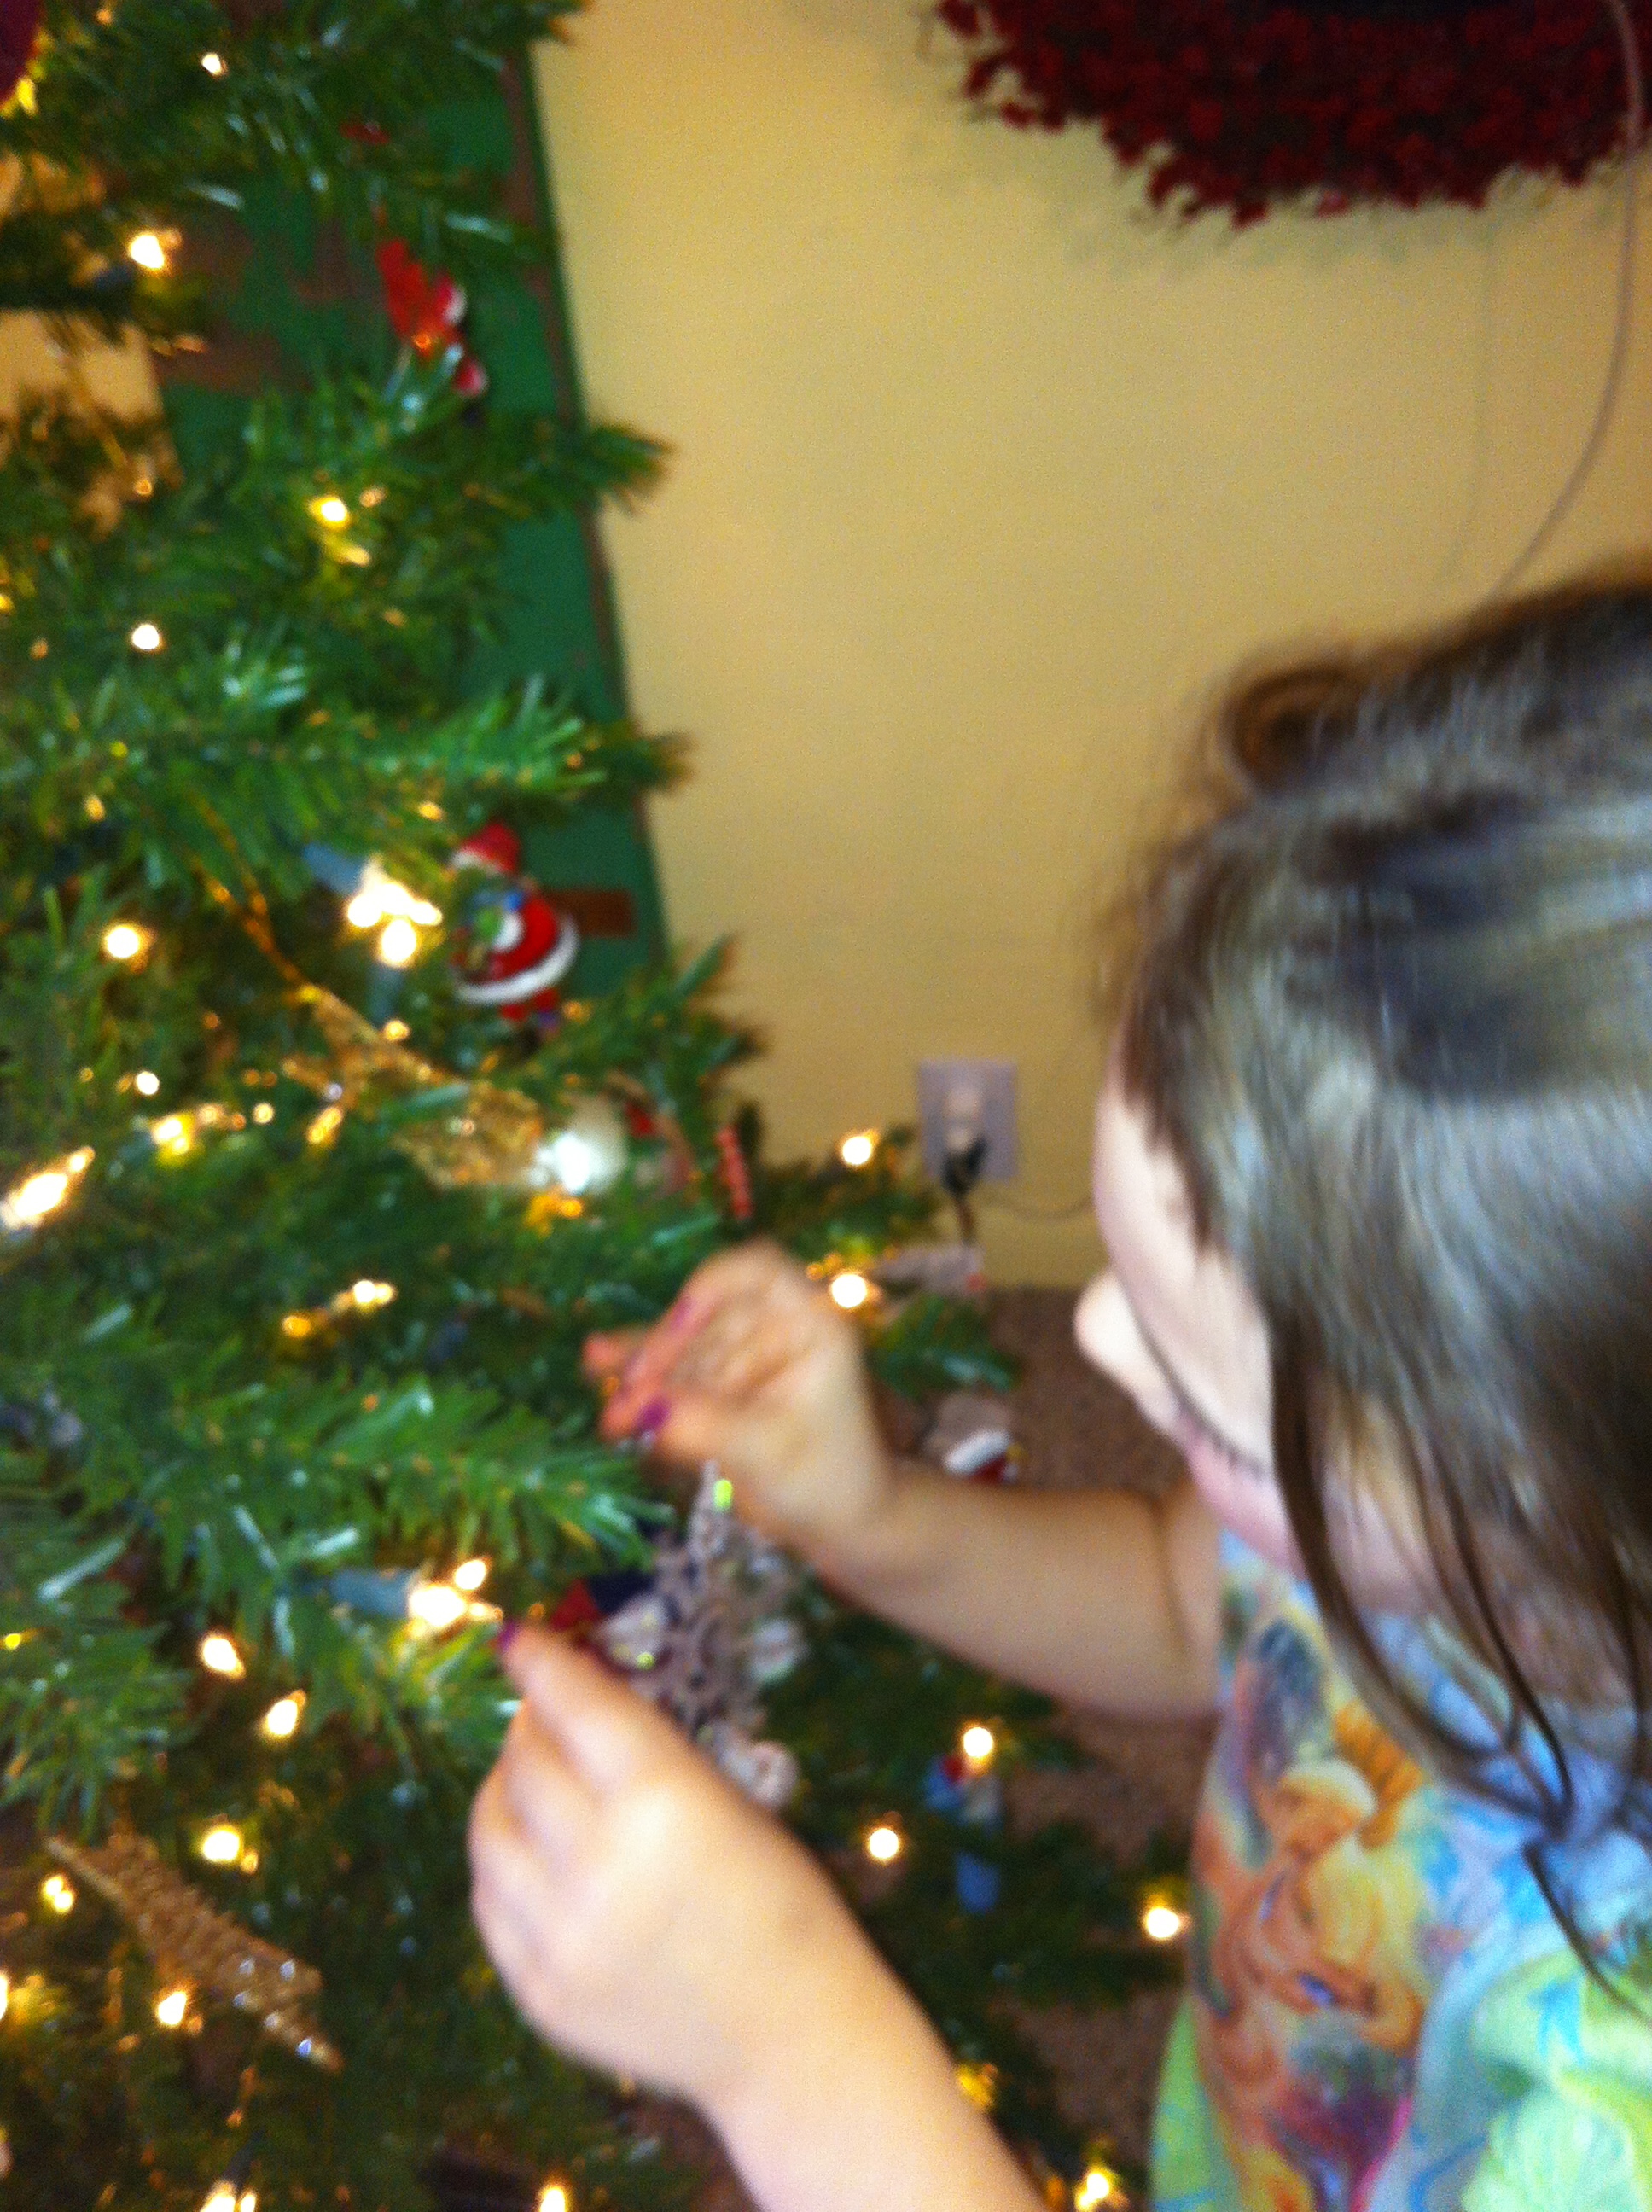
Before we left for Denver, a certain little girl pleaded to put up the Christmas tree. She was quite convincing, so despite the extra work, we did just that!
Daddy has no problem setting the tree up…But he’s not a fan of “fluffing” the branches…Sawyer was an AWESOME ornament hanger!
Our house doesn’t have just a ton of open space, so our tall skinny tree fits perfectly!
Seeing this everyday makes me smile.
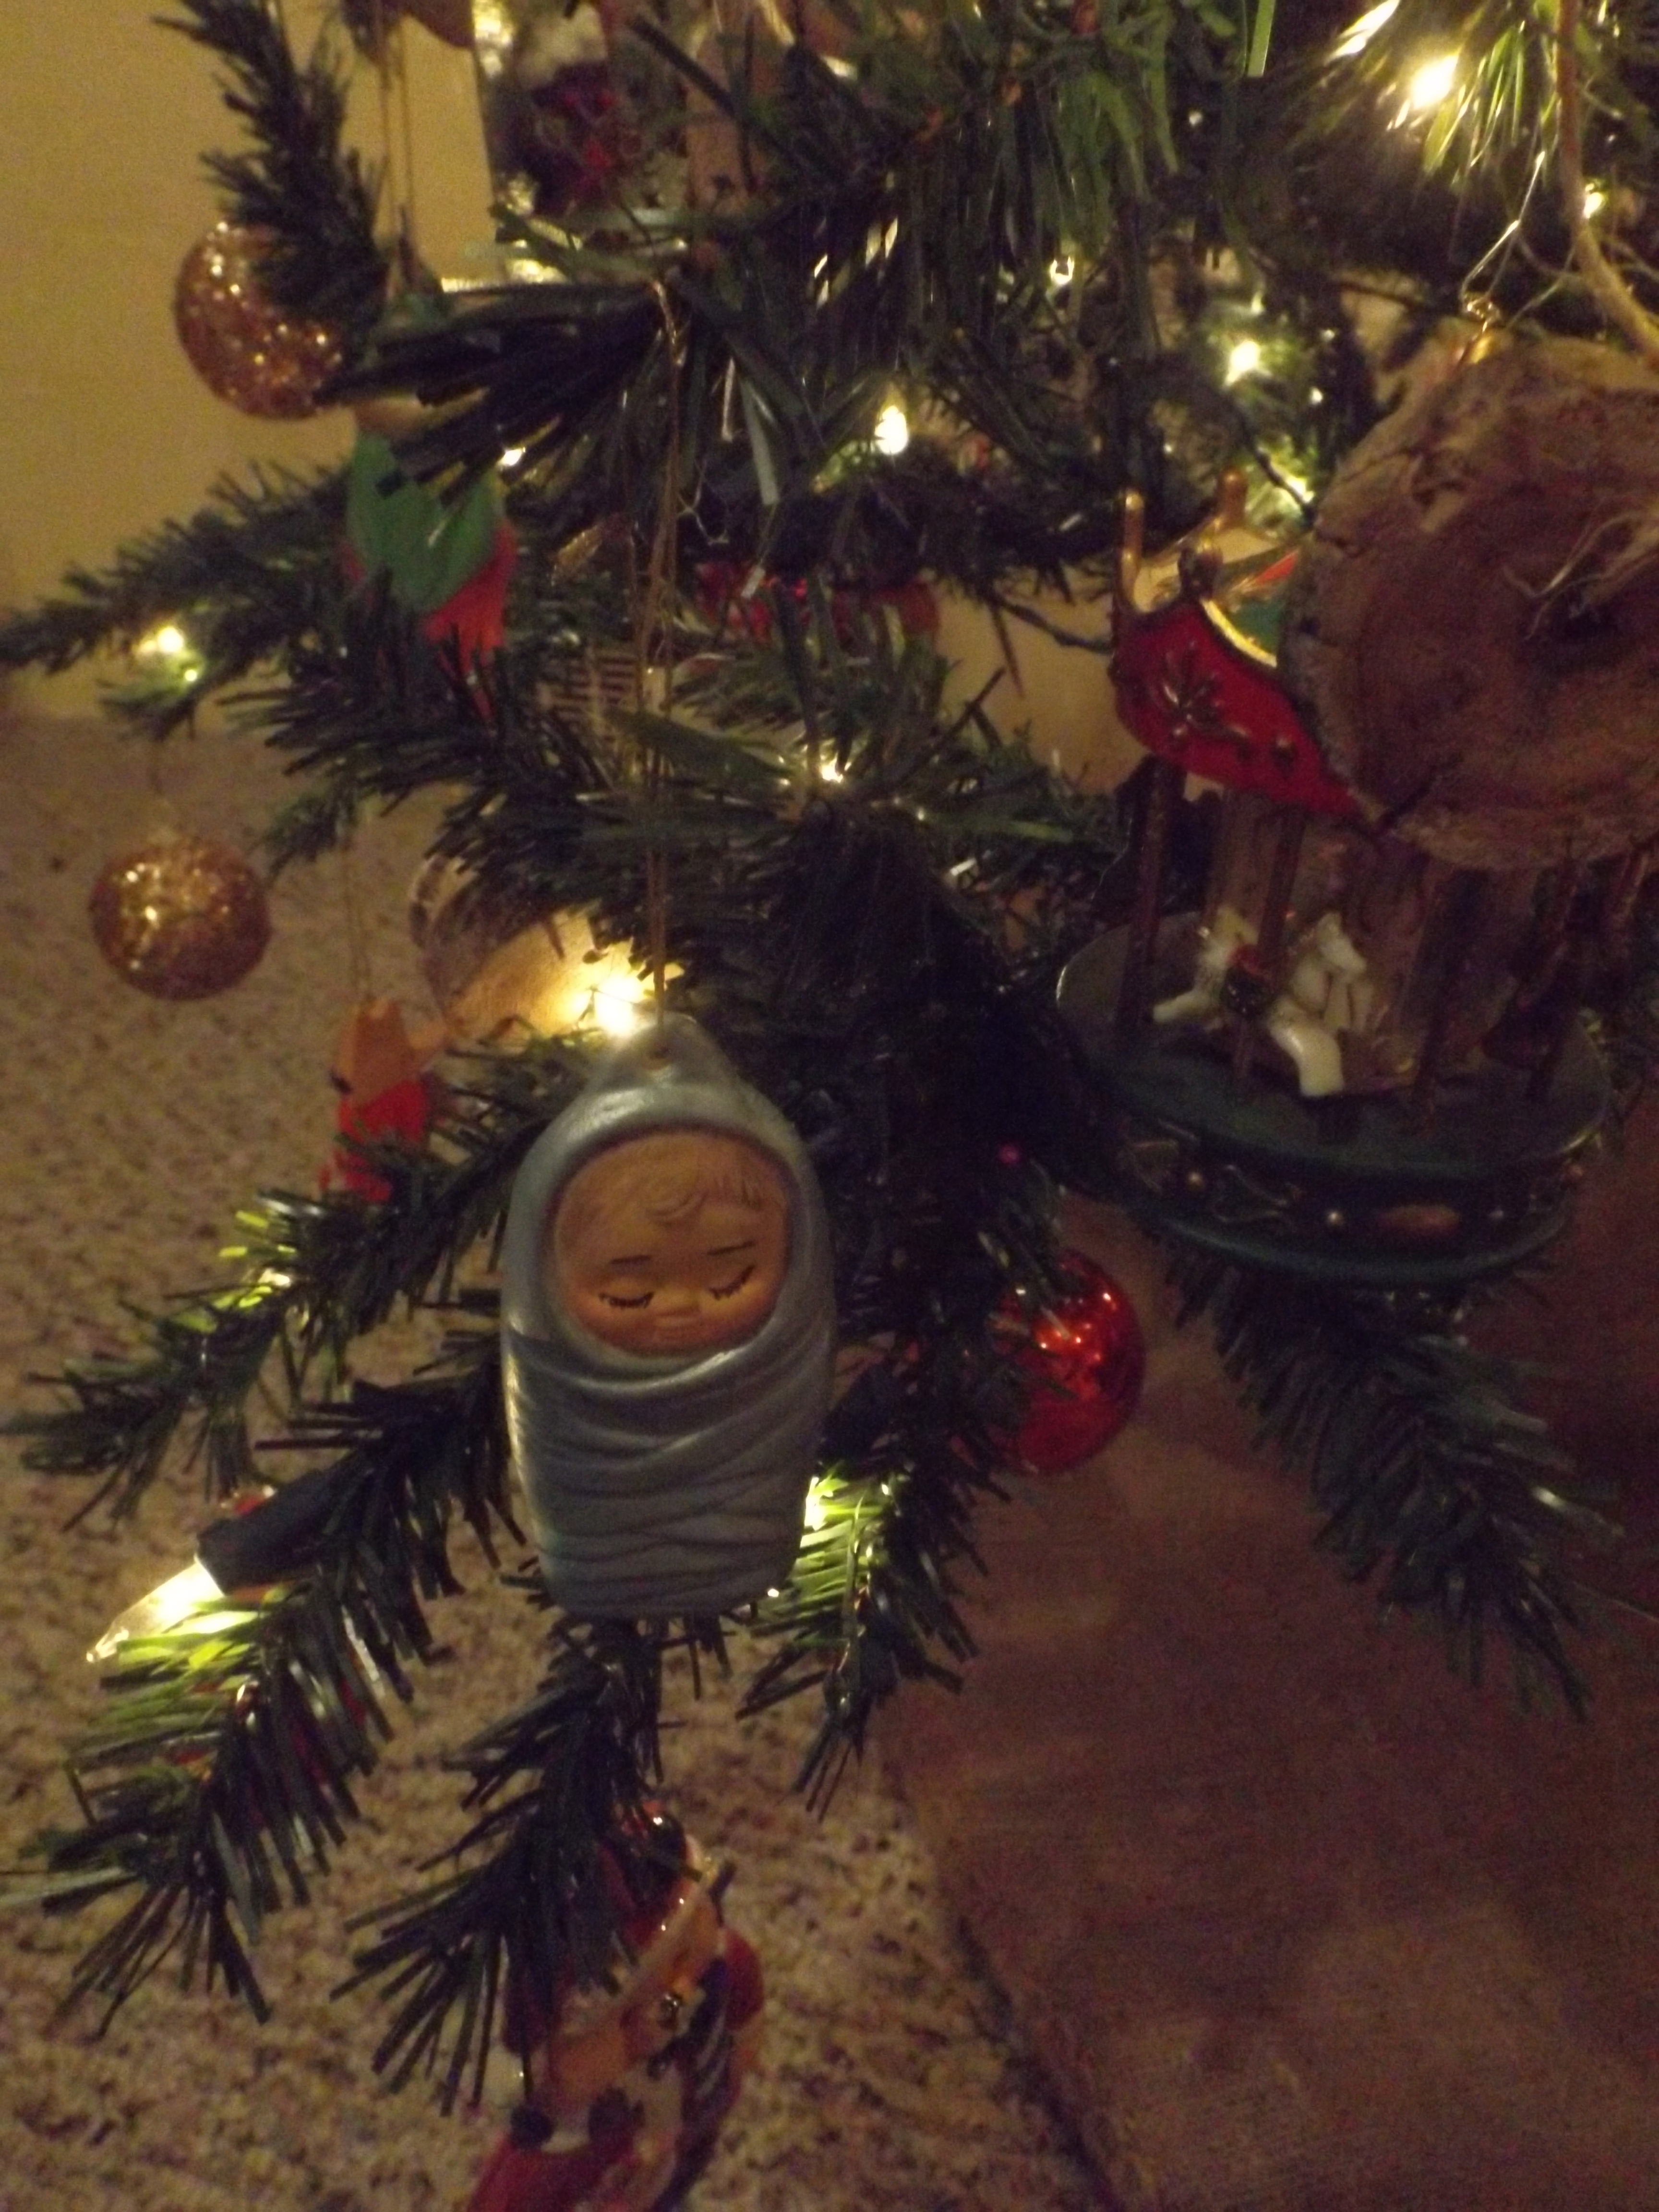
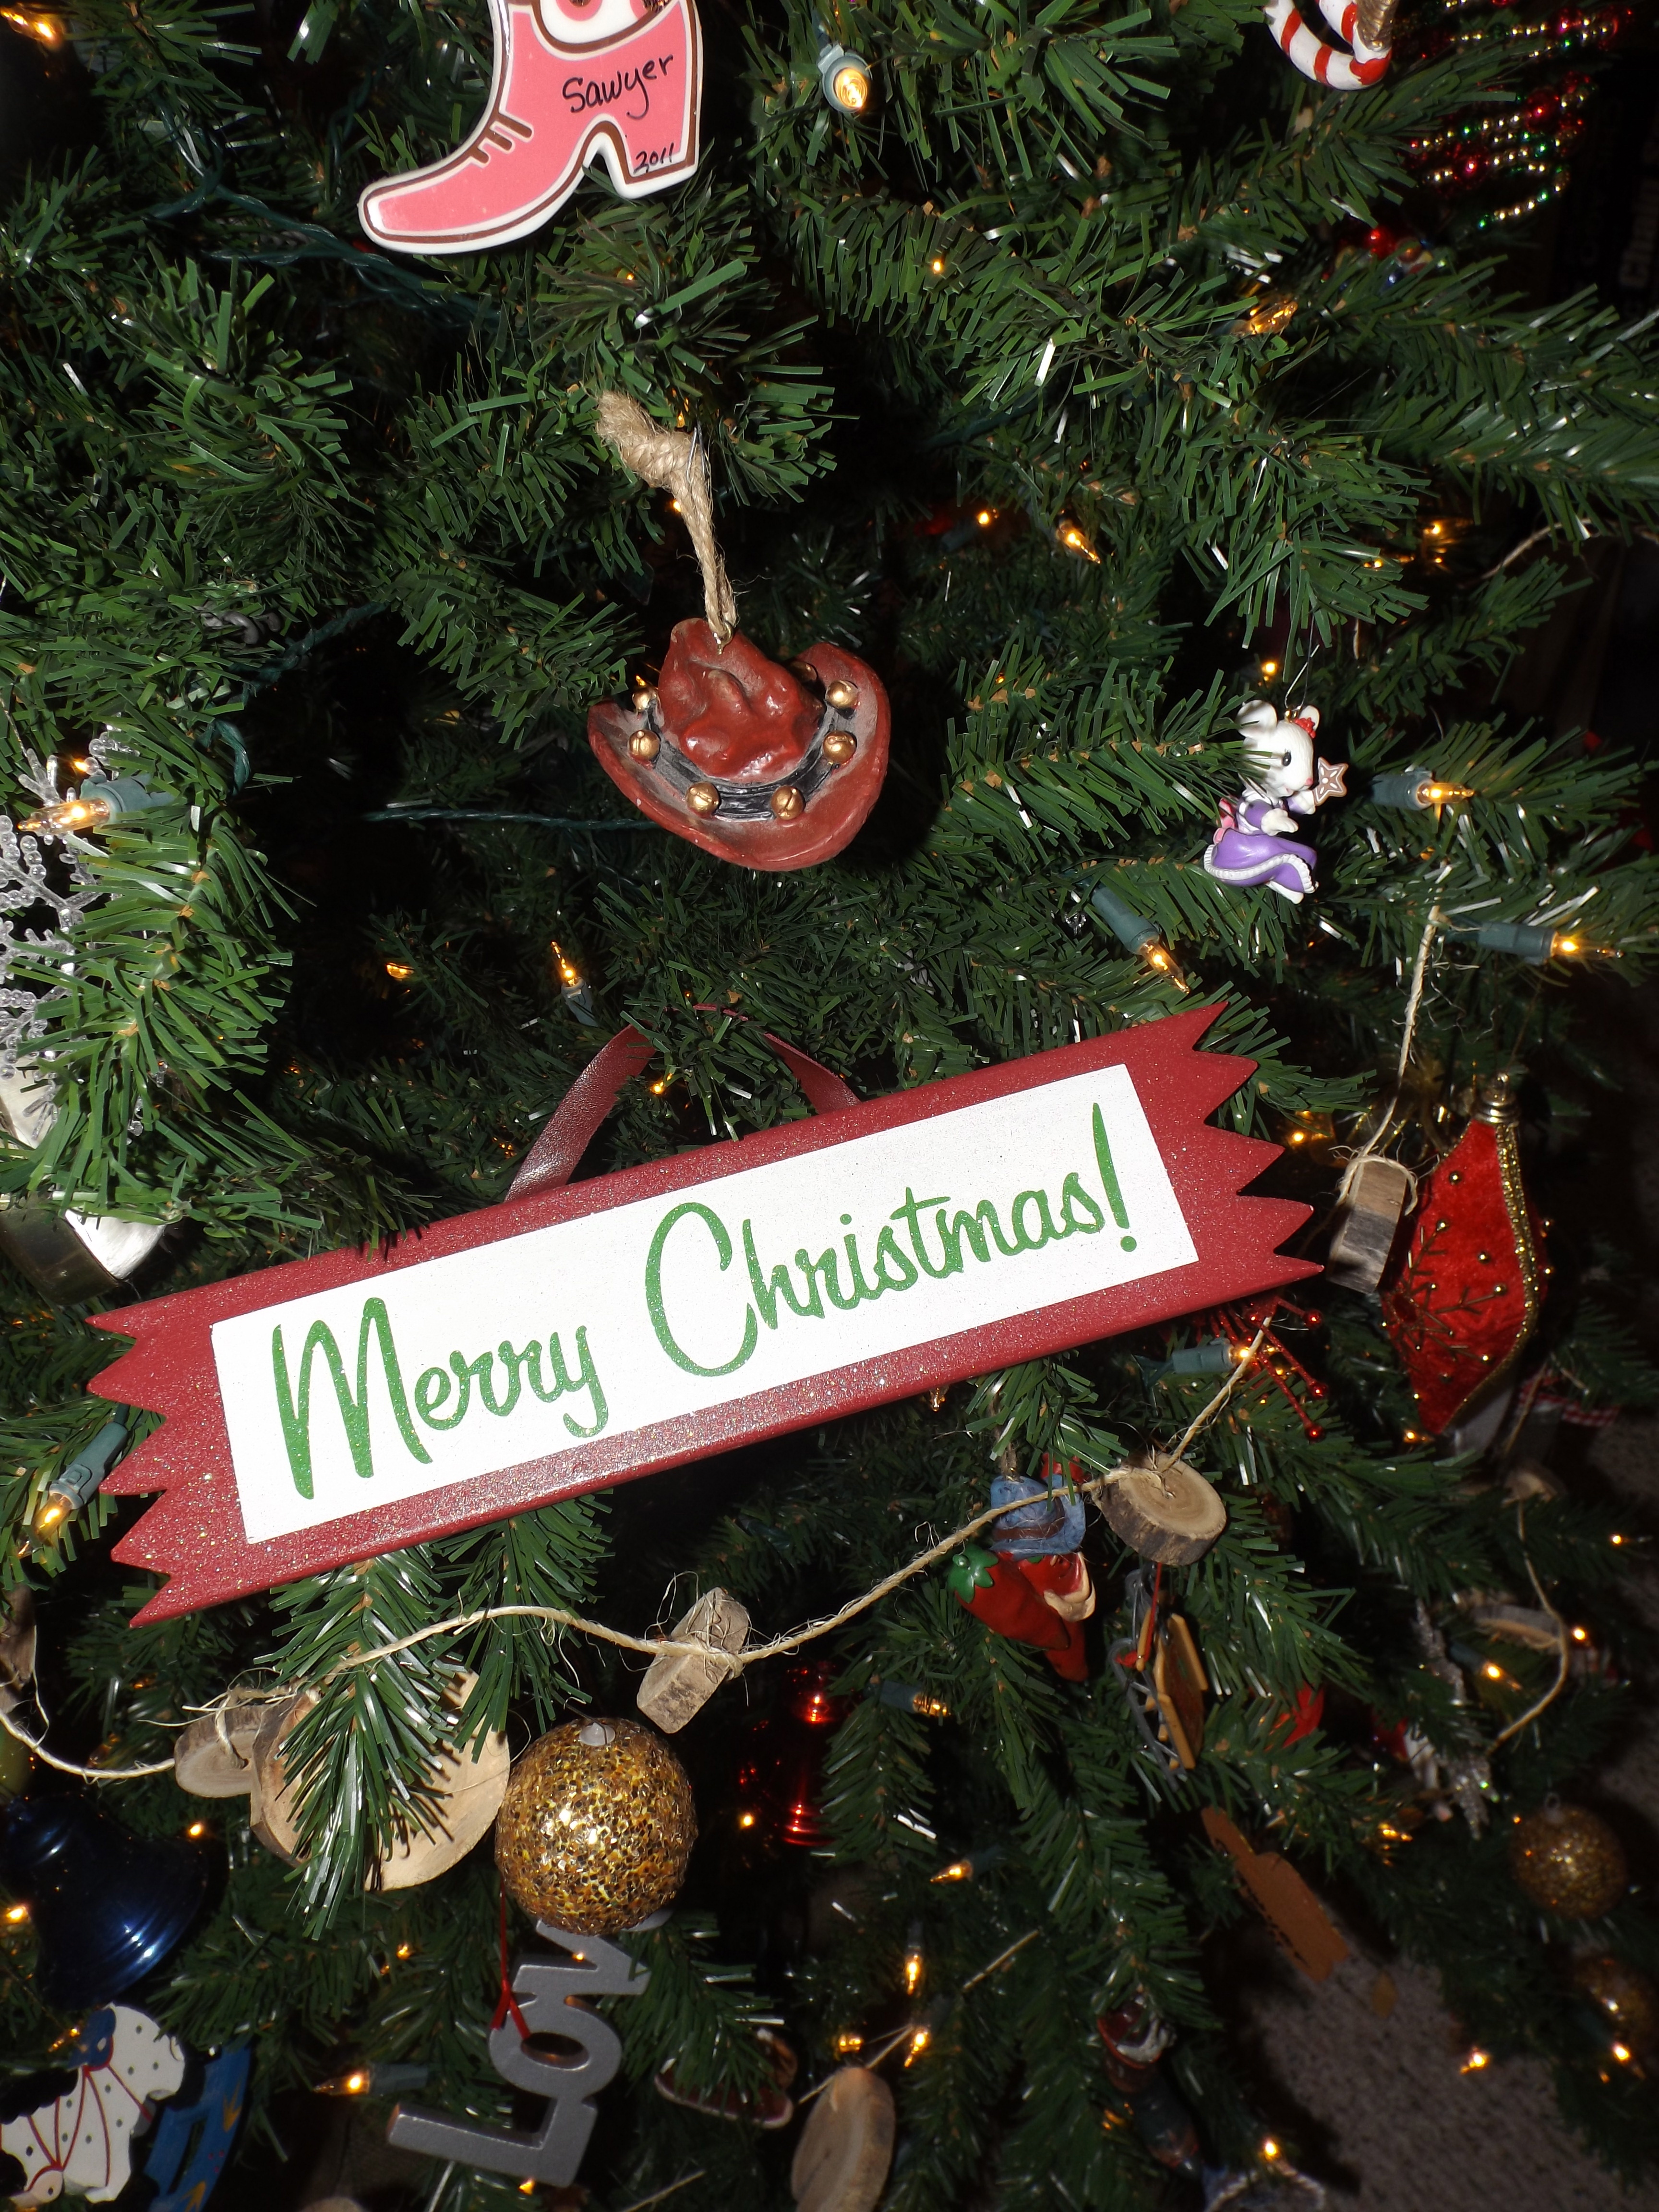
I’m kind of a traditionalist when it comes to Christmas; I like traditional colors and ornaments that mean something or were passed down or tell a story.
Jesus! It’s all about Him…
Our tree is full of Wrex and I’s ornaments from when we were younger, along with ones for the kids and ones we got when we were first married, etc. I LOVE the rich history that is hanging on that tree!
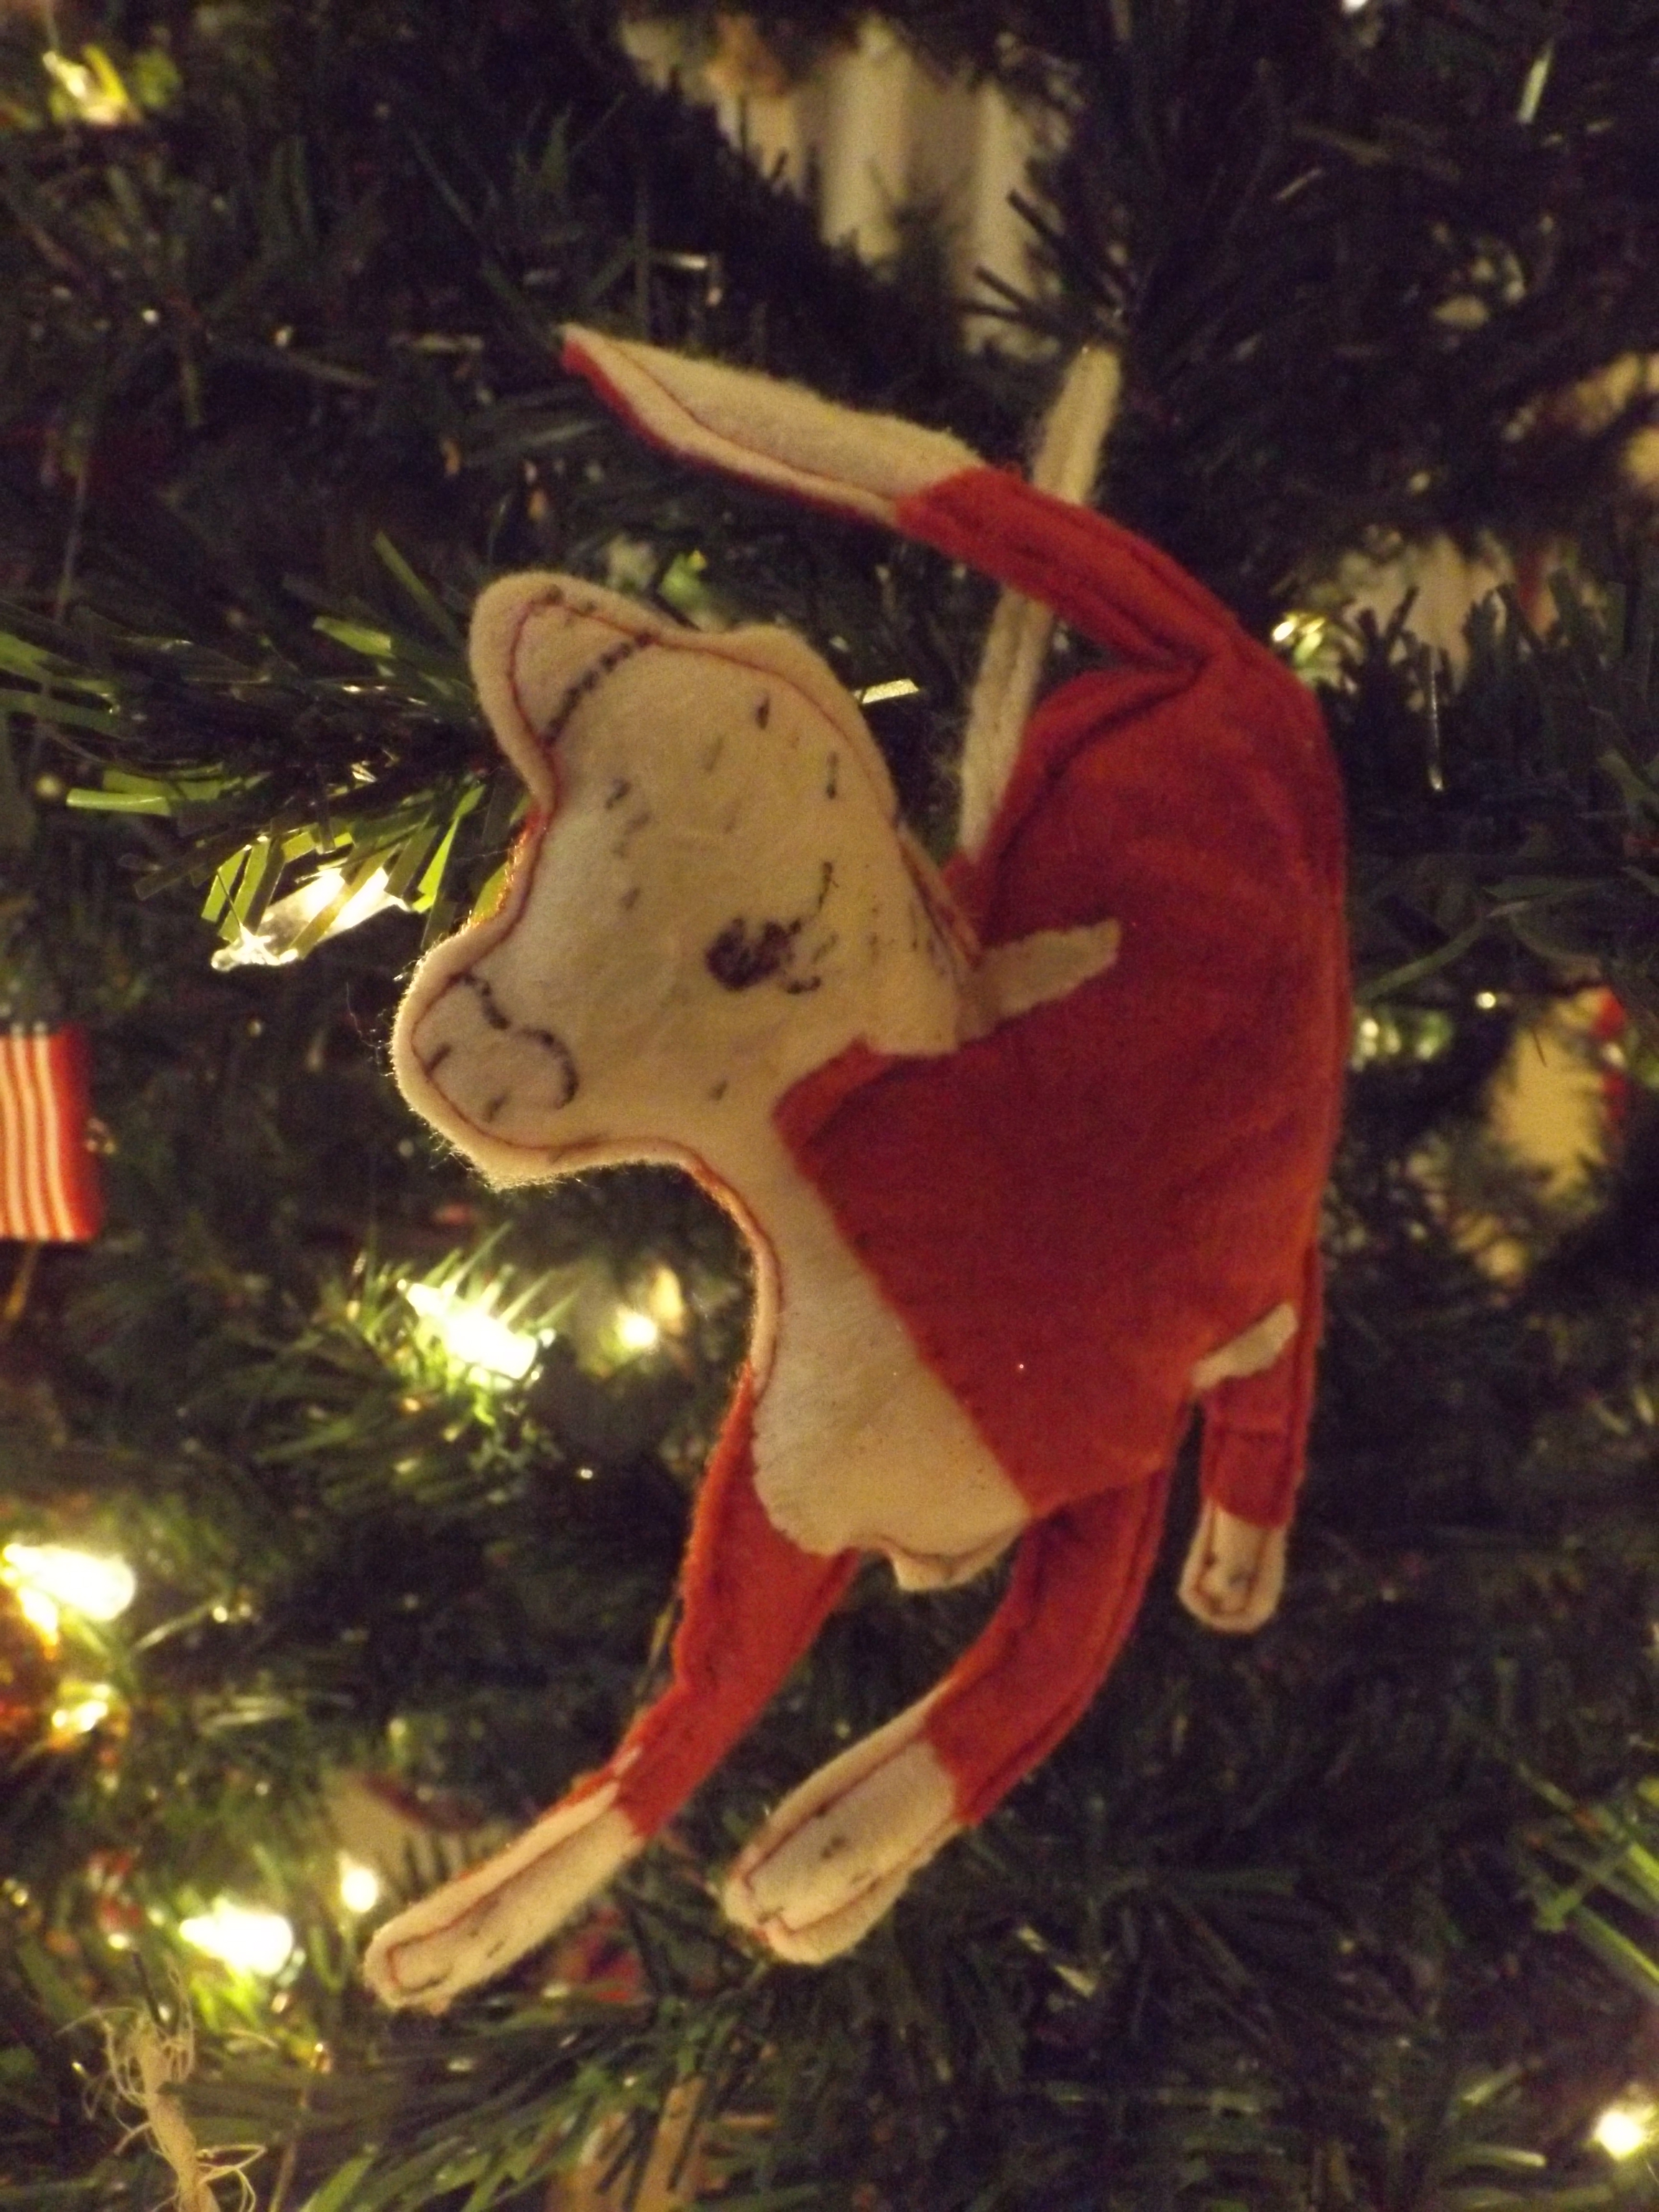
My favorite ornament of Wrexy’s – a little Hereford calf!
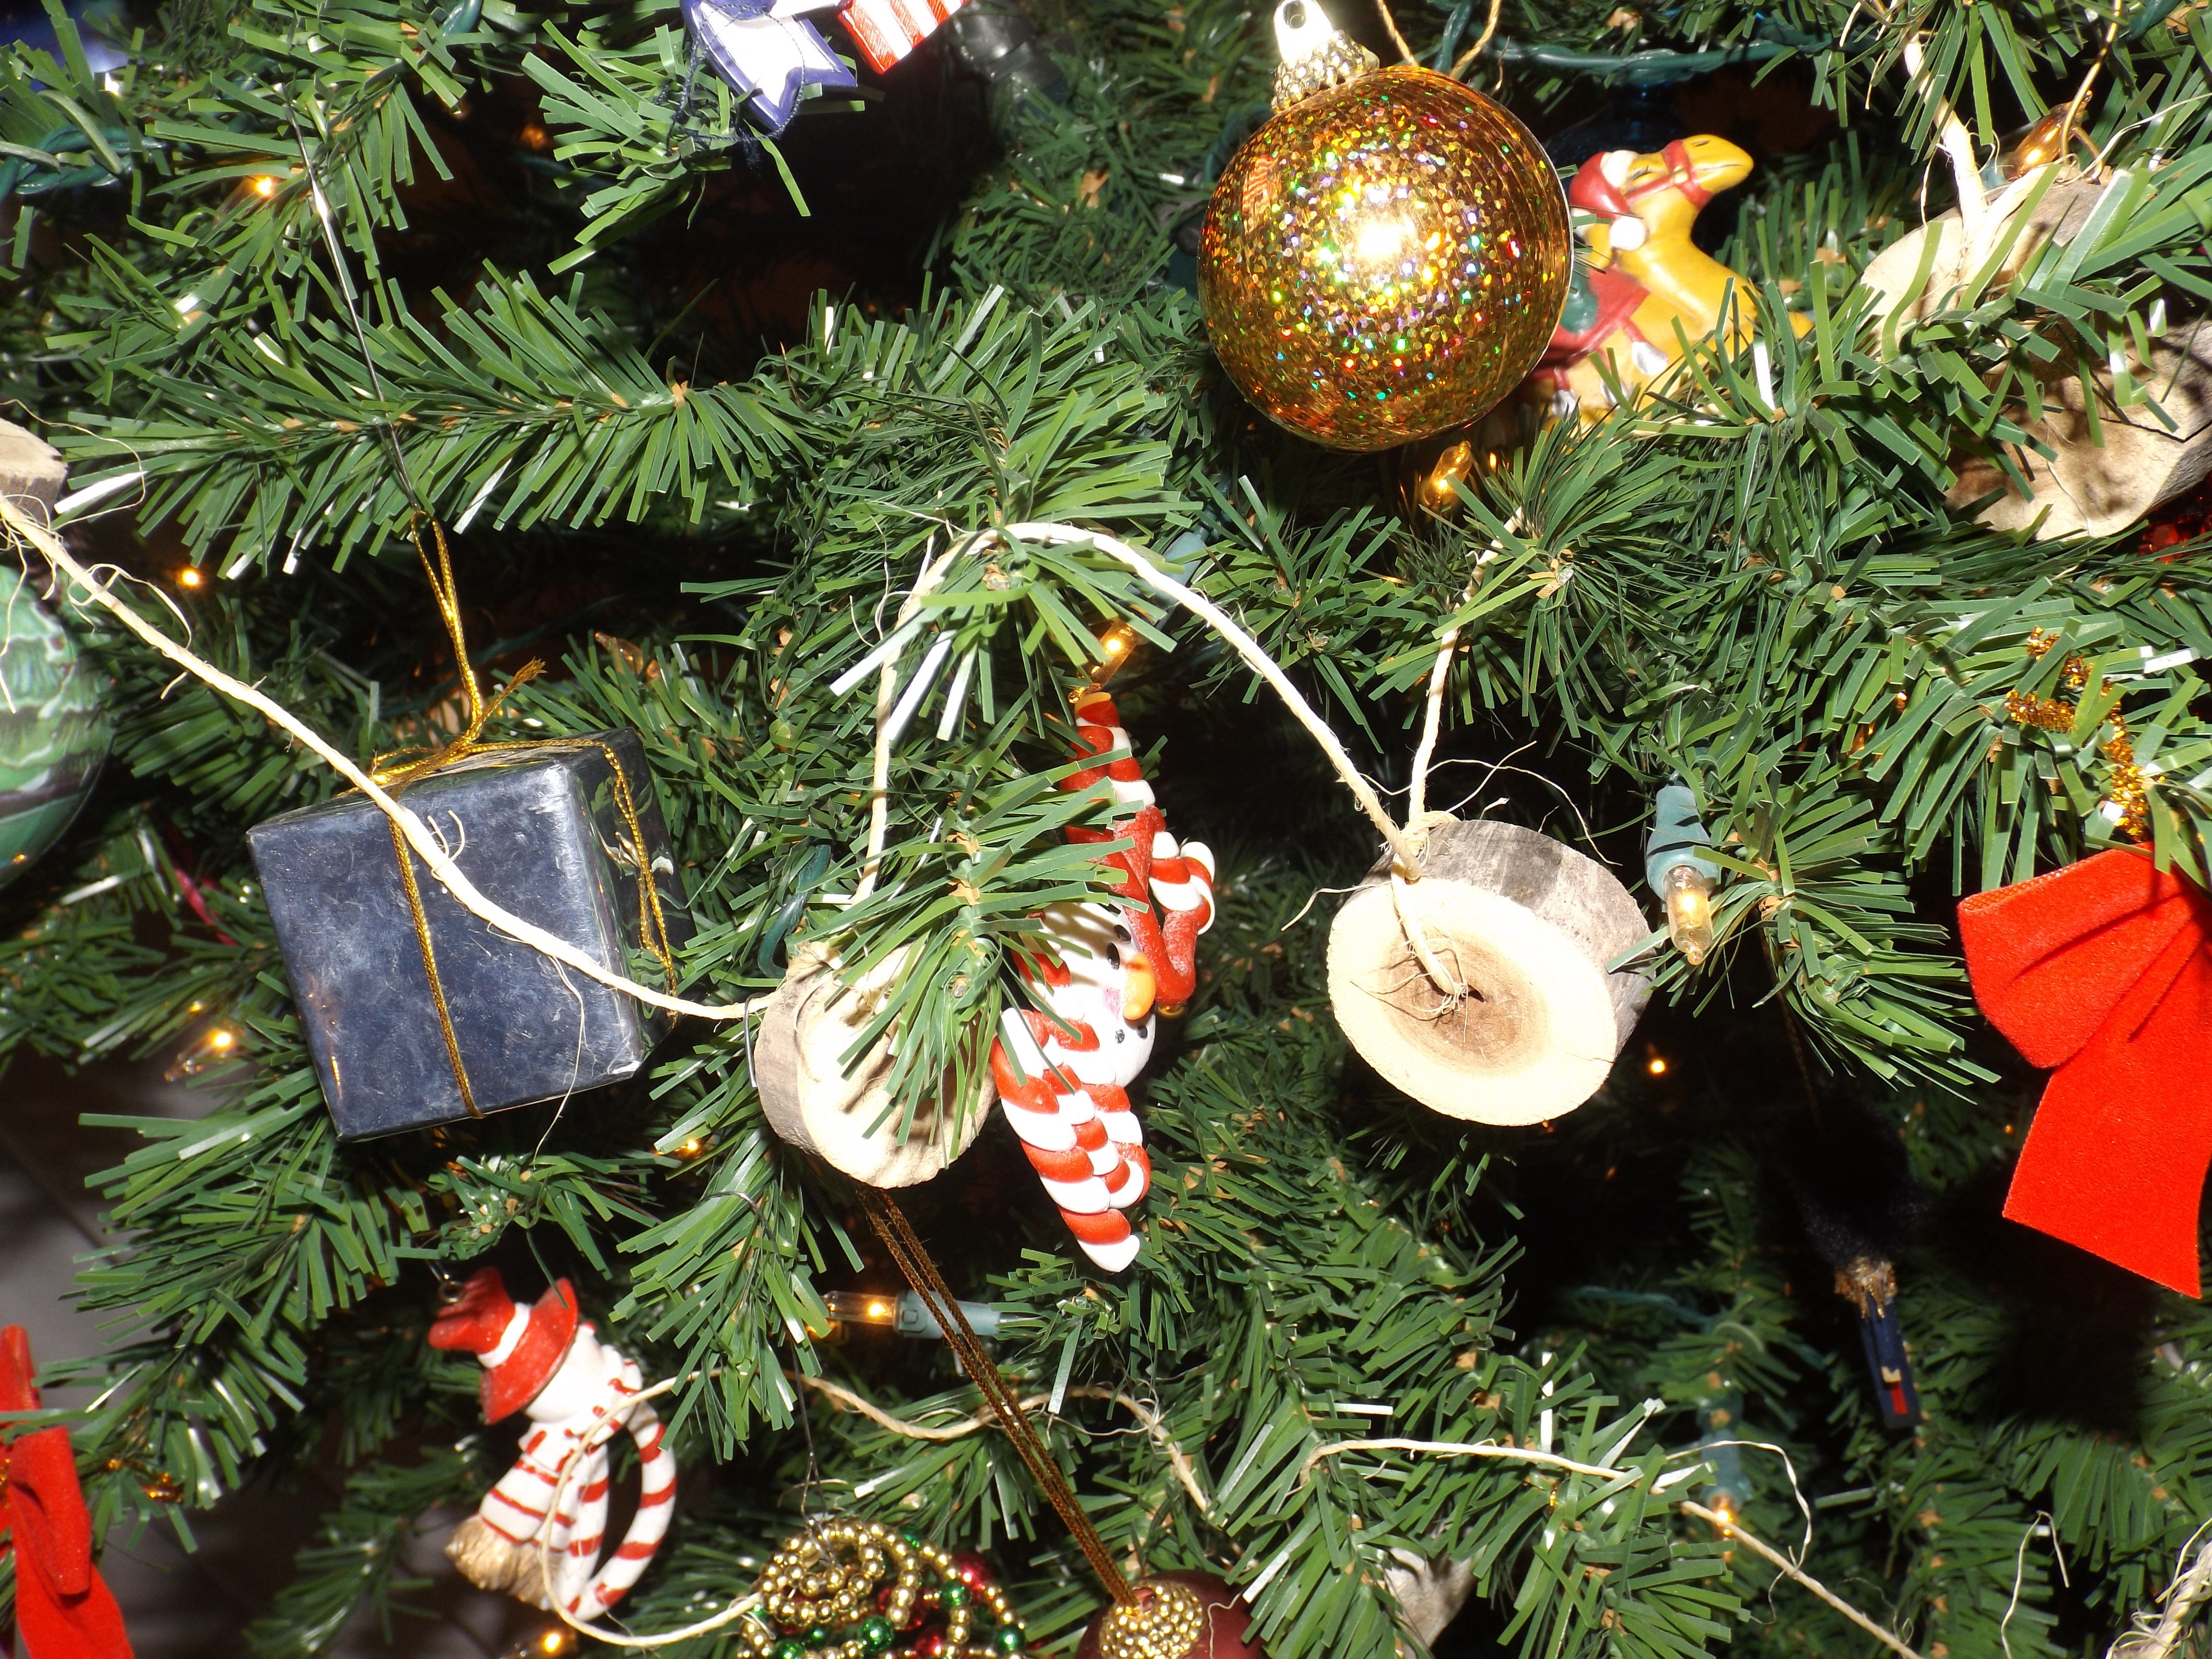
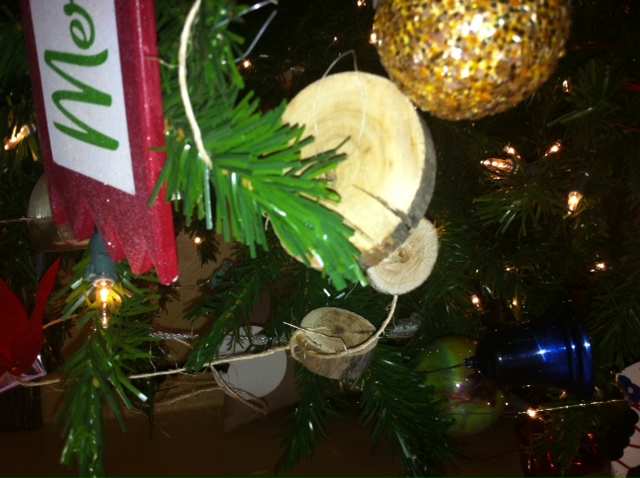
We went a little more woodsy this year and added this tree branch garland. We made this for a friend’s wedding this summer and re-used it as part of our Christmas decor.
Isn’t it fun?
We collected branches and then Wrex cut them into disks, drilled holes and then threaded twine through them. I really like how rustic and organic they look.
We might be seeing this at MOPS meeting soon…
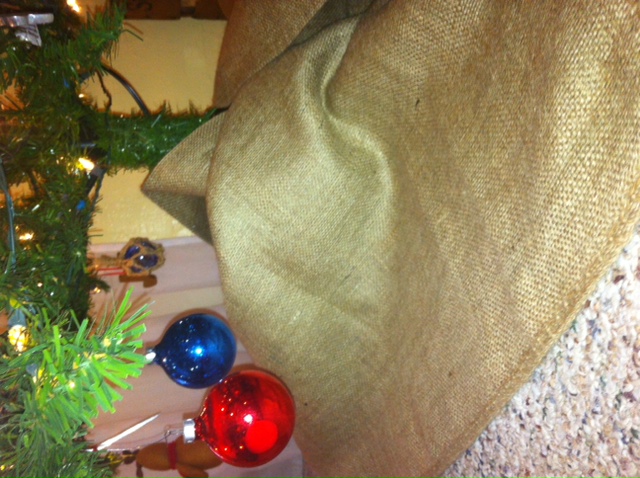
I’ve never owned a tree skirt. I always end up finding something fun (fake snow, felt, etc.) and making due. This year, I grabbed a couple of burlap feed sacks from the stash I have that is still BEGGING to be made into curtains. (I’ll get to that…in all of my spare time, ya know. HA!) I wrapped them around the base and voila! Cute enough for me!
Who doesn’t love burlap anyways?
I love this time of year and all that it represents. Let us not forget that if we make it about anything other than Jesus the Christ, then it is not Christmas. He IS the reason we celebrate and decorate and give and feast! Merry Christmas, friends!
Indeed!
Keep an eye out for a full living room tour this week!
Oh, Pinterest. I don’t spend as much time with you as I did in the beginning…and that’s more than fine with me…but you’ll always have a special place in my creative heart. You make organizing for the holidays a lot simpler, as I love having all of my PINspiration in one, easy-to-find place. I’ve jumped on a few times here lately and these are some of my favorites as of late! ***Beware – randomness ahead***
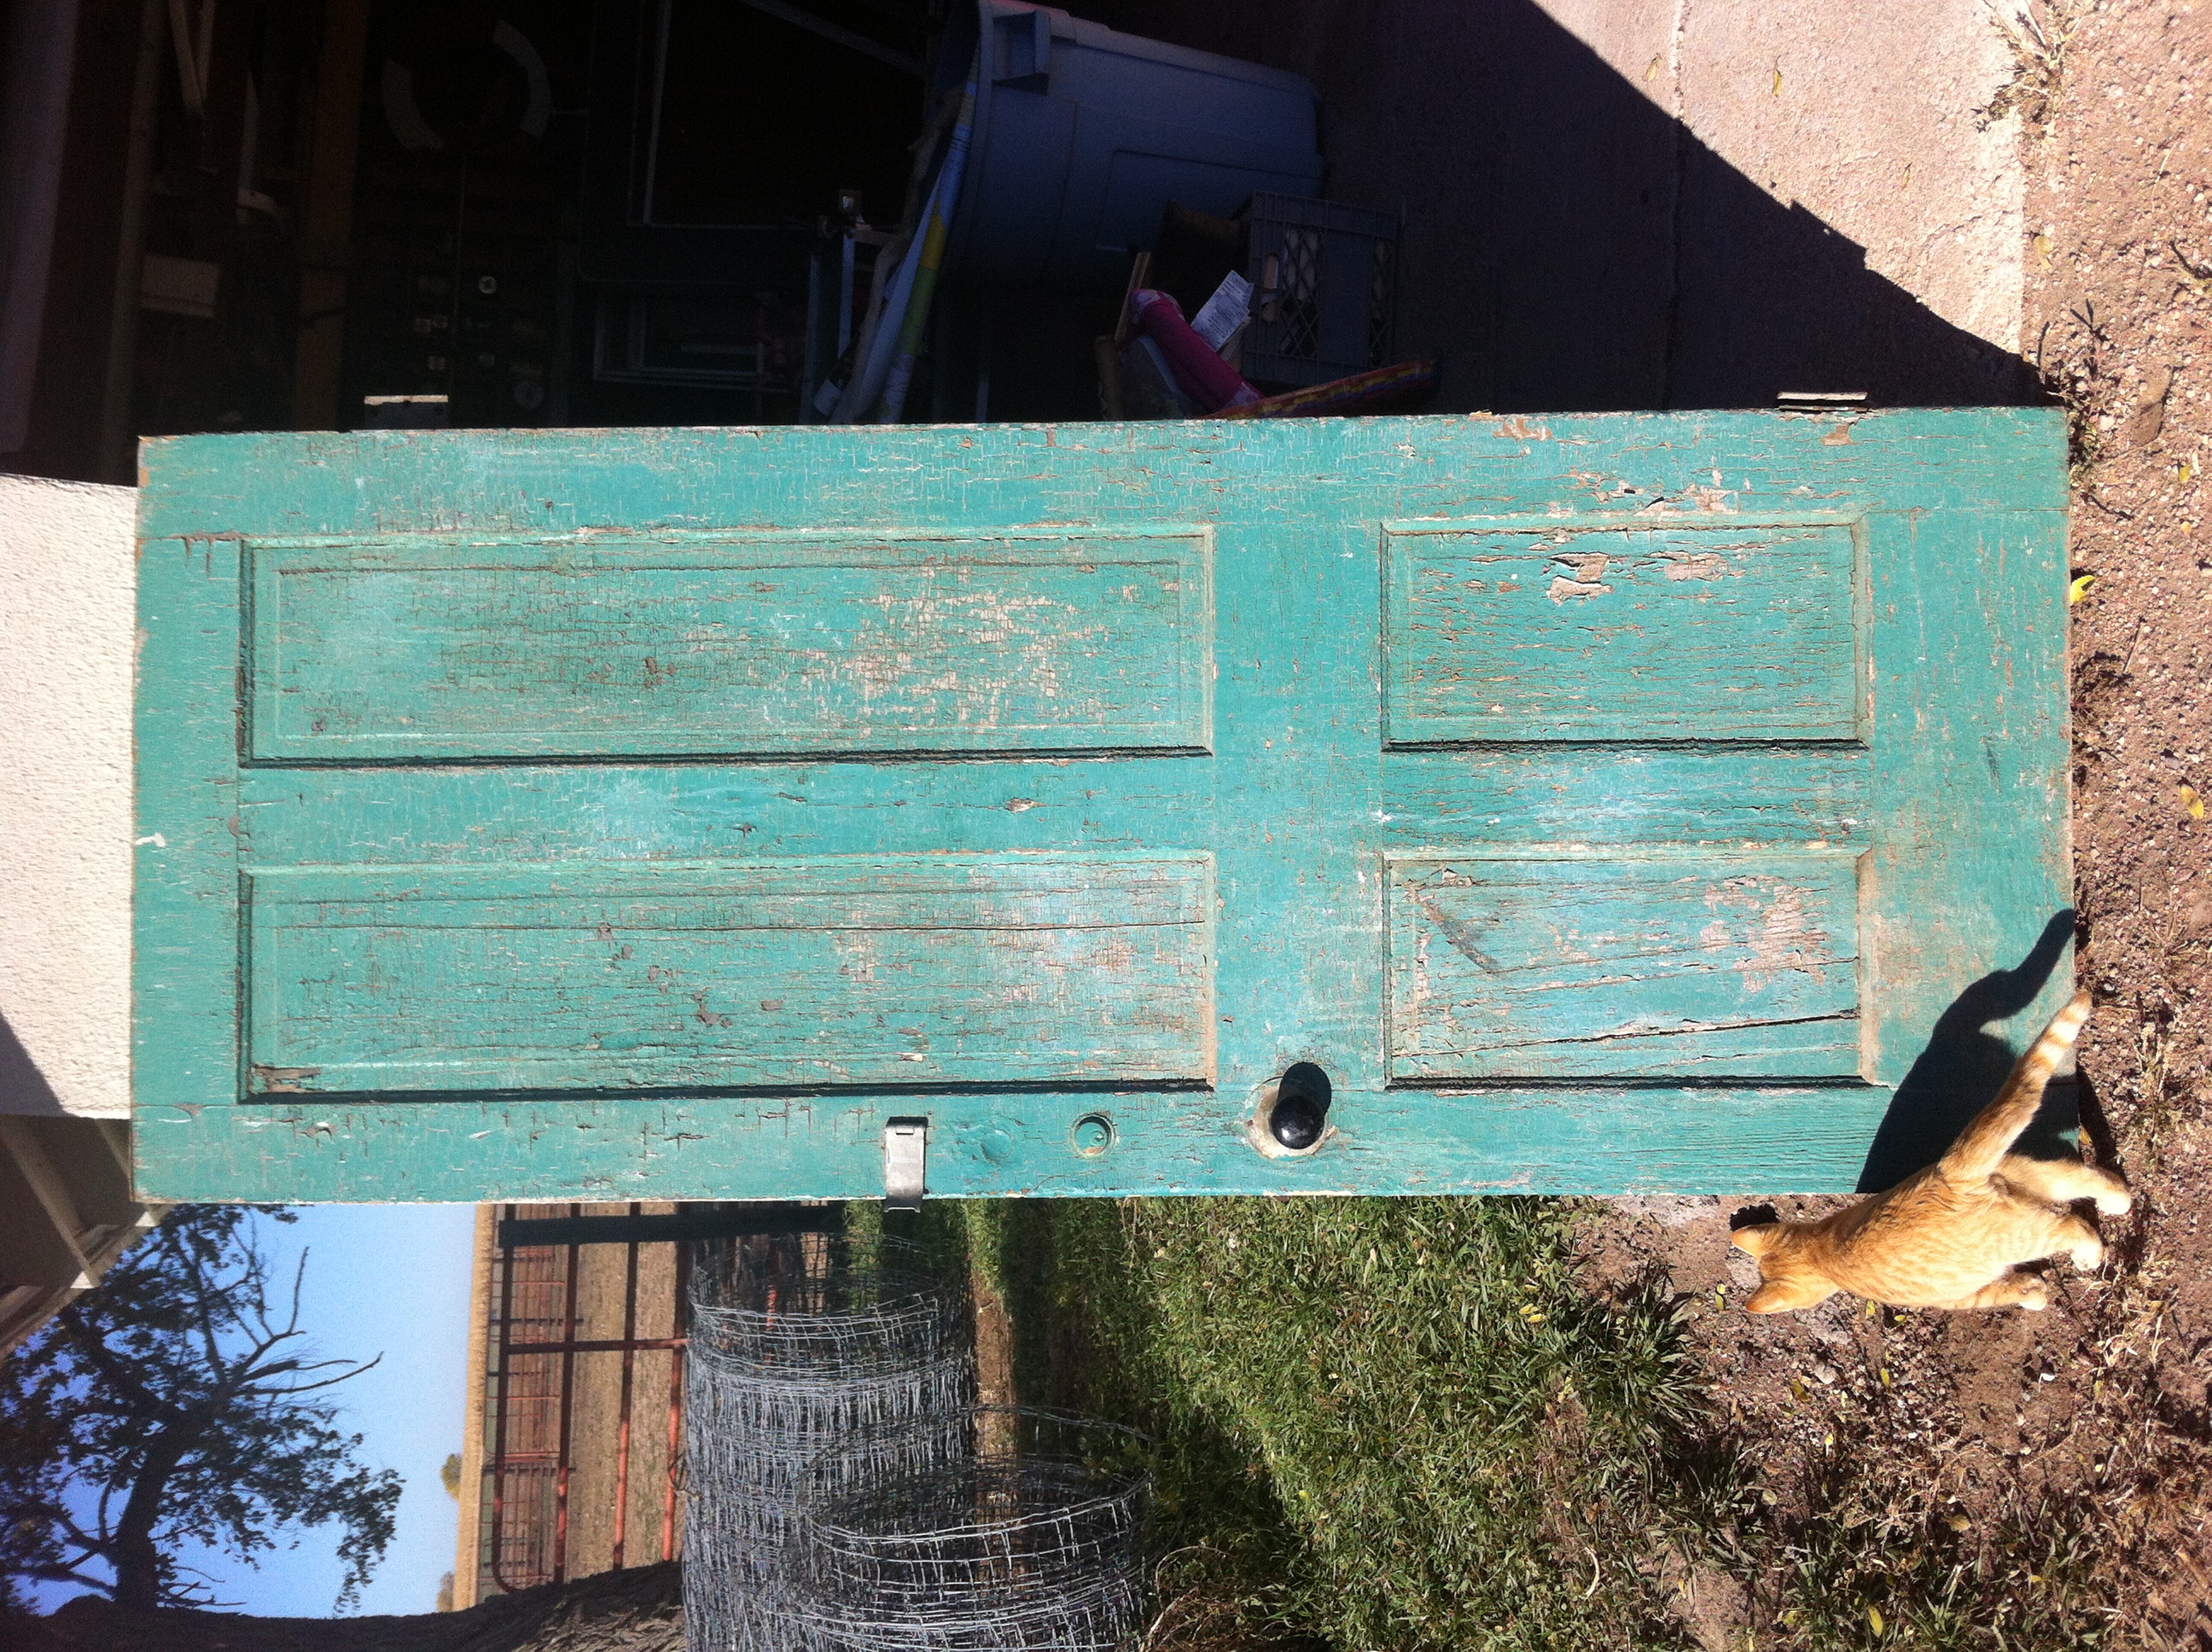
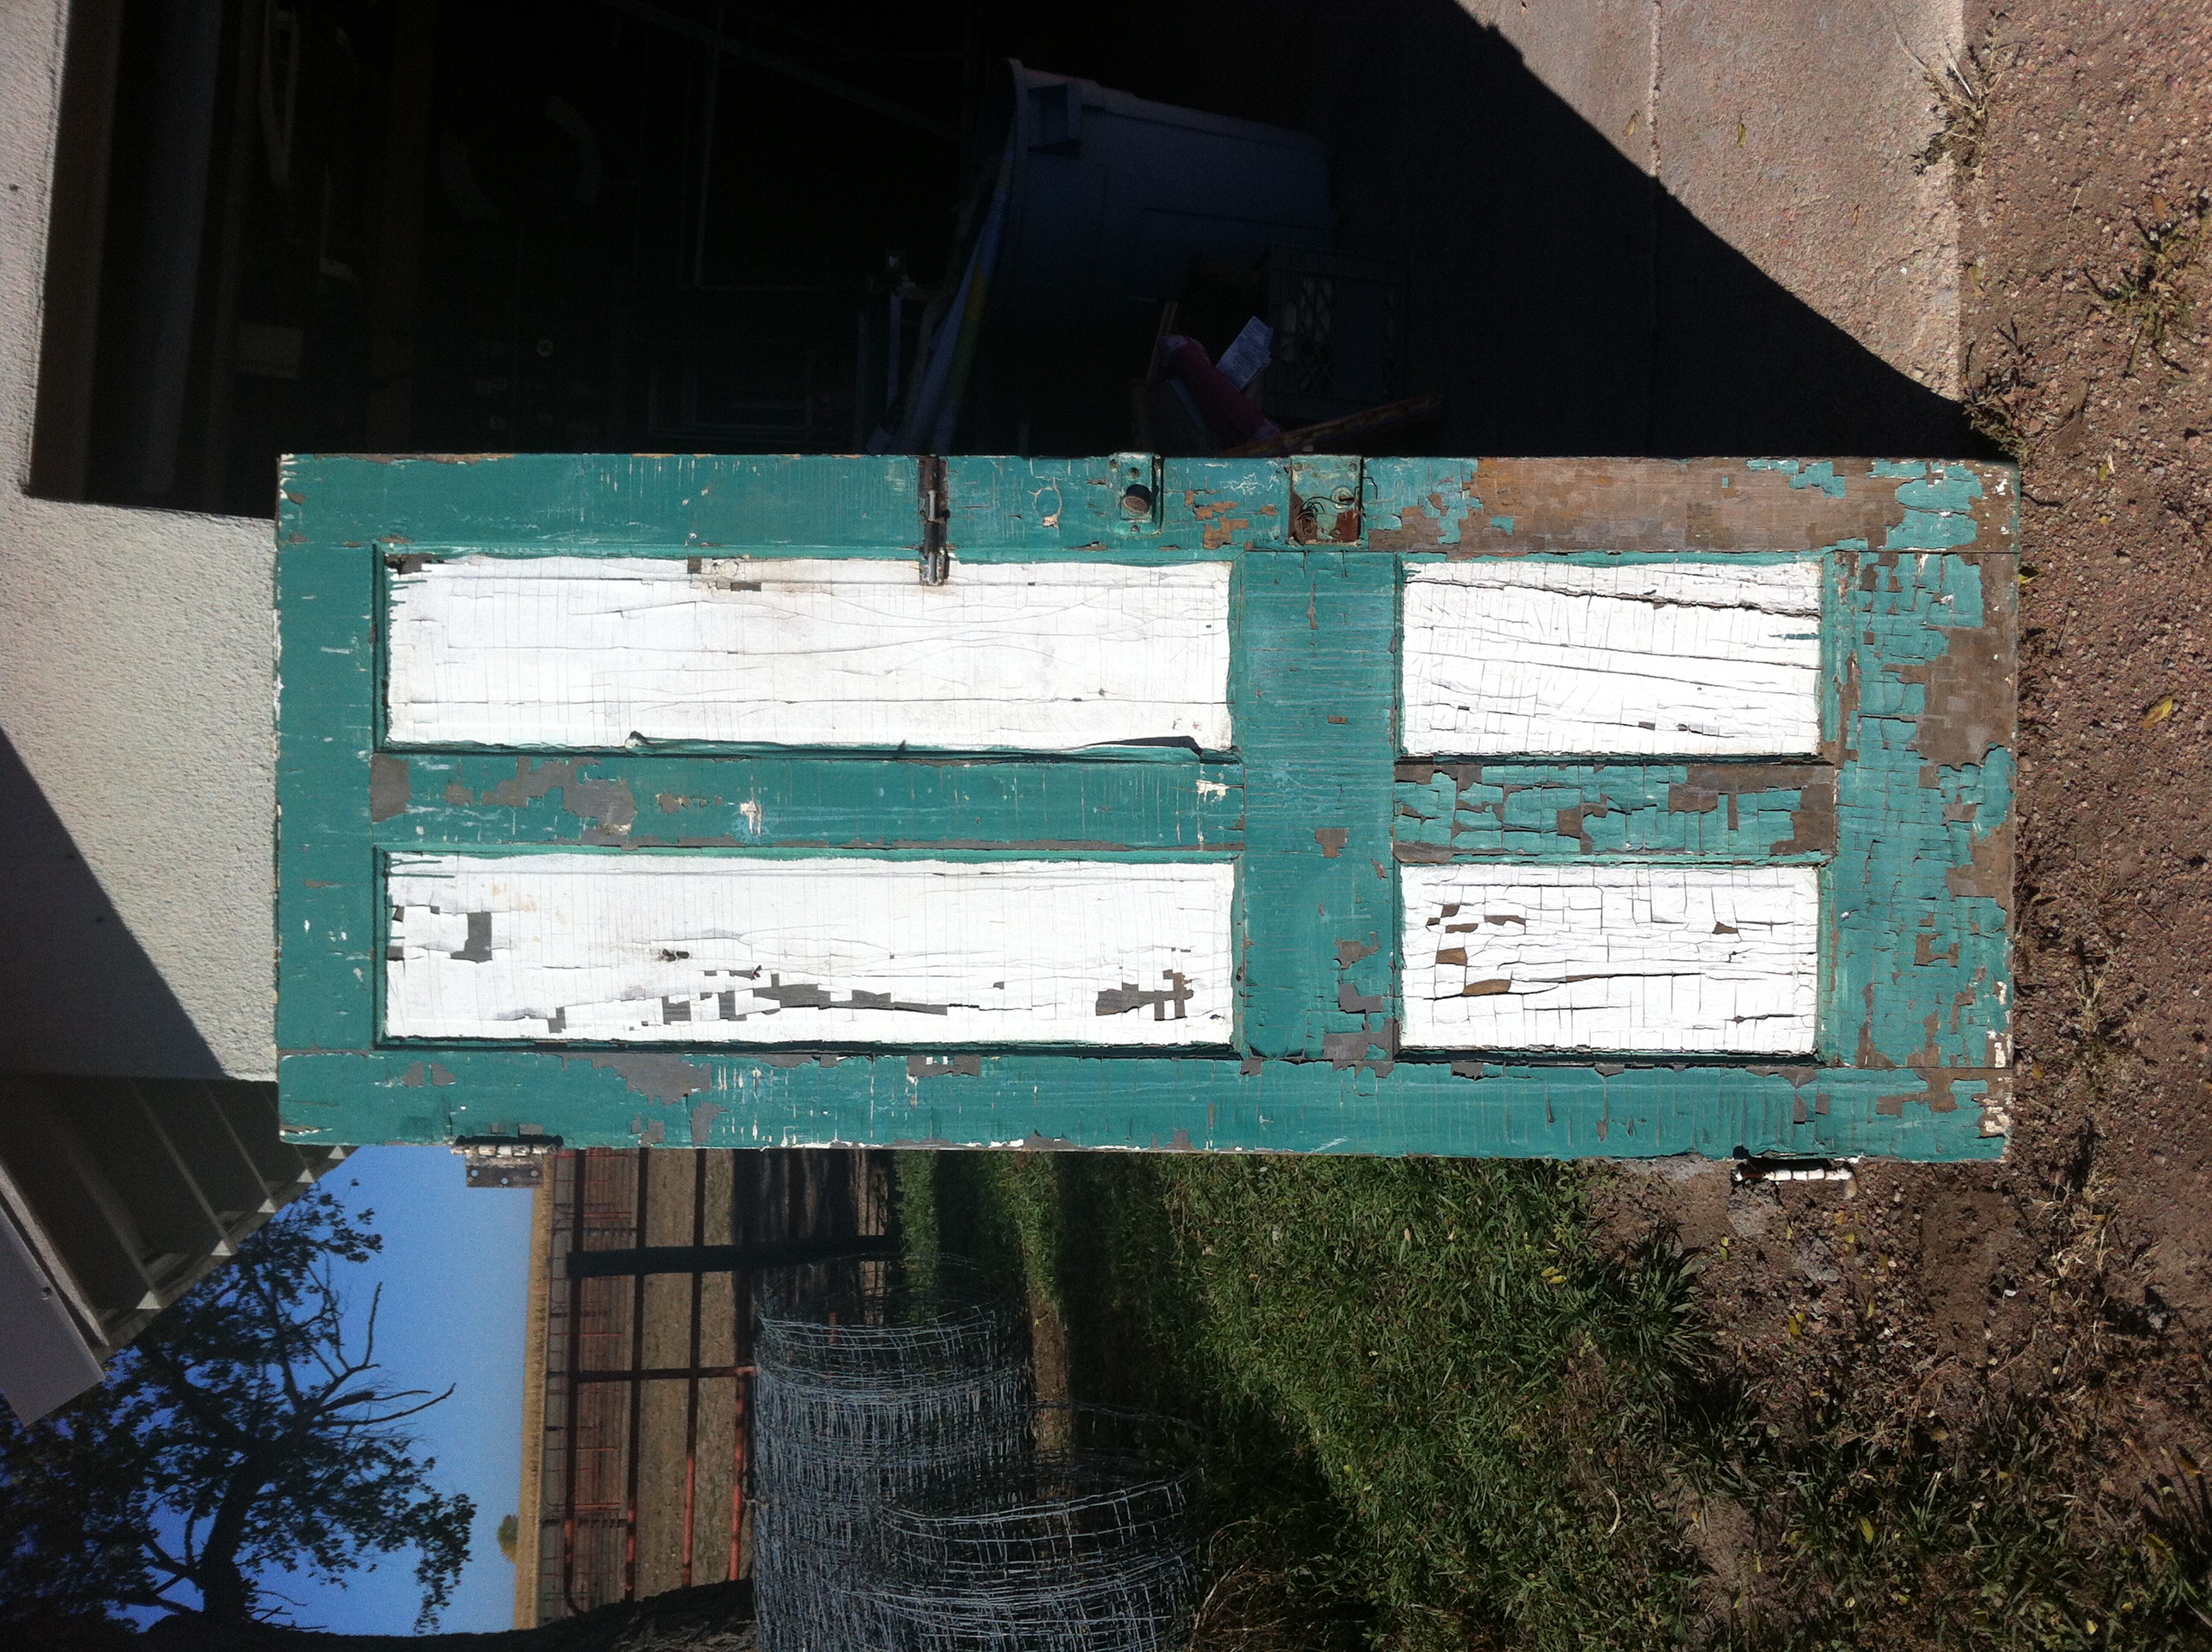
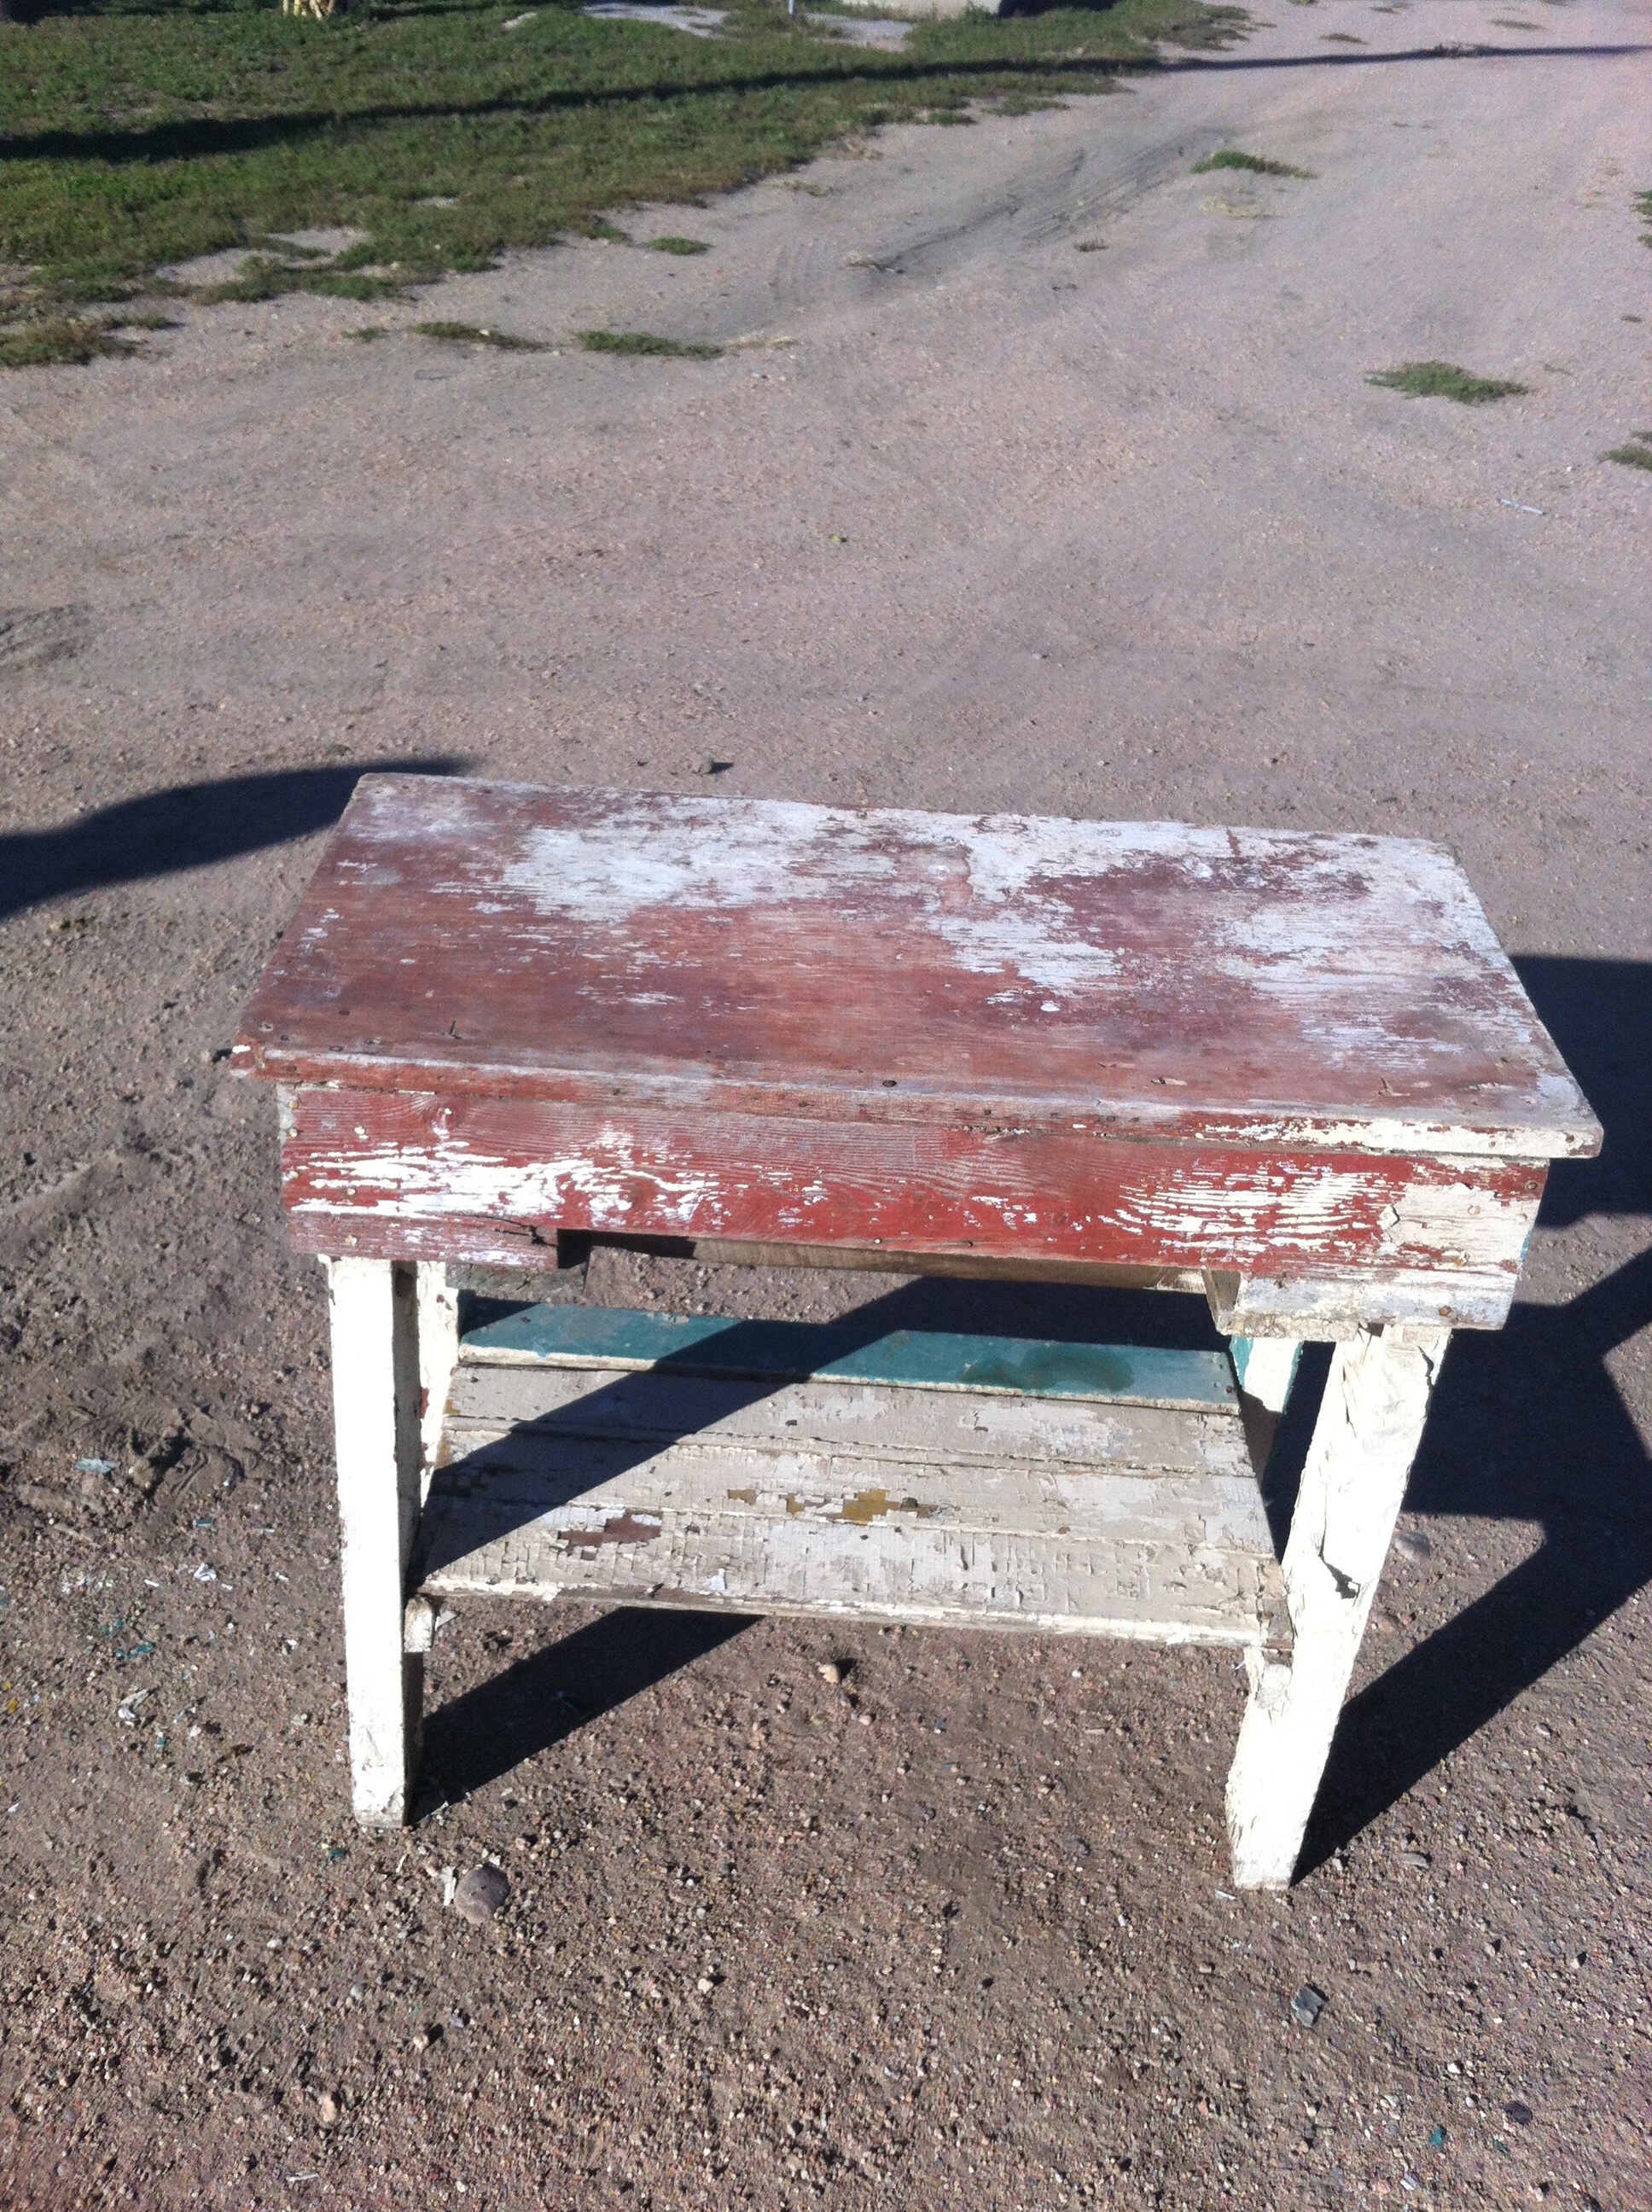
If you’ll recall, my birthday was back in September and my family spoiled me rotten! Apparently, they weren’t done. We made a quick trip to Denver this weekend and Wrexy informed me that we had to make a little detour. He had conspired with a friend and bought me some amazing, old, chippy farmhouse doors and a lovely little table! (See what I mean – he’s the BEST.)
That table is going to spend some time at MOPS but then? Oh, I have plans for it! What do you think I should do with those RAD doors? Send me your ideas!
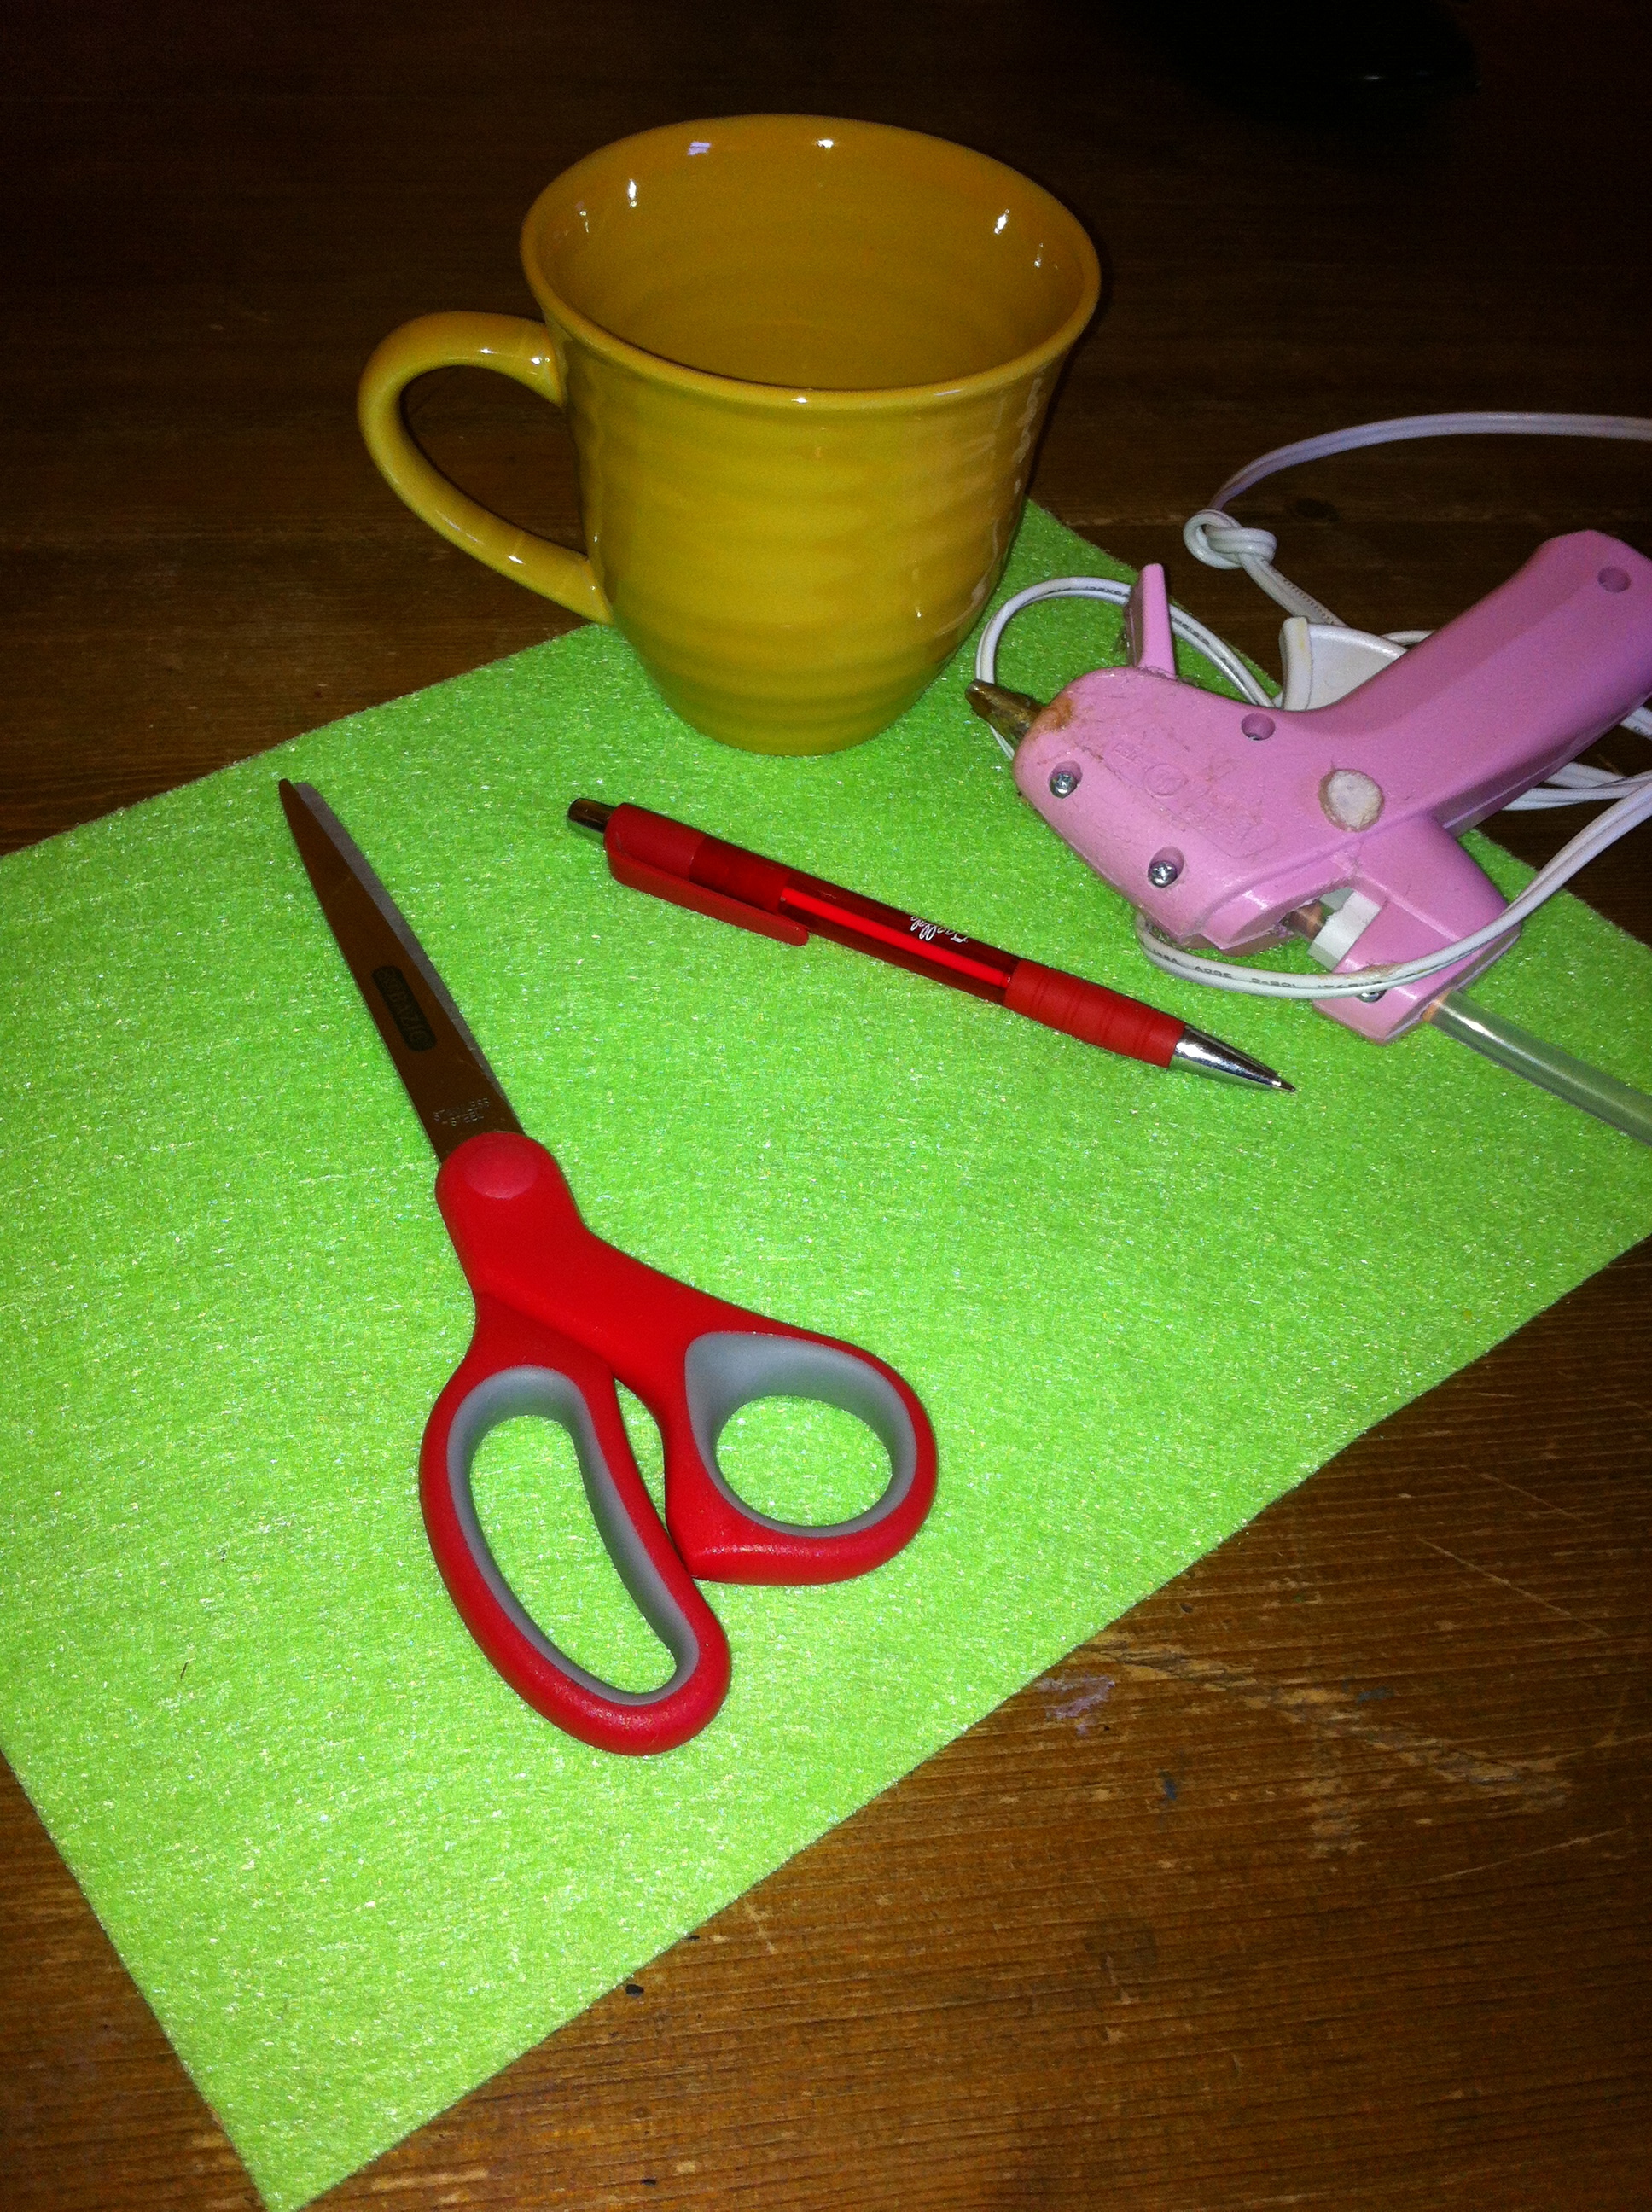
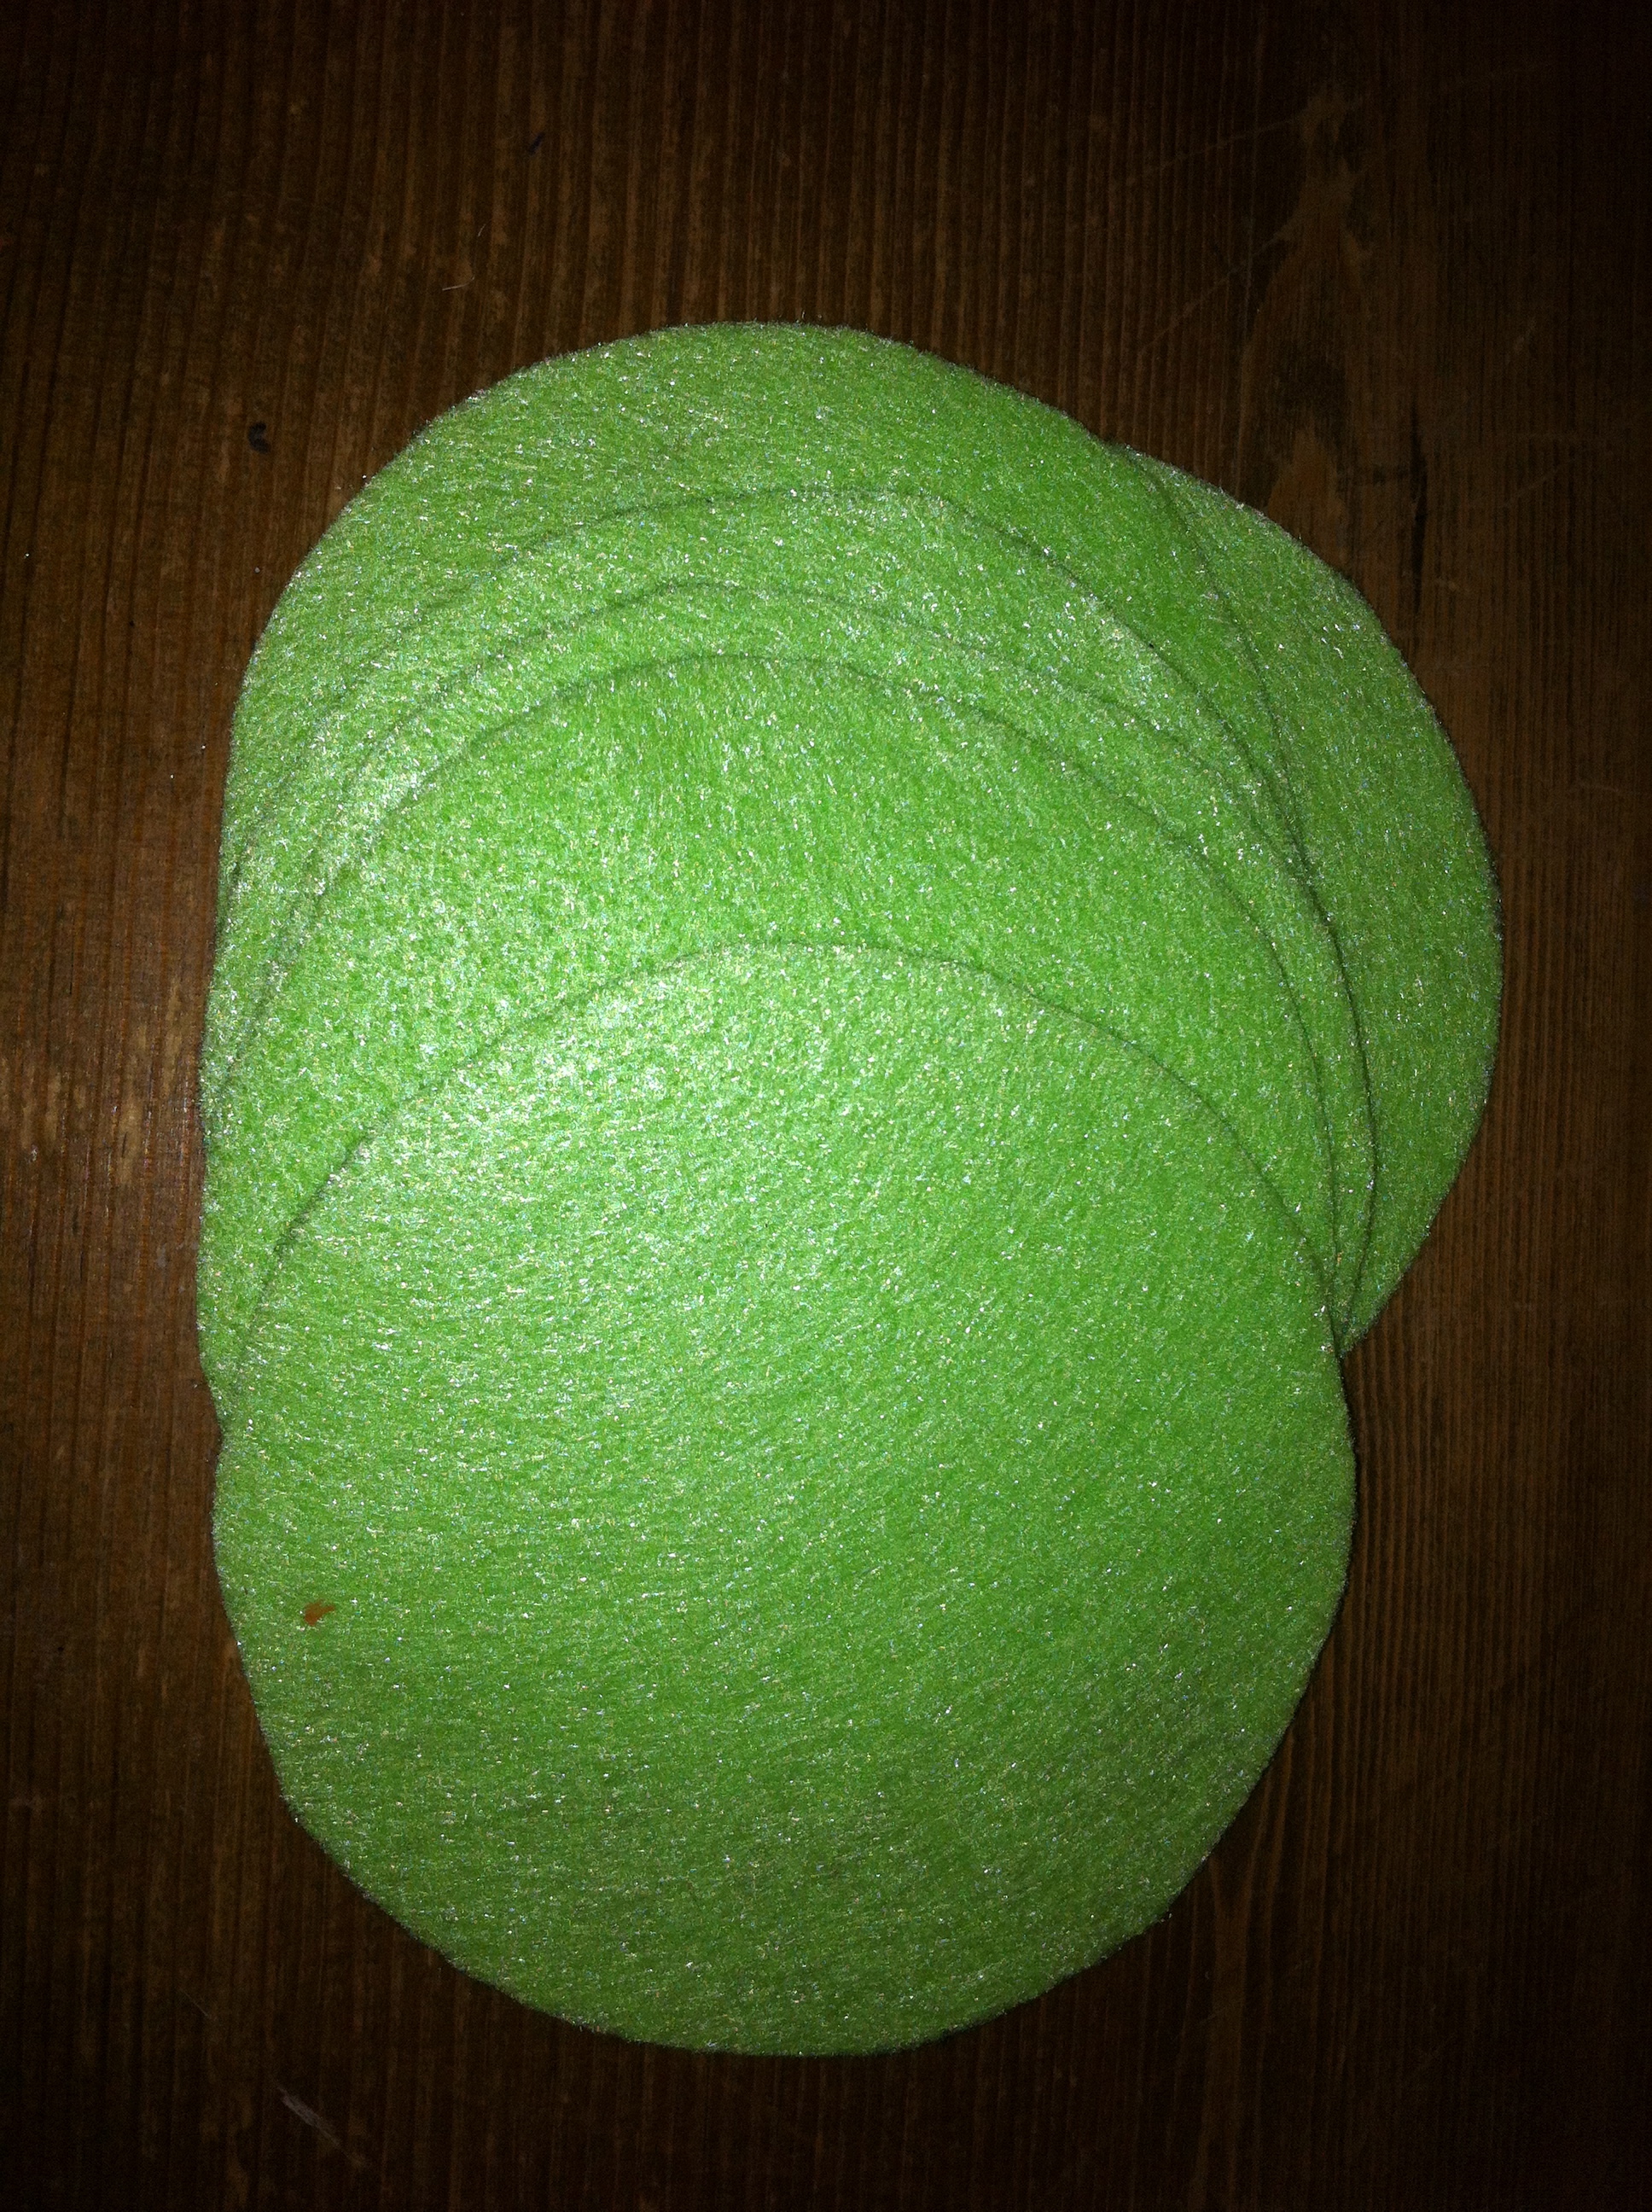
They are SUPER simple (and cheap!) to make and you can do countless things with them. All you need to create this flower is:
1 sheet of felt (your color choice)
Scissors
Pen
A round object for tracing
Hot glue gun
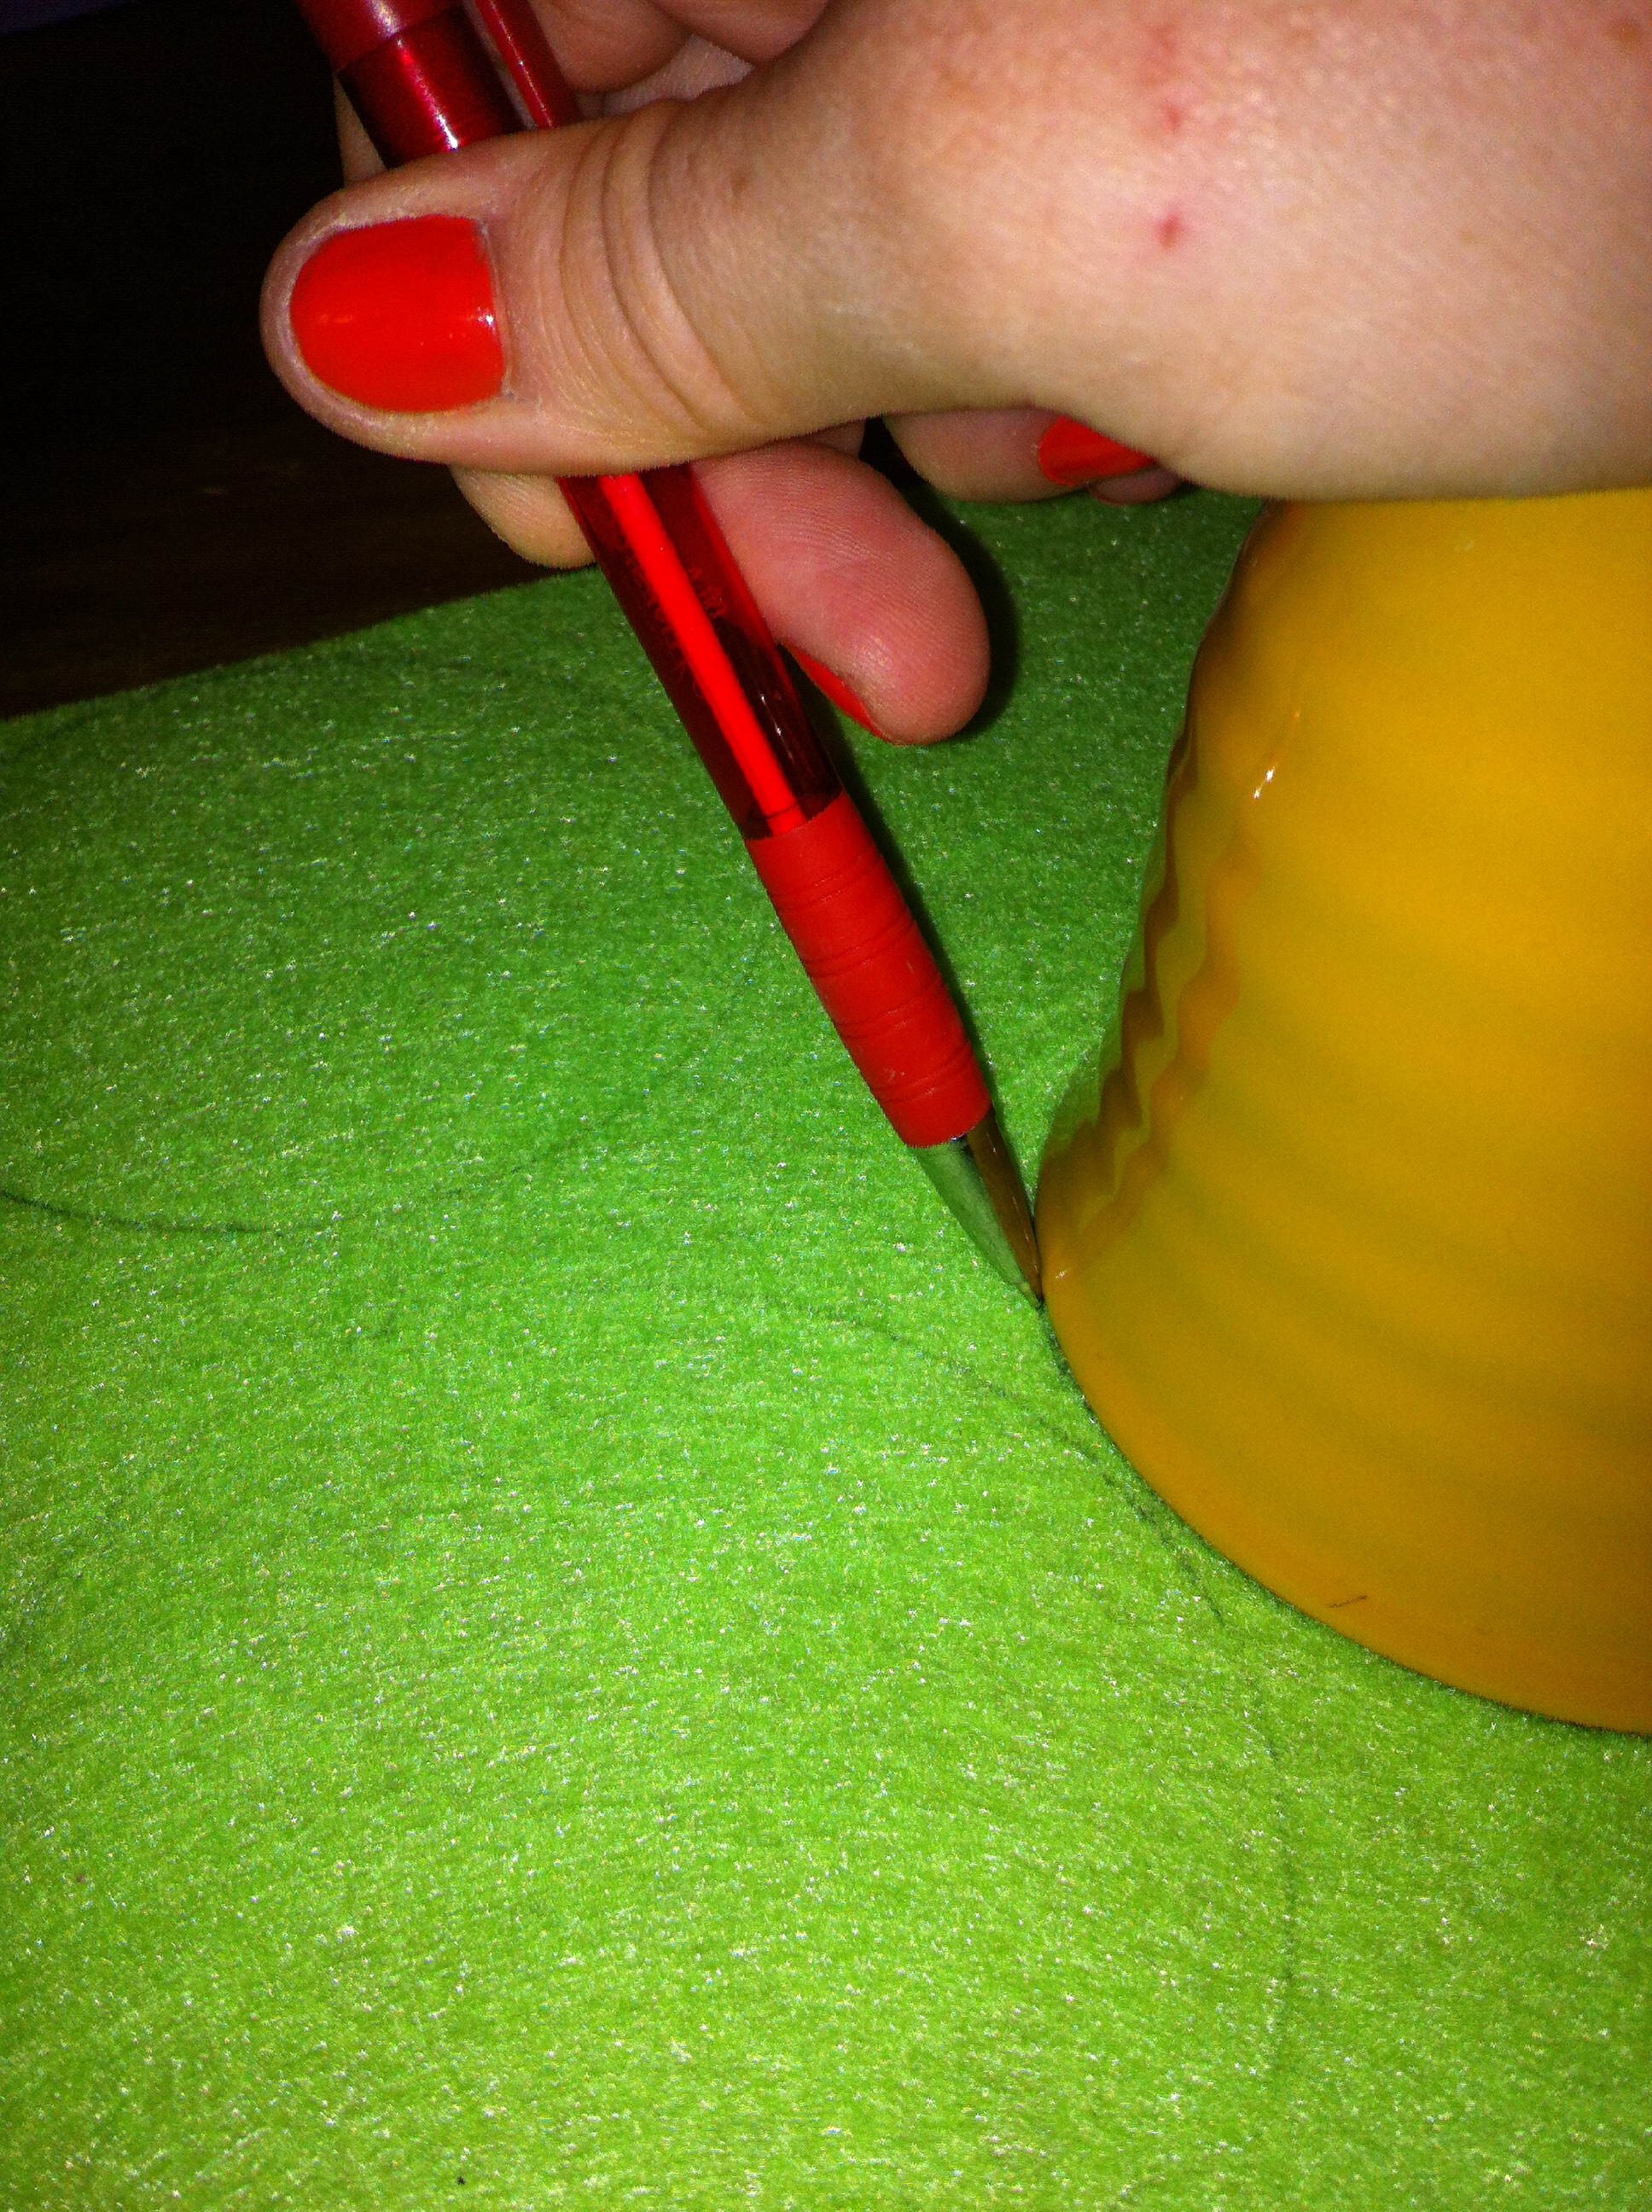
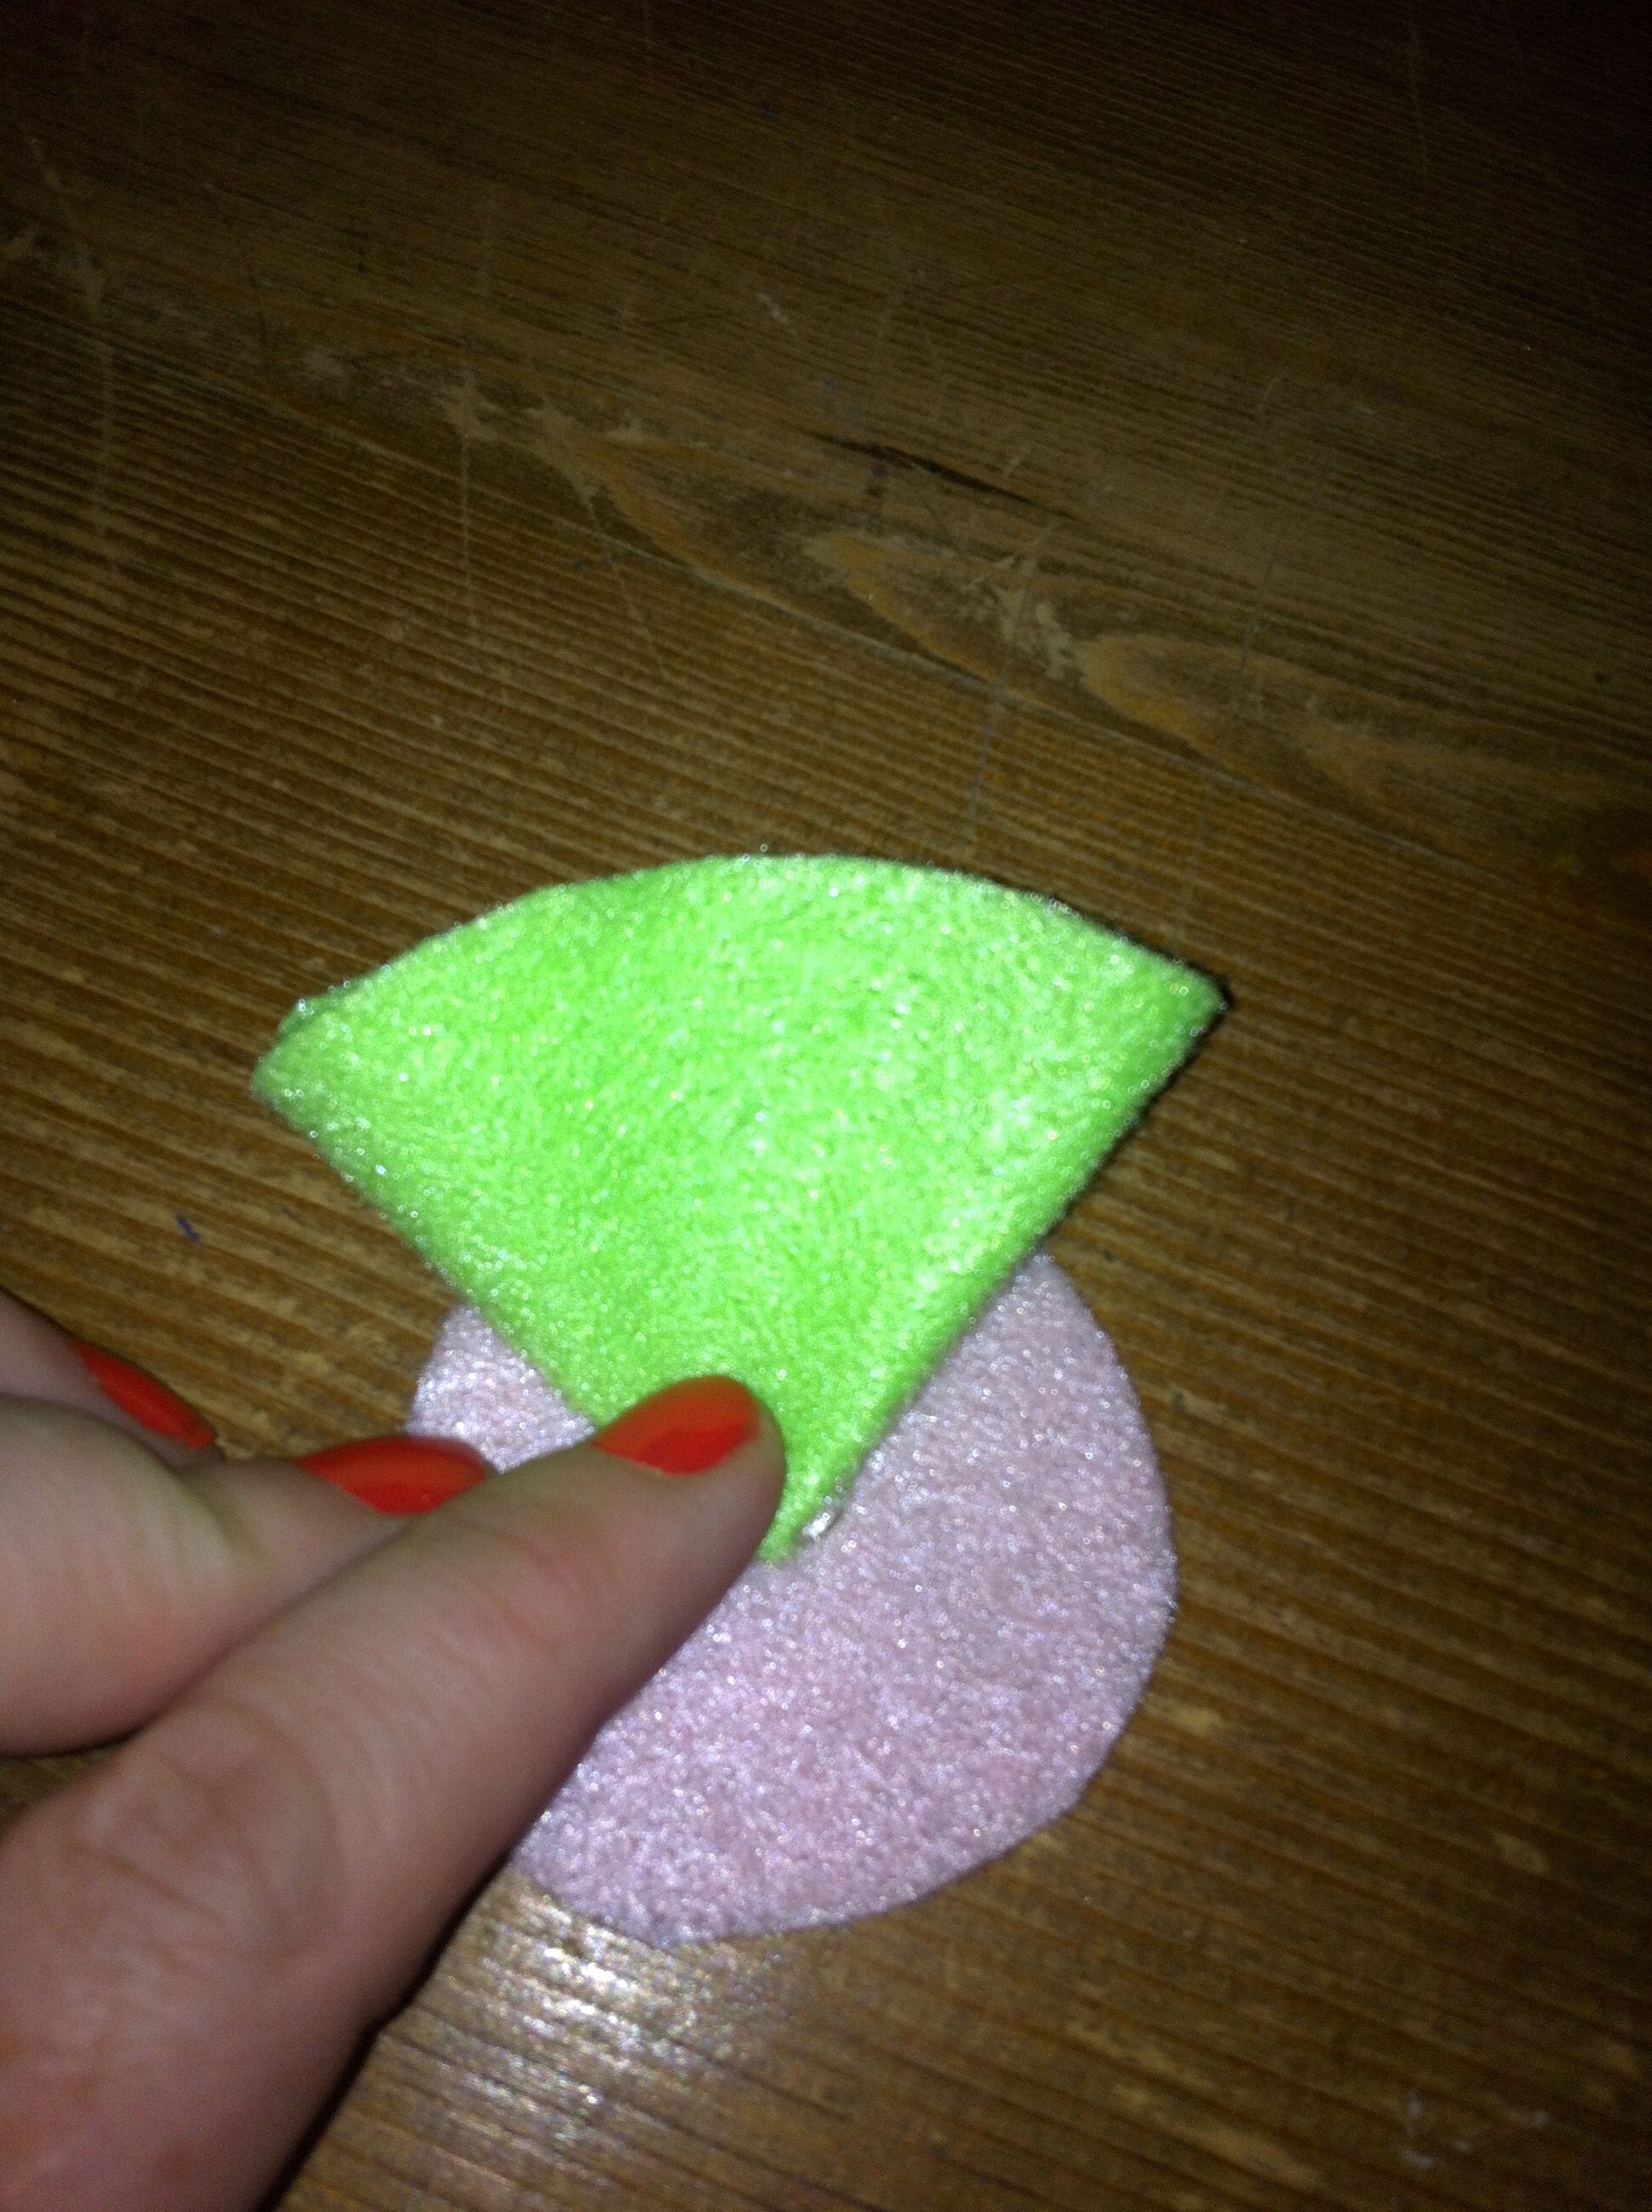
Step 1: Trace out 6 circles onto the felt.
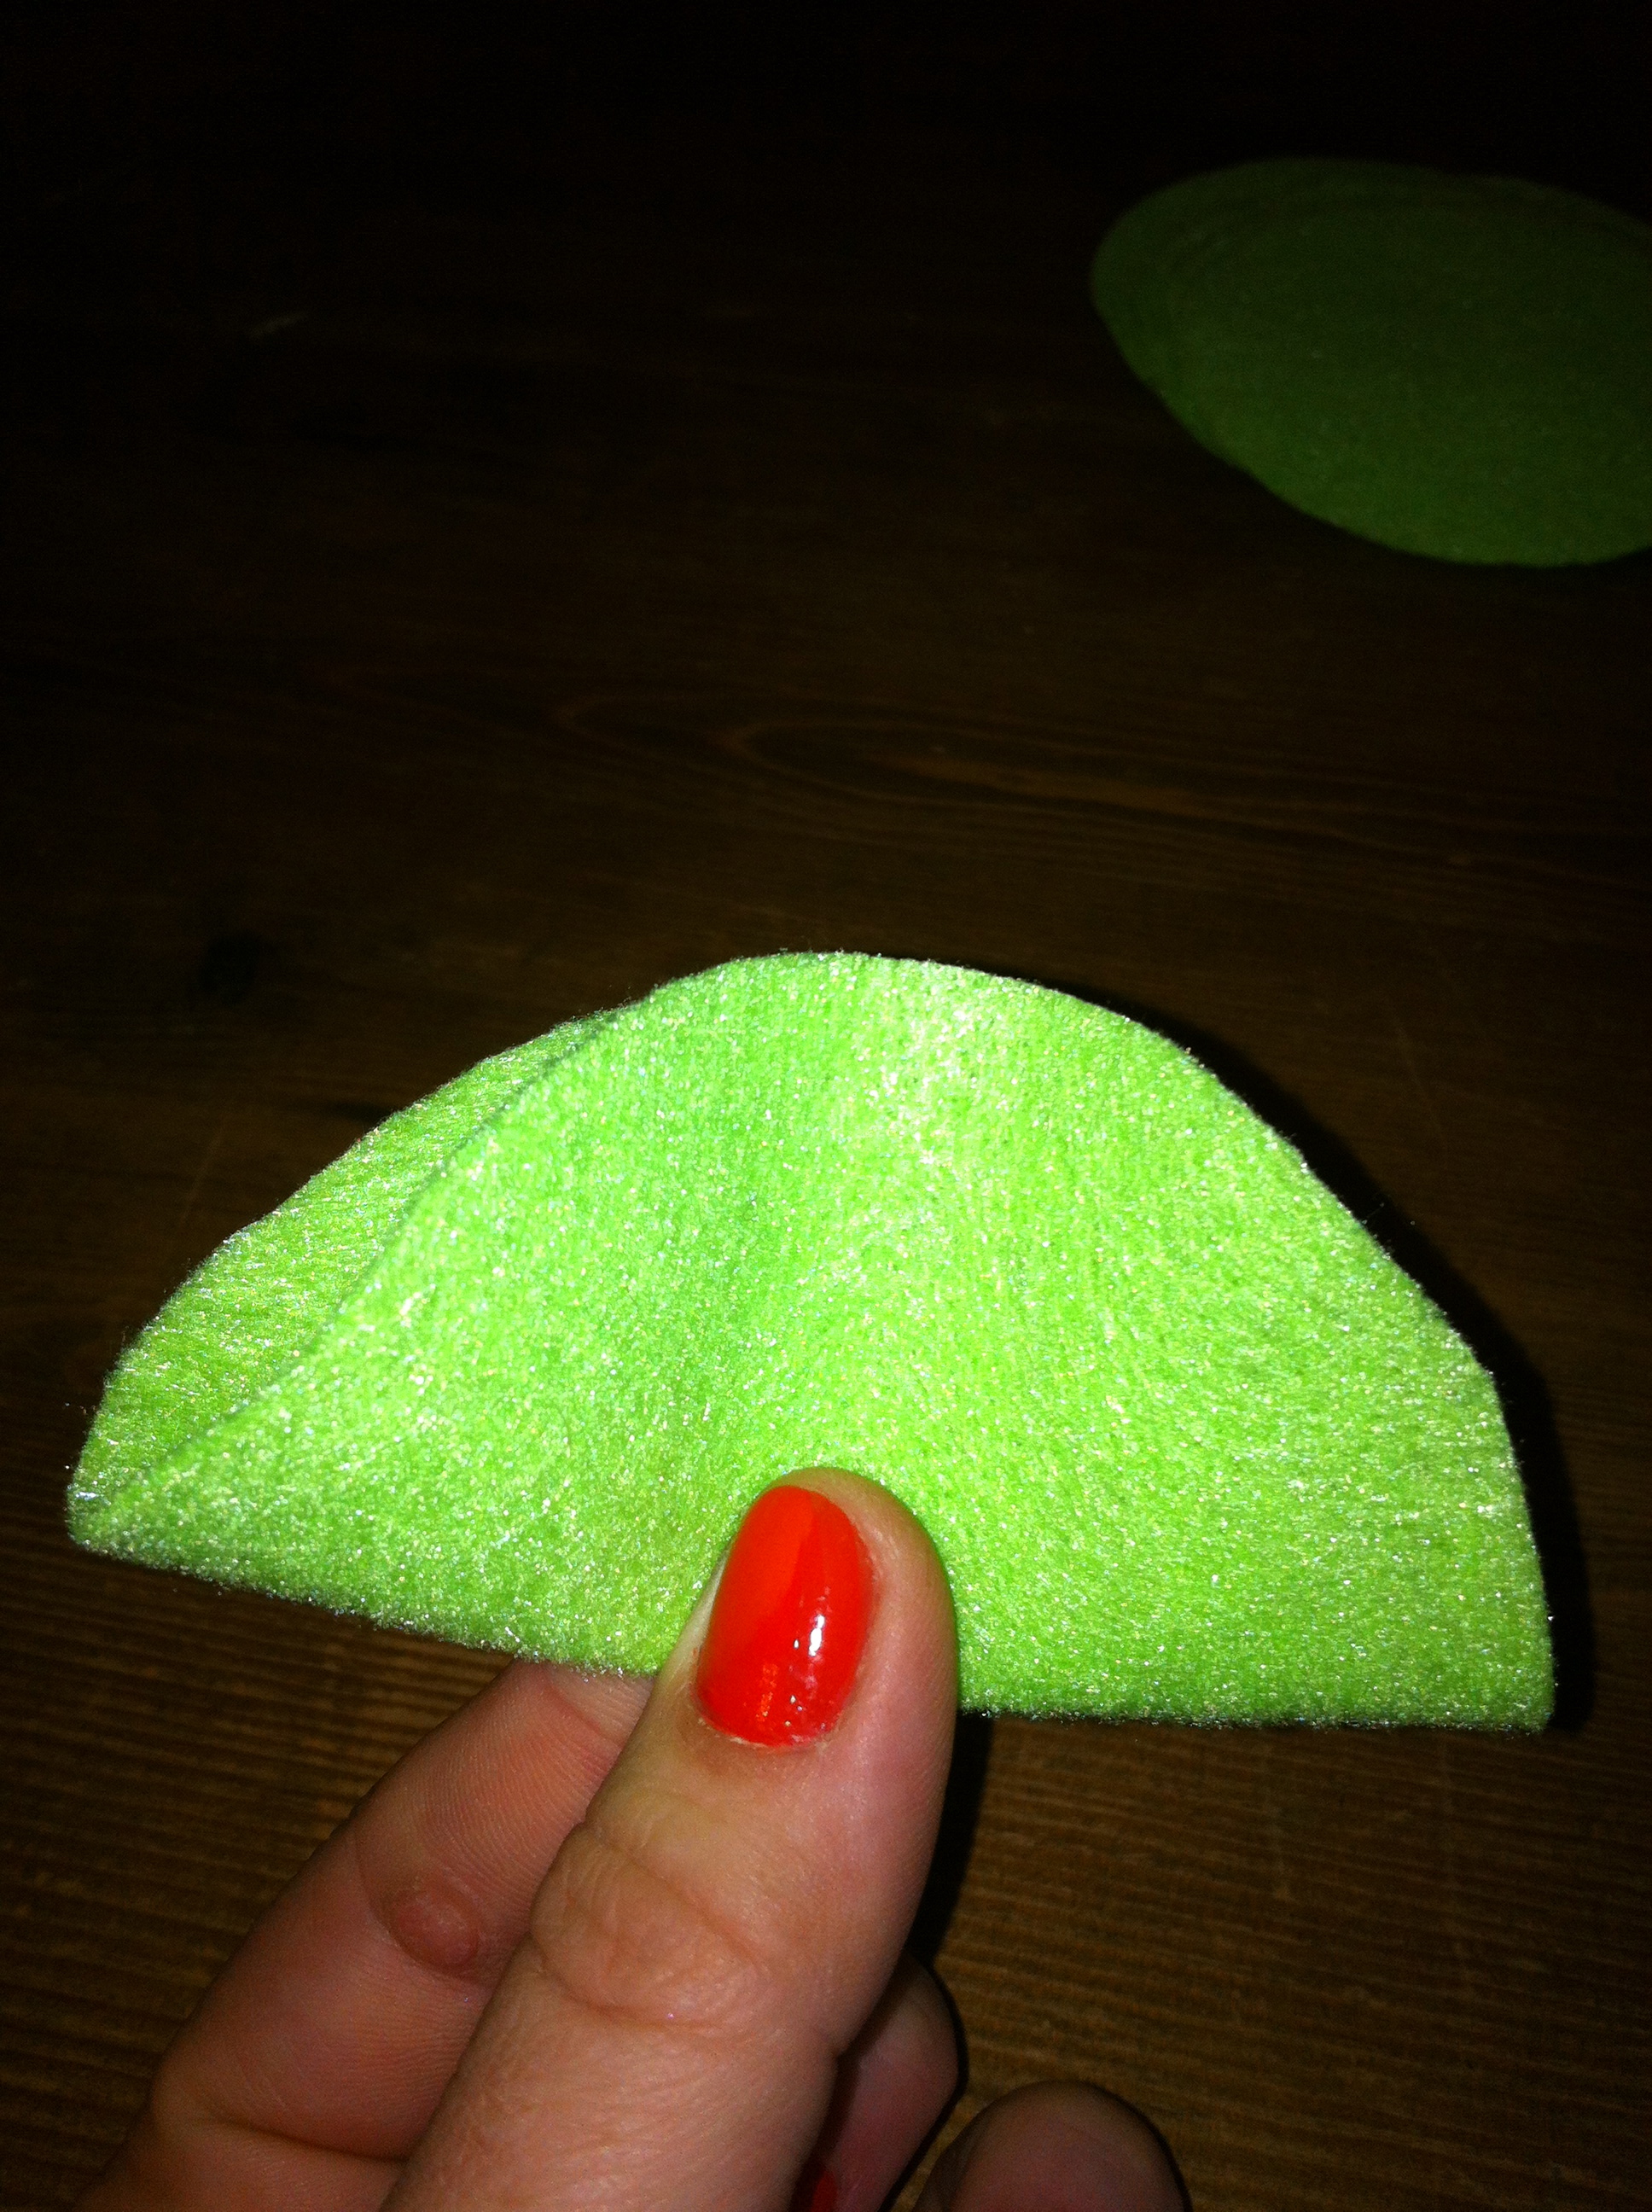
I used the big end of a coffee cup to make these and ended up with about a 4″ flower. Then, flip the cup over and cut a smaller circle; you’ll adhere your flowers petals to this smaller circle.
Step 2: Cut out all of your circles.
Step 3: Fold your circles in half, like a taco. (Yummmm….tacos….)
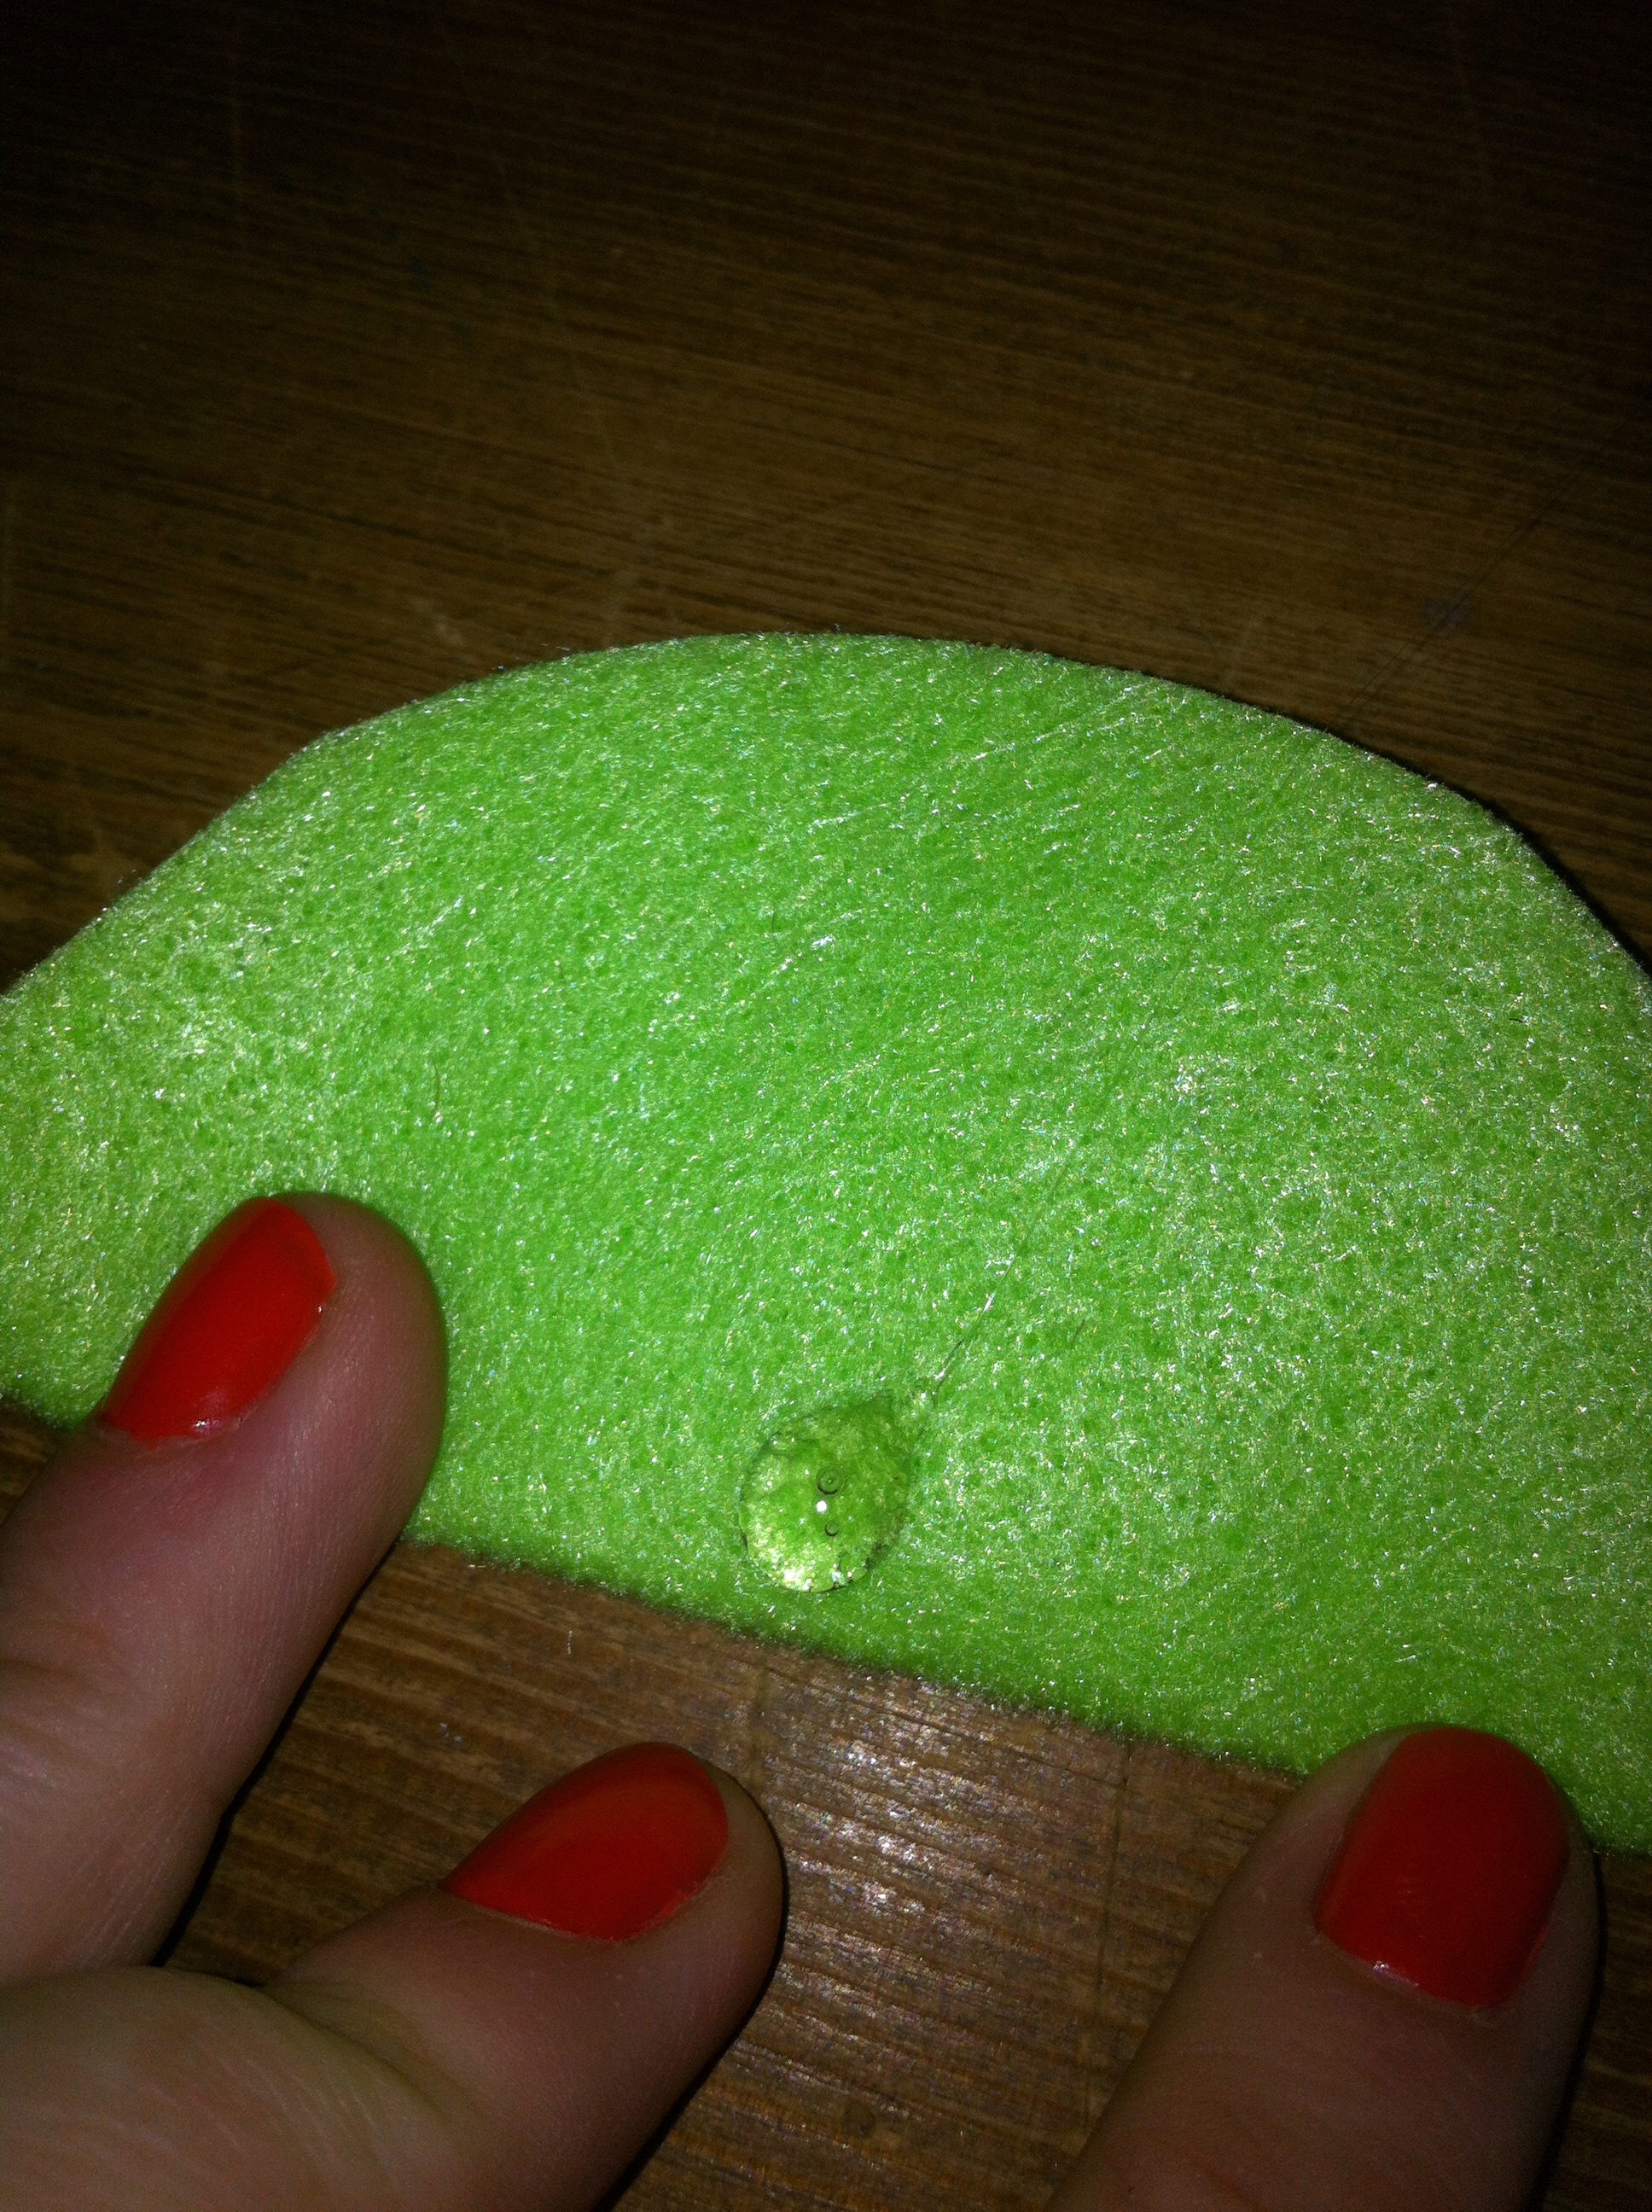
Step 4: Place a decent sized dot of hot glue in the bottom middle of your taco.
Step 5: Fold your felt taco in half again and pinch it at the bottom. Allow the glue to dry completely.
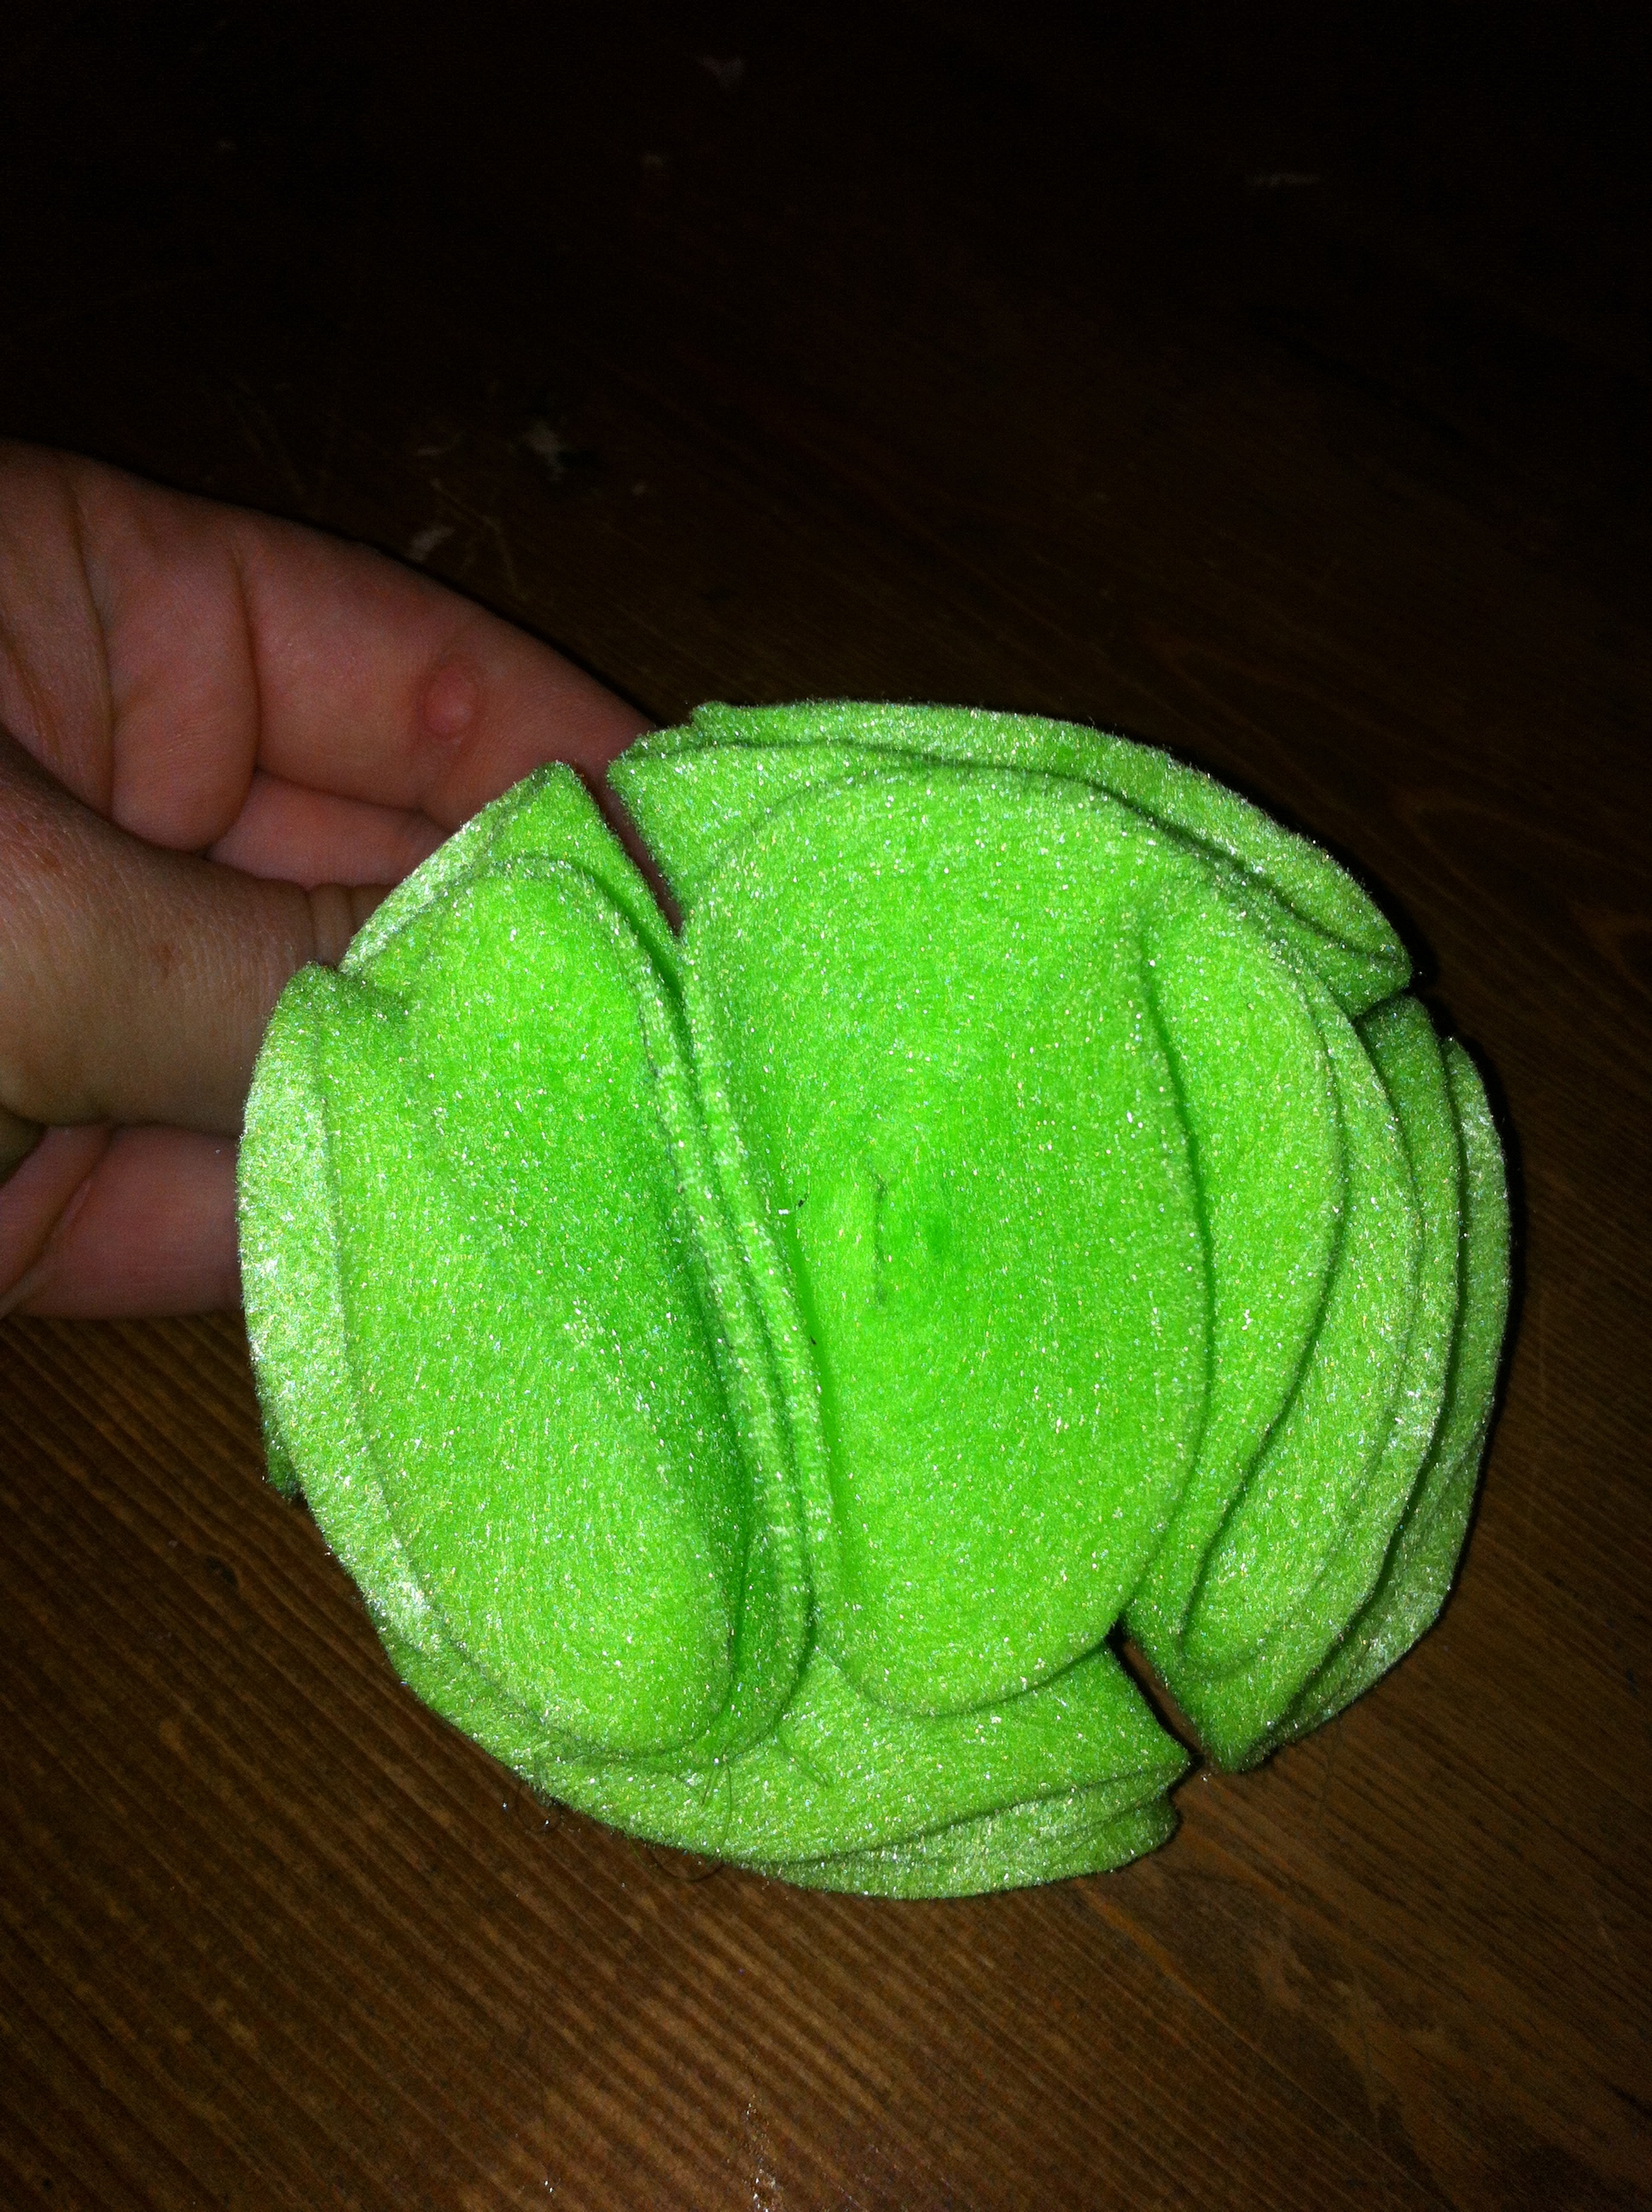
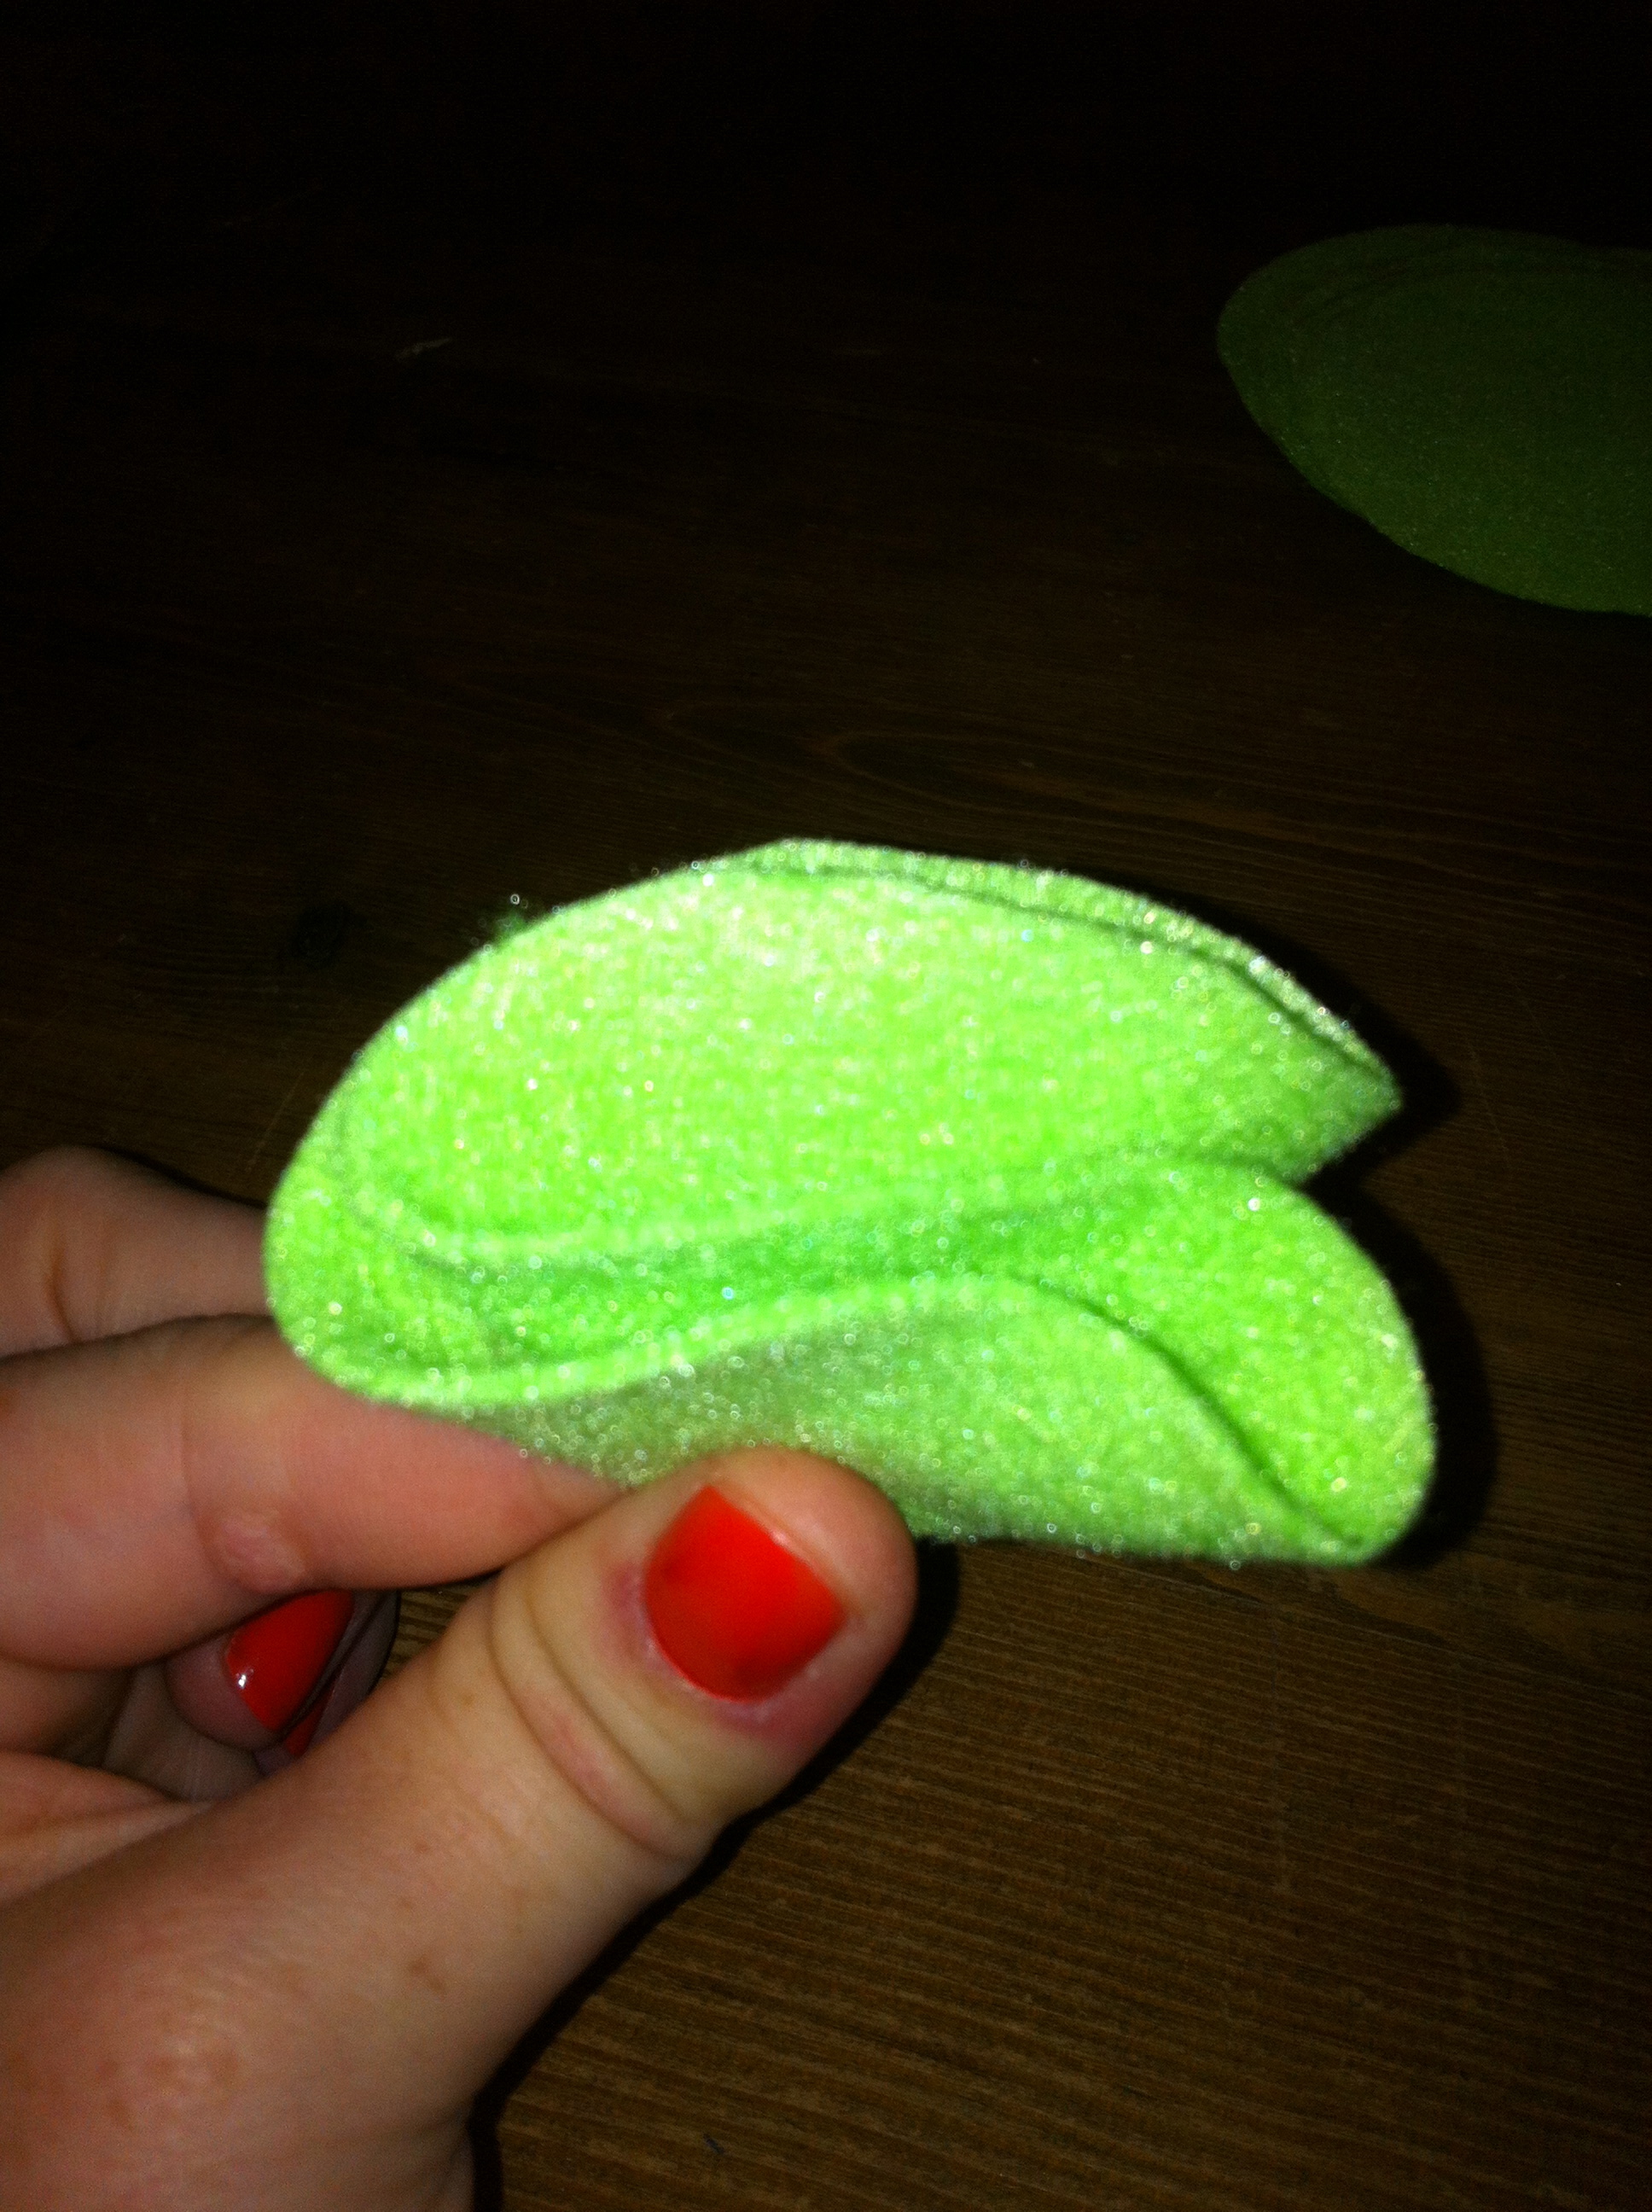
You’ll end up with a twirly, cone shape. Cute, yes? This is your first petal. Repeat this with all six of your big circles.
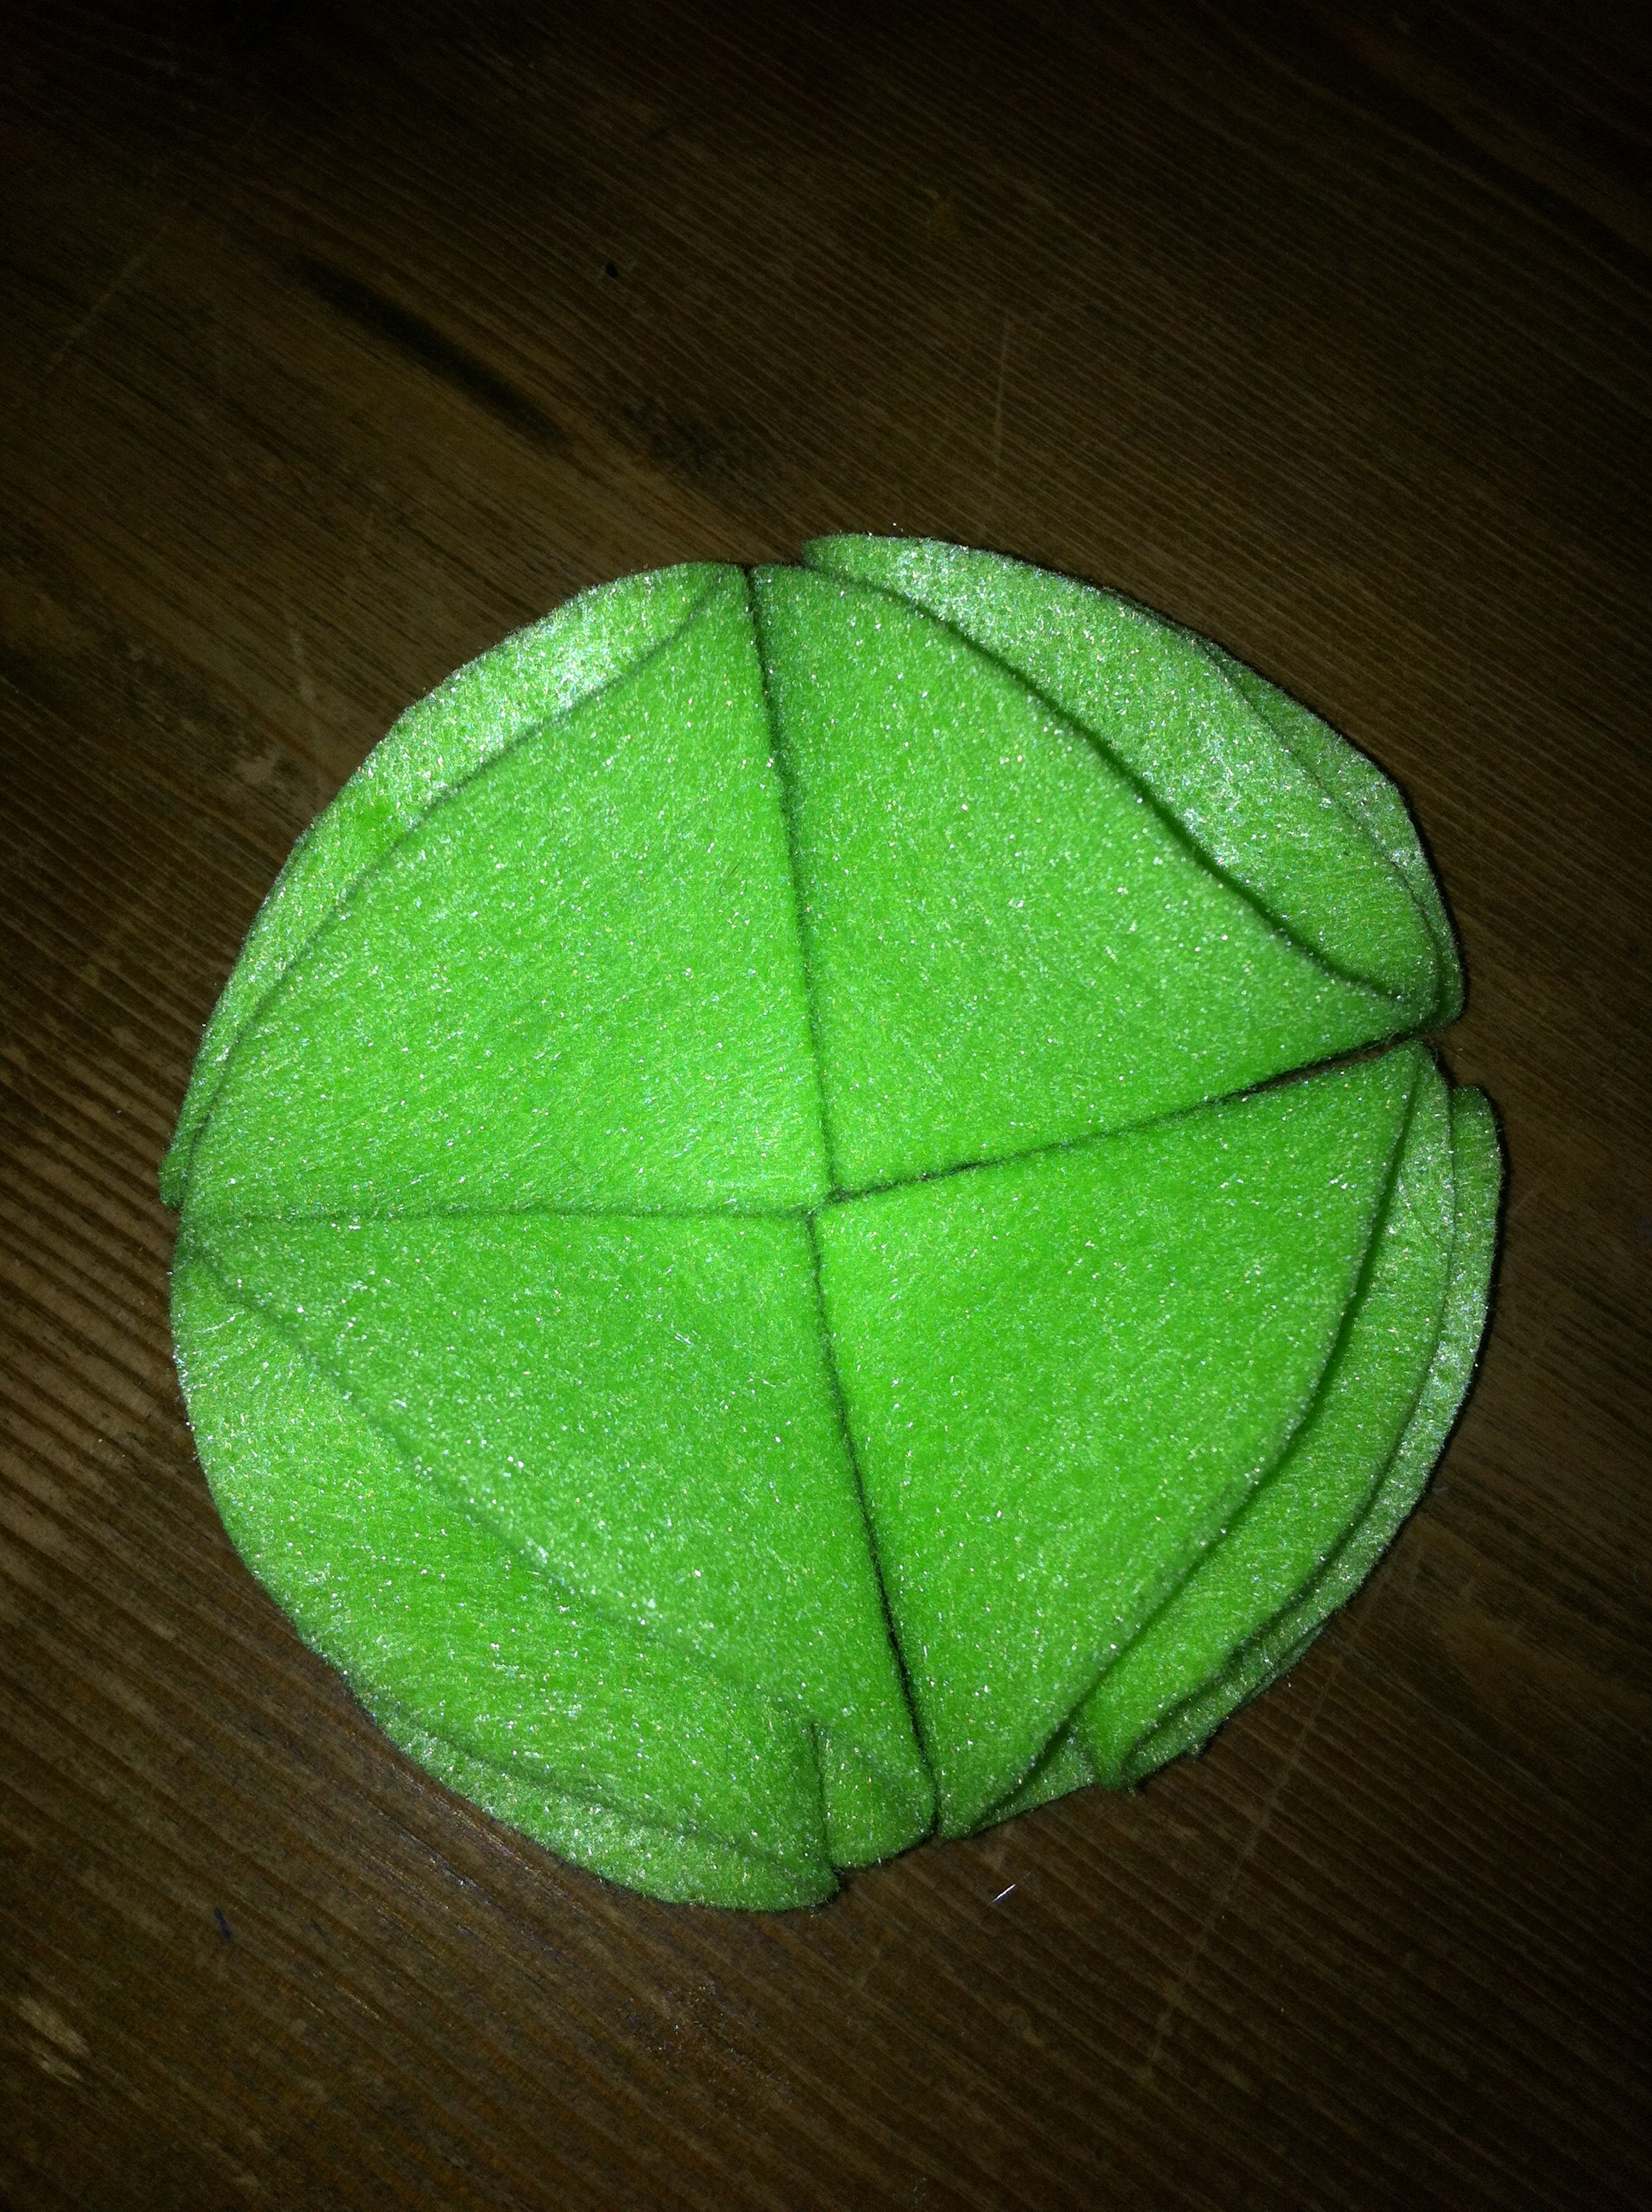
Step 6: Glue four of your petals onto the small circle.
It should look like this once all four are glued on.
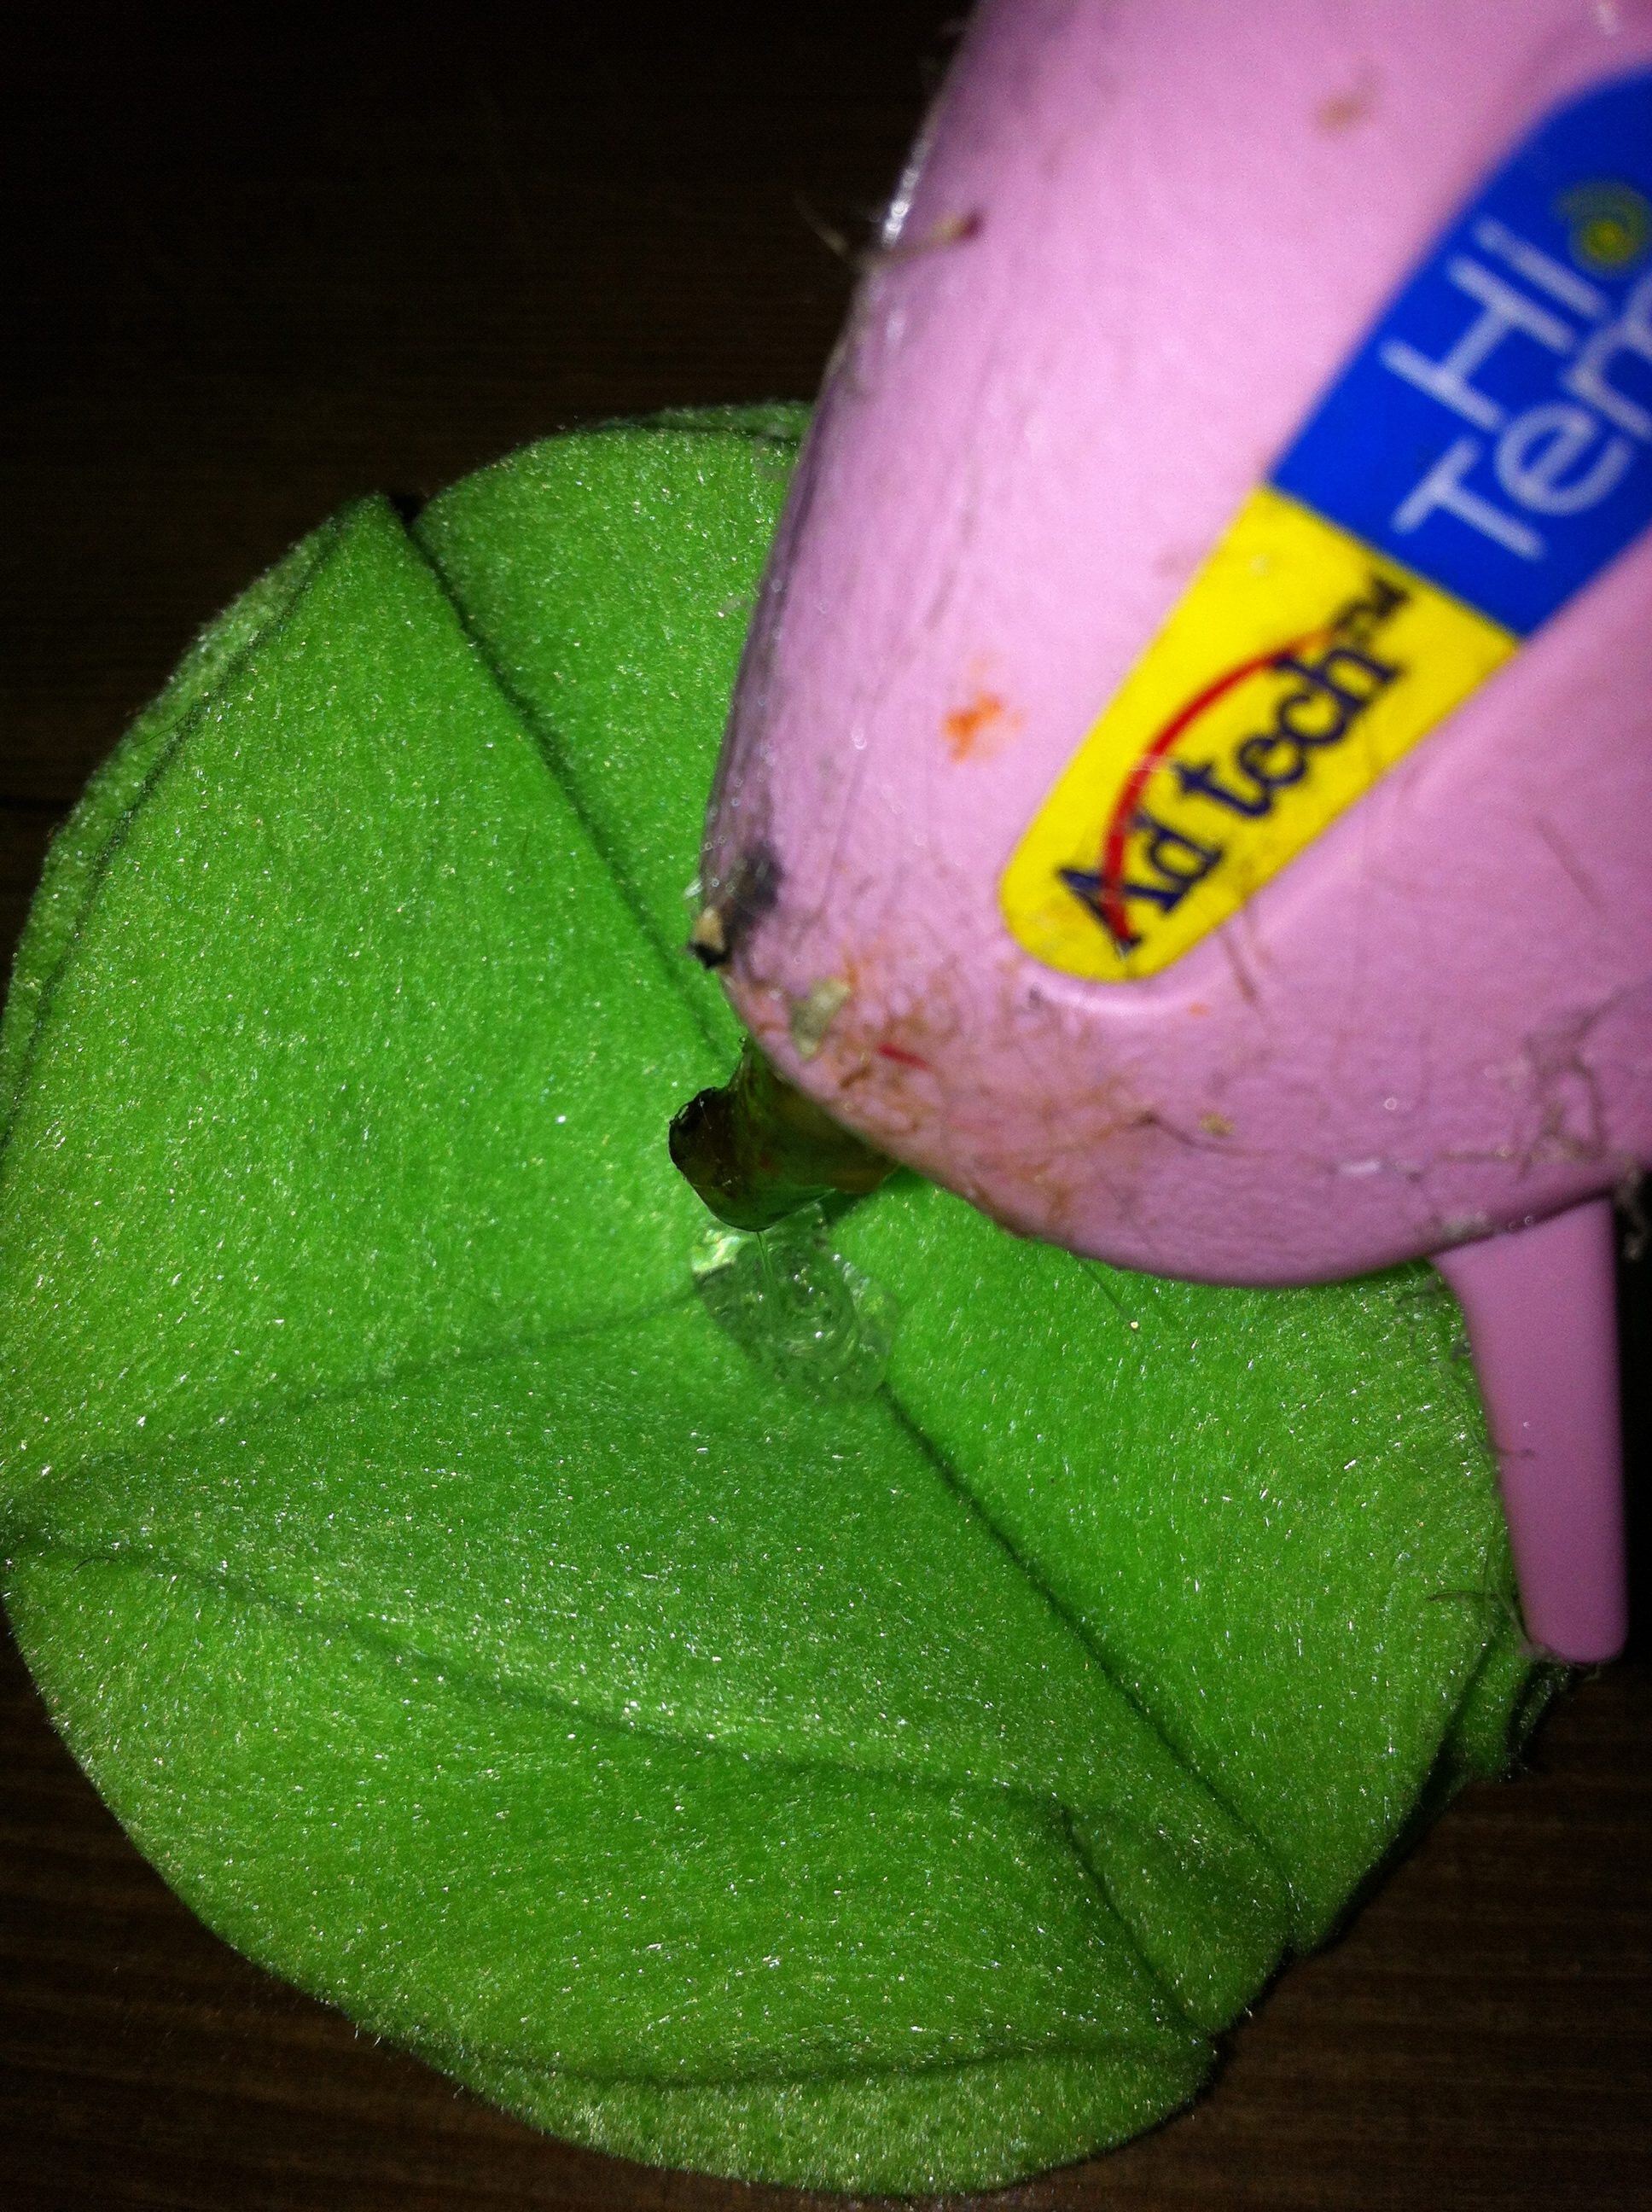
Step 7: Put a well of hot glue in the middle of these four petals.
Step 8: Add the two remaining petals (standing up as opposed to flat) to the center of the flower.
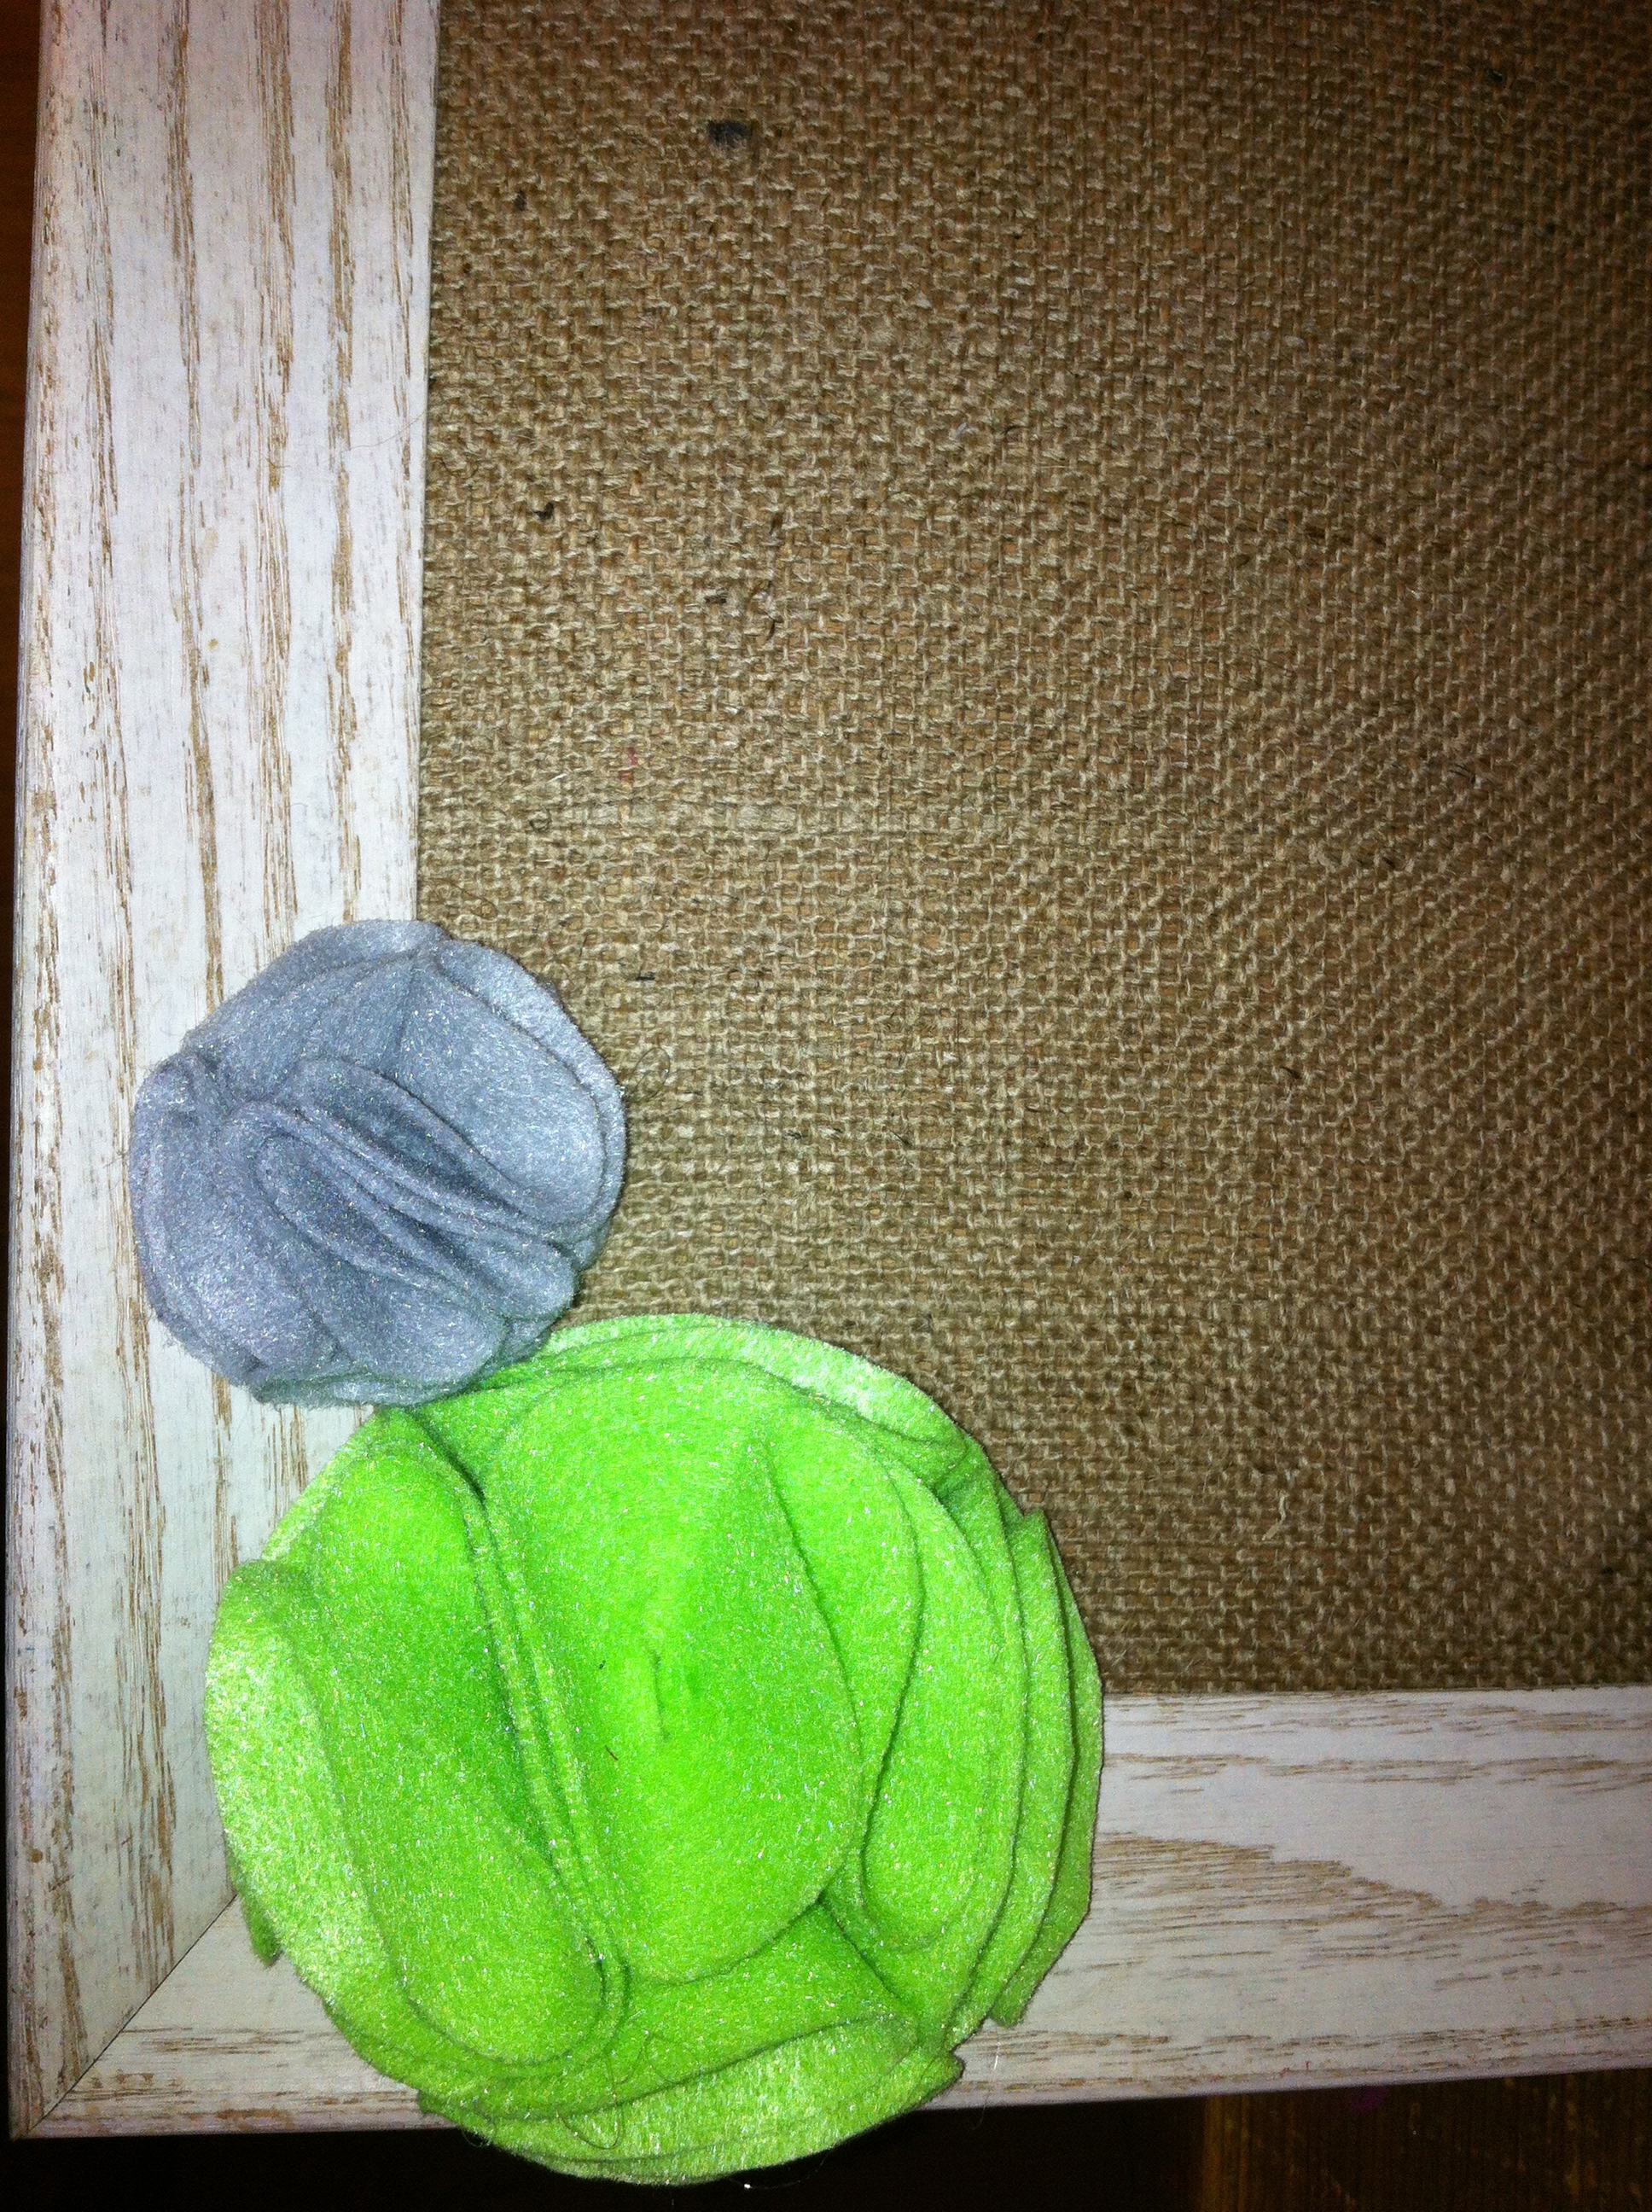
Seriously, aren’t these the cutest?! You can do sooooo much with them! I added these guys to a cute frame project I’m working on.
You can make them into name tags, necklaces, package decor – anything you can think of! If you decide to give these a whirl, let me know what you make with them!
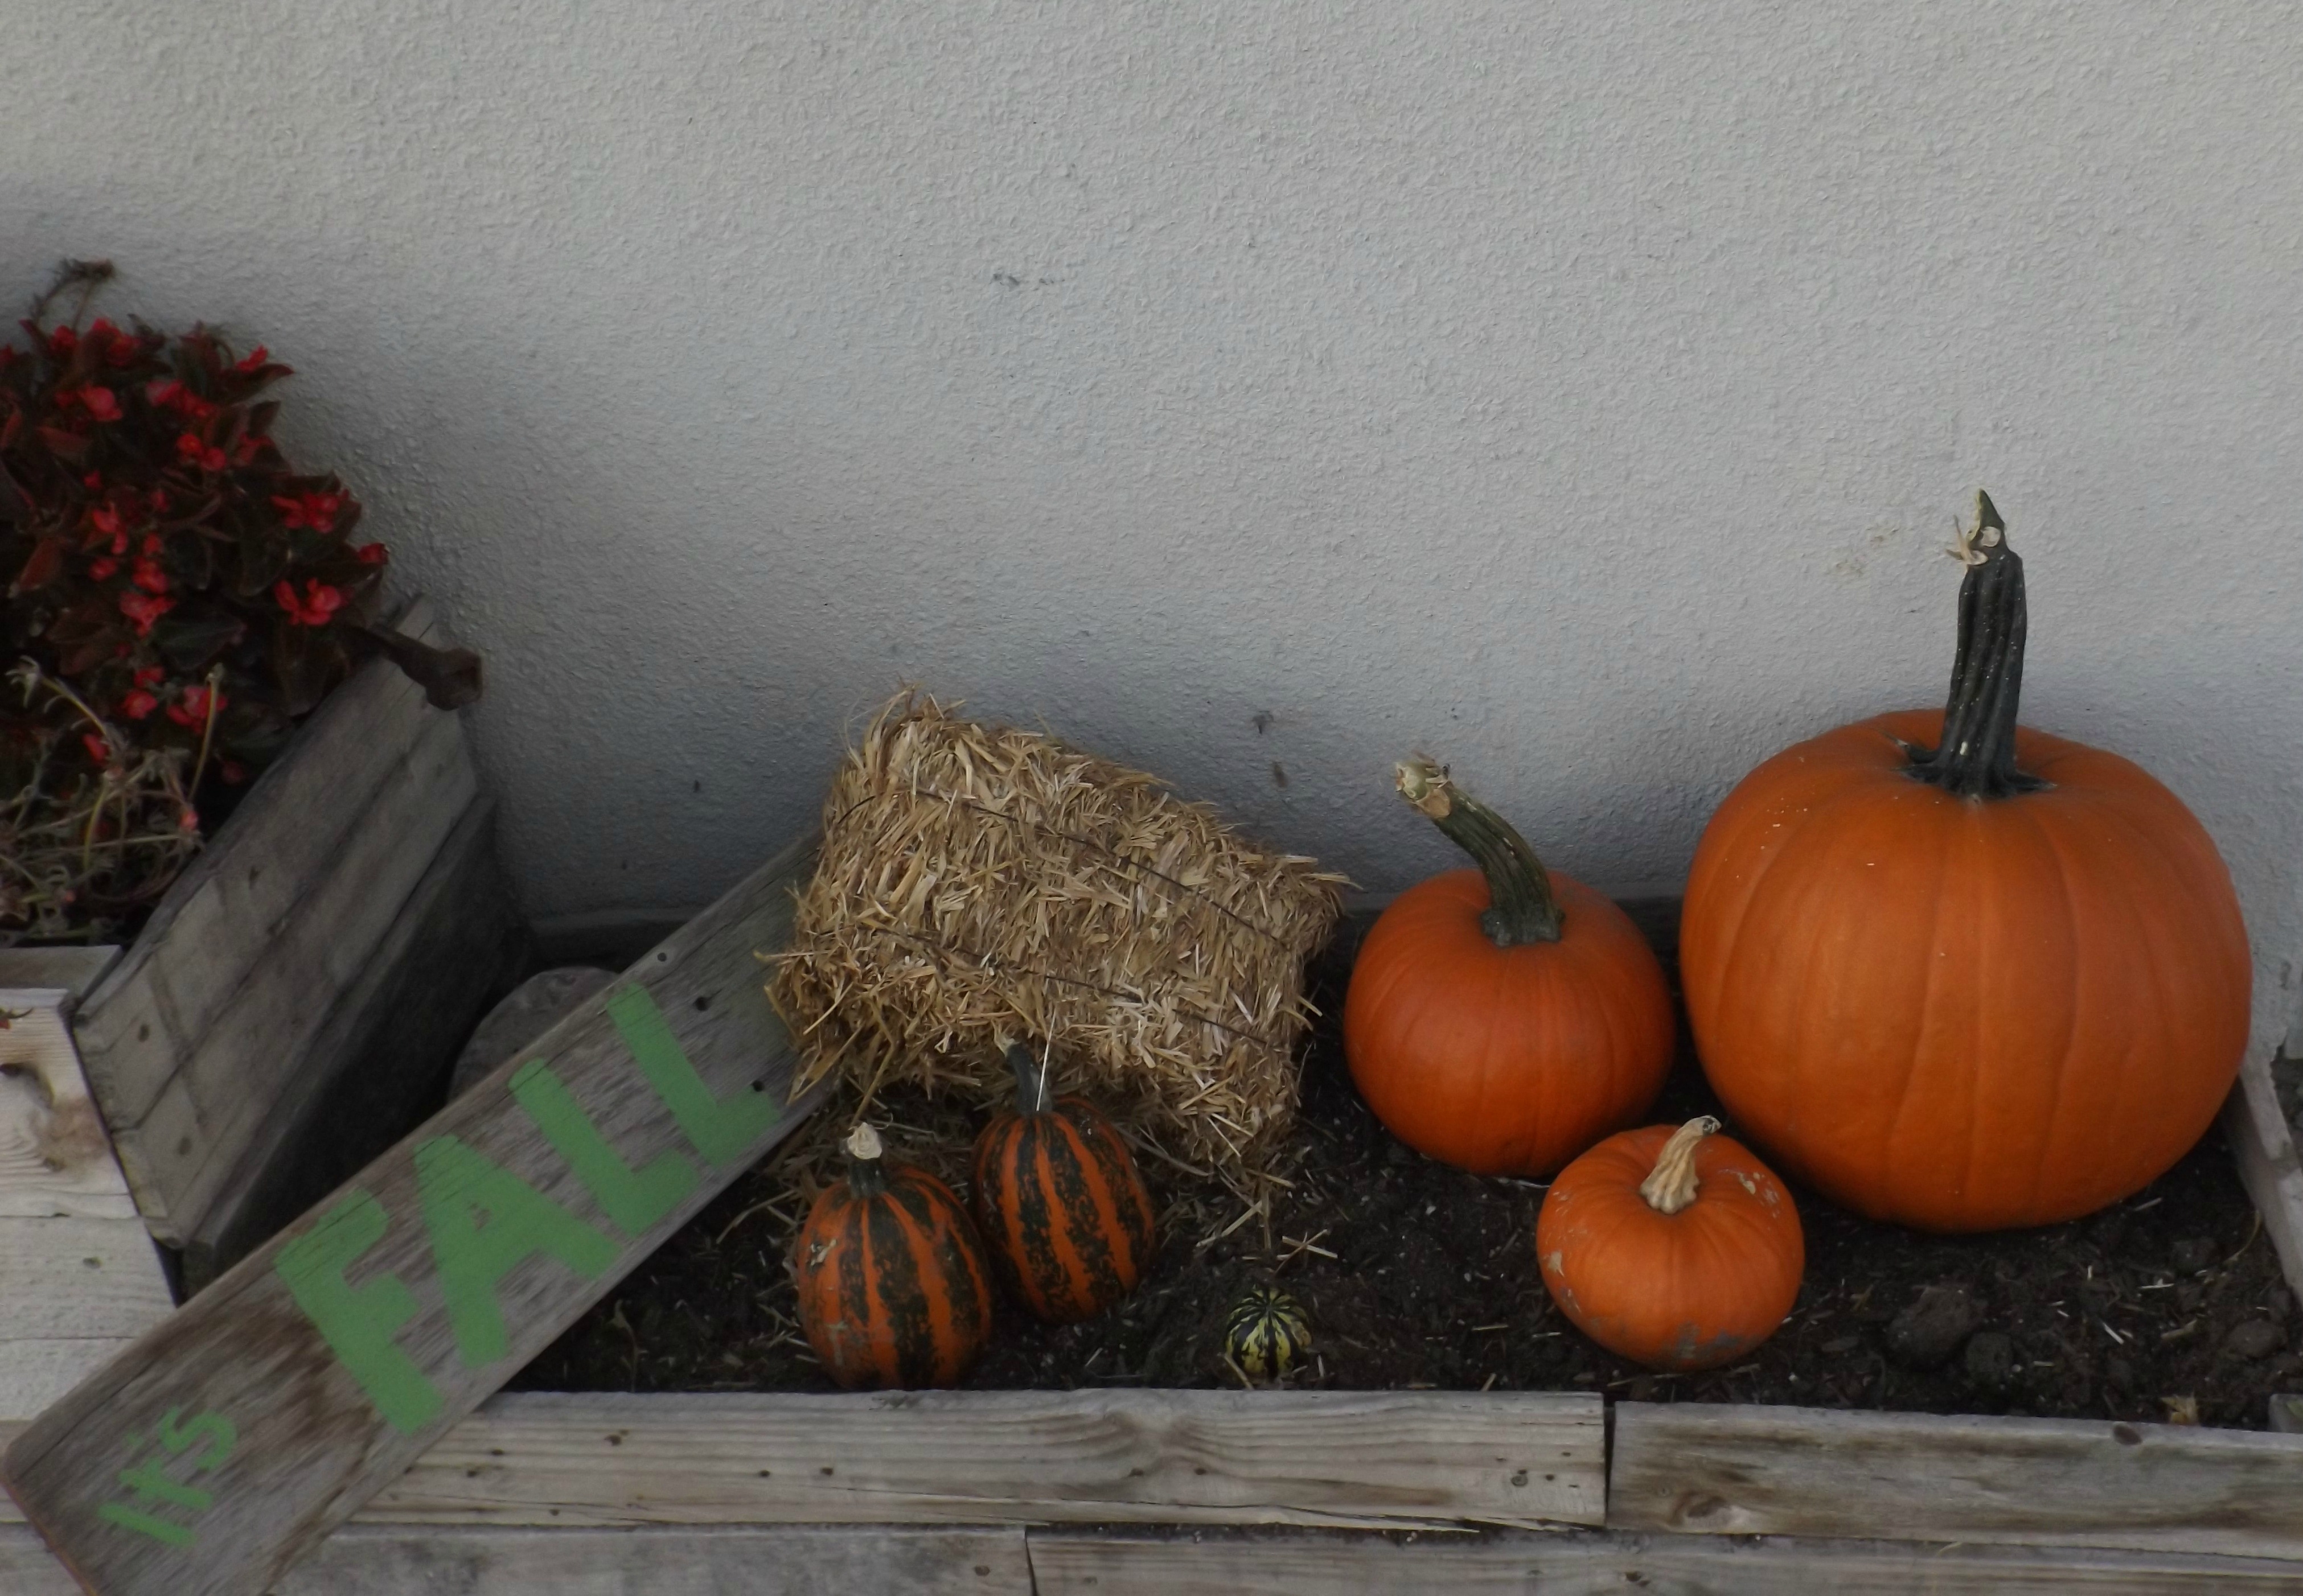
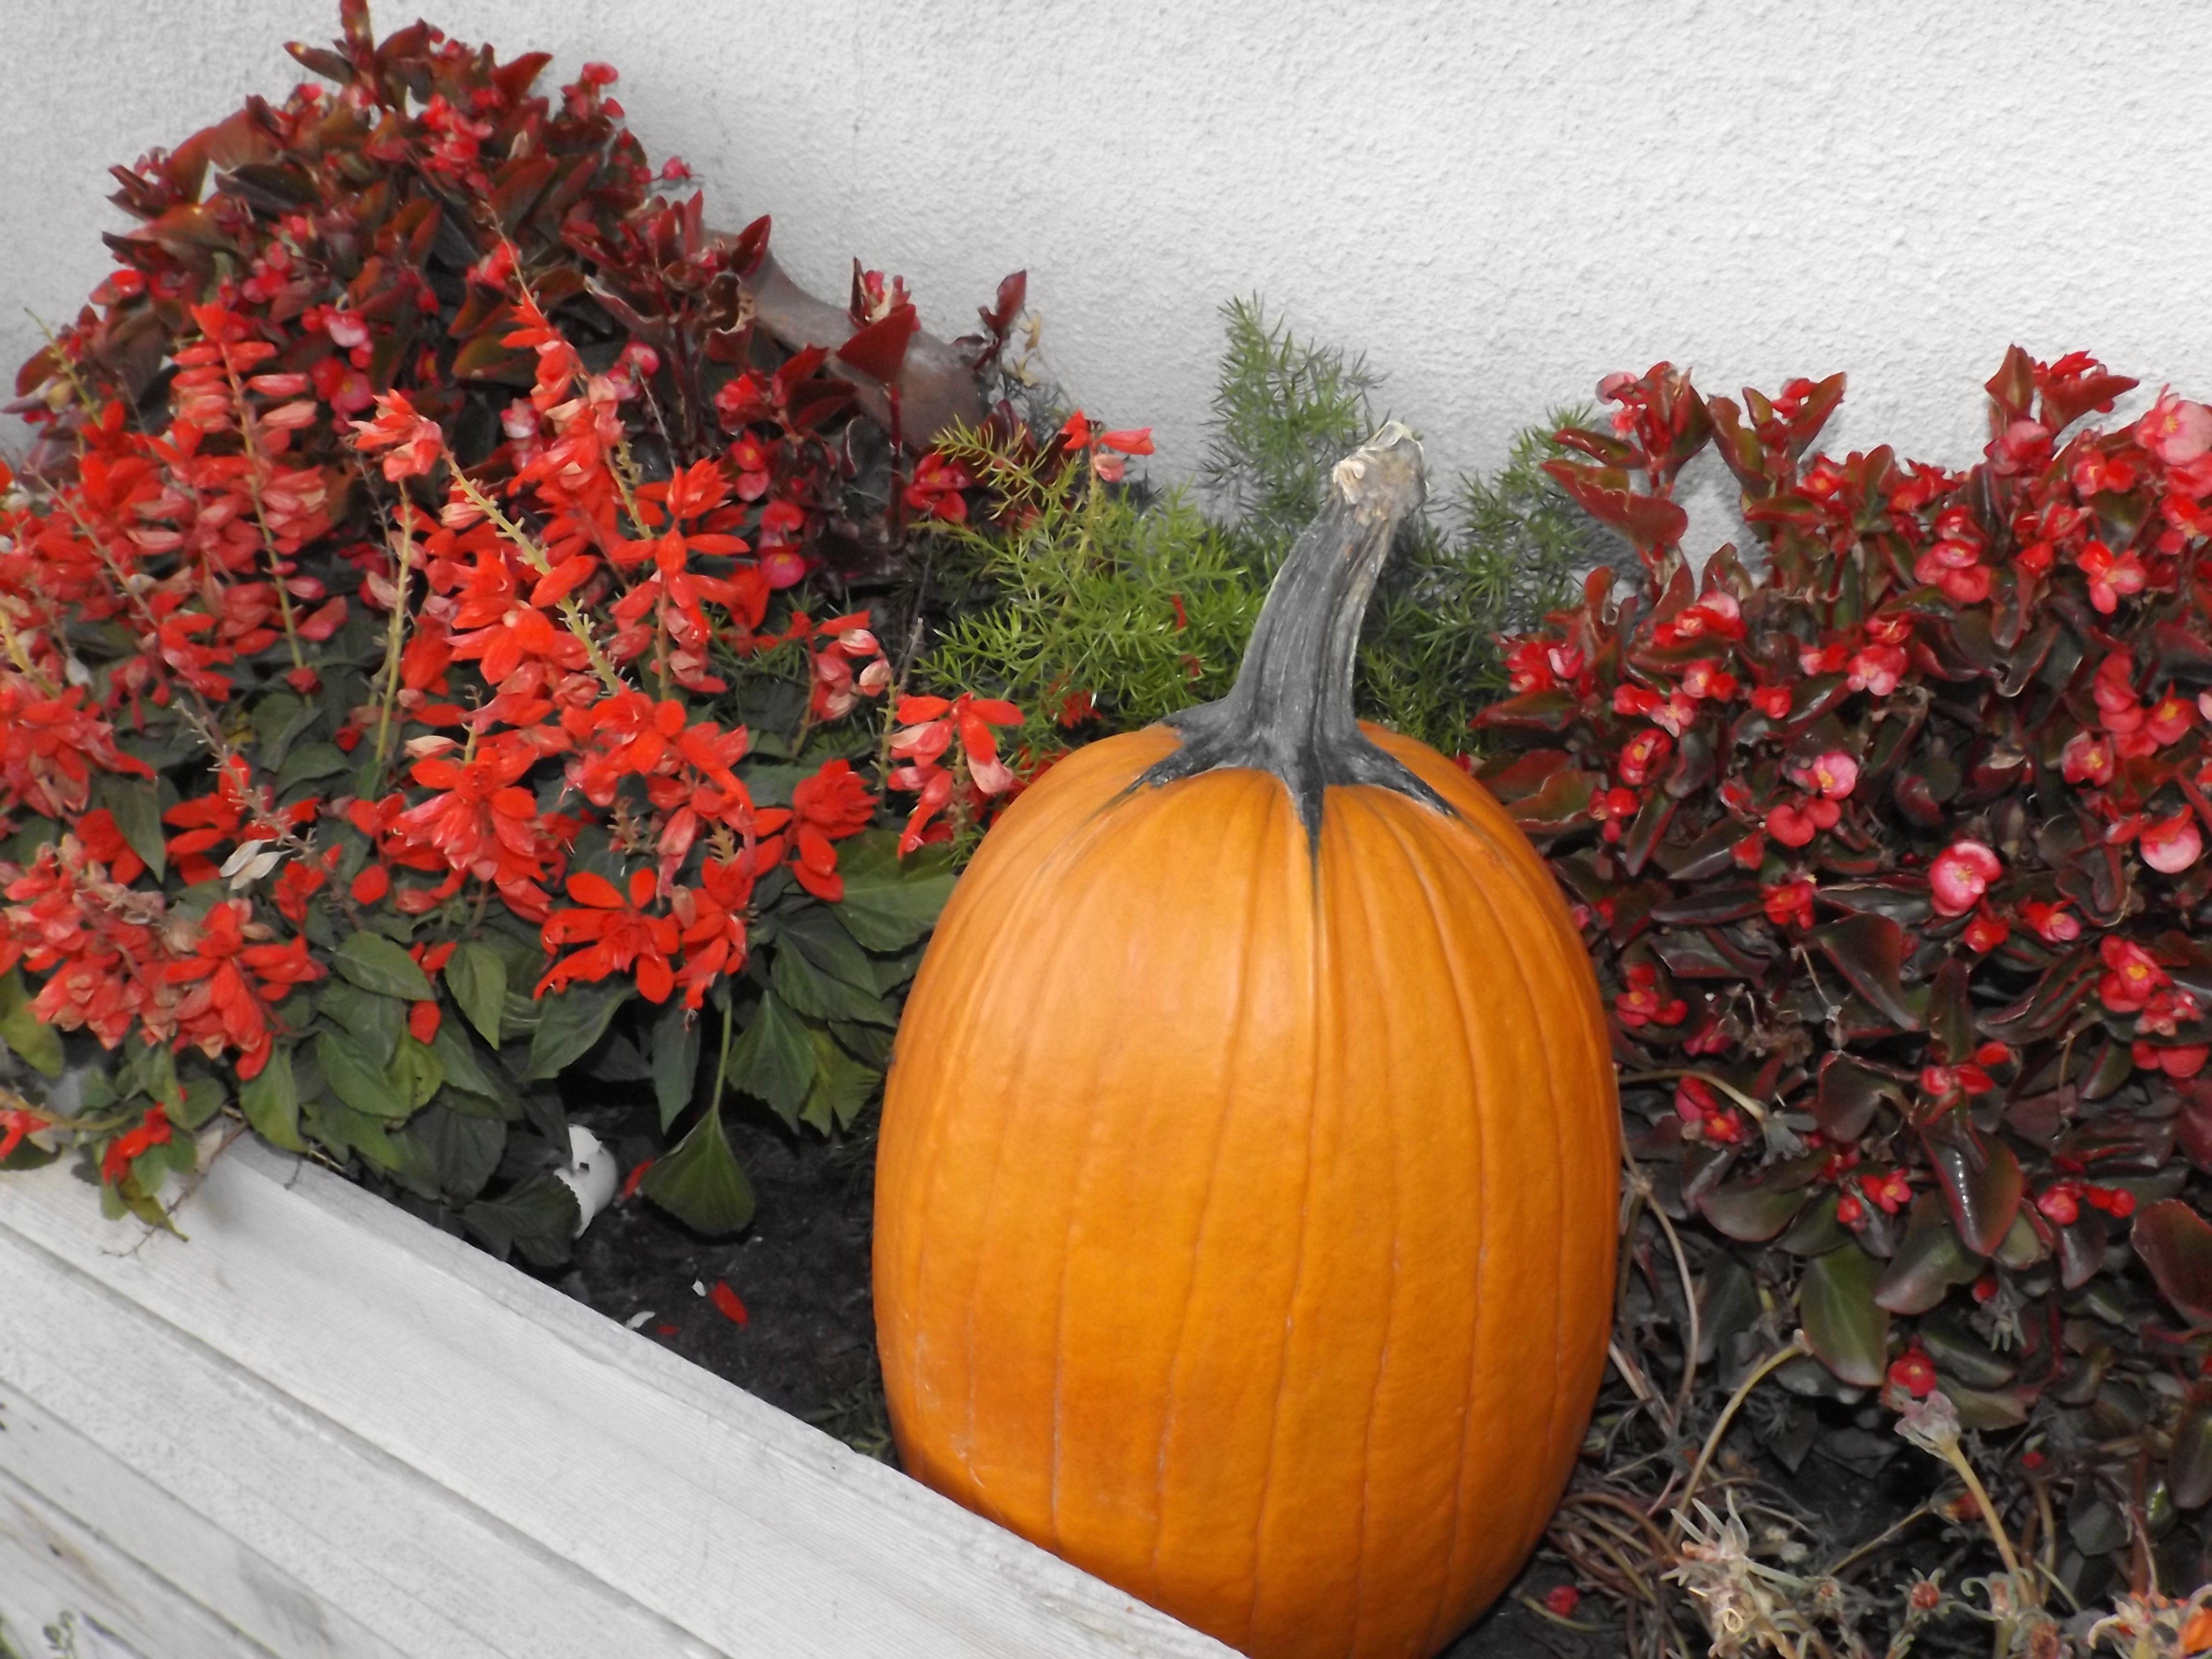
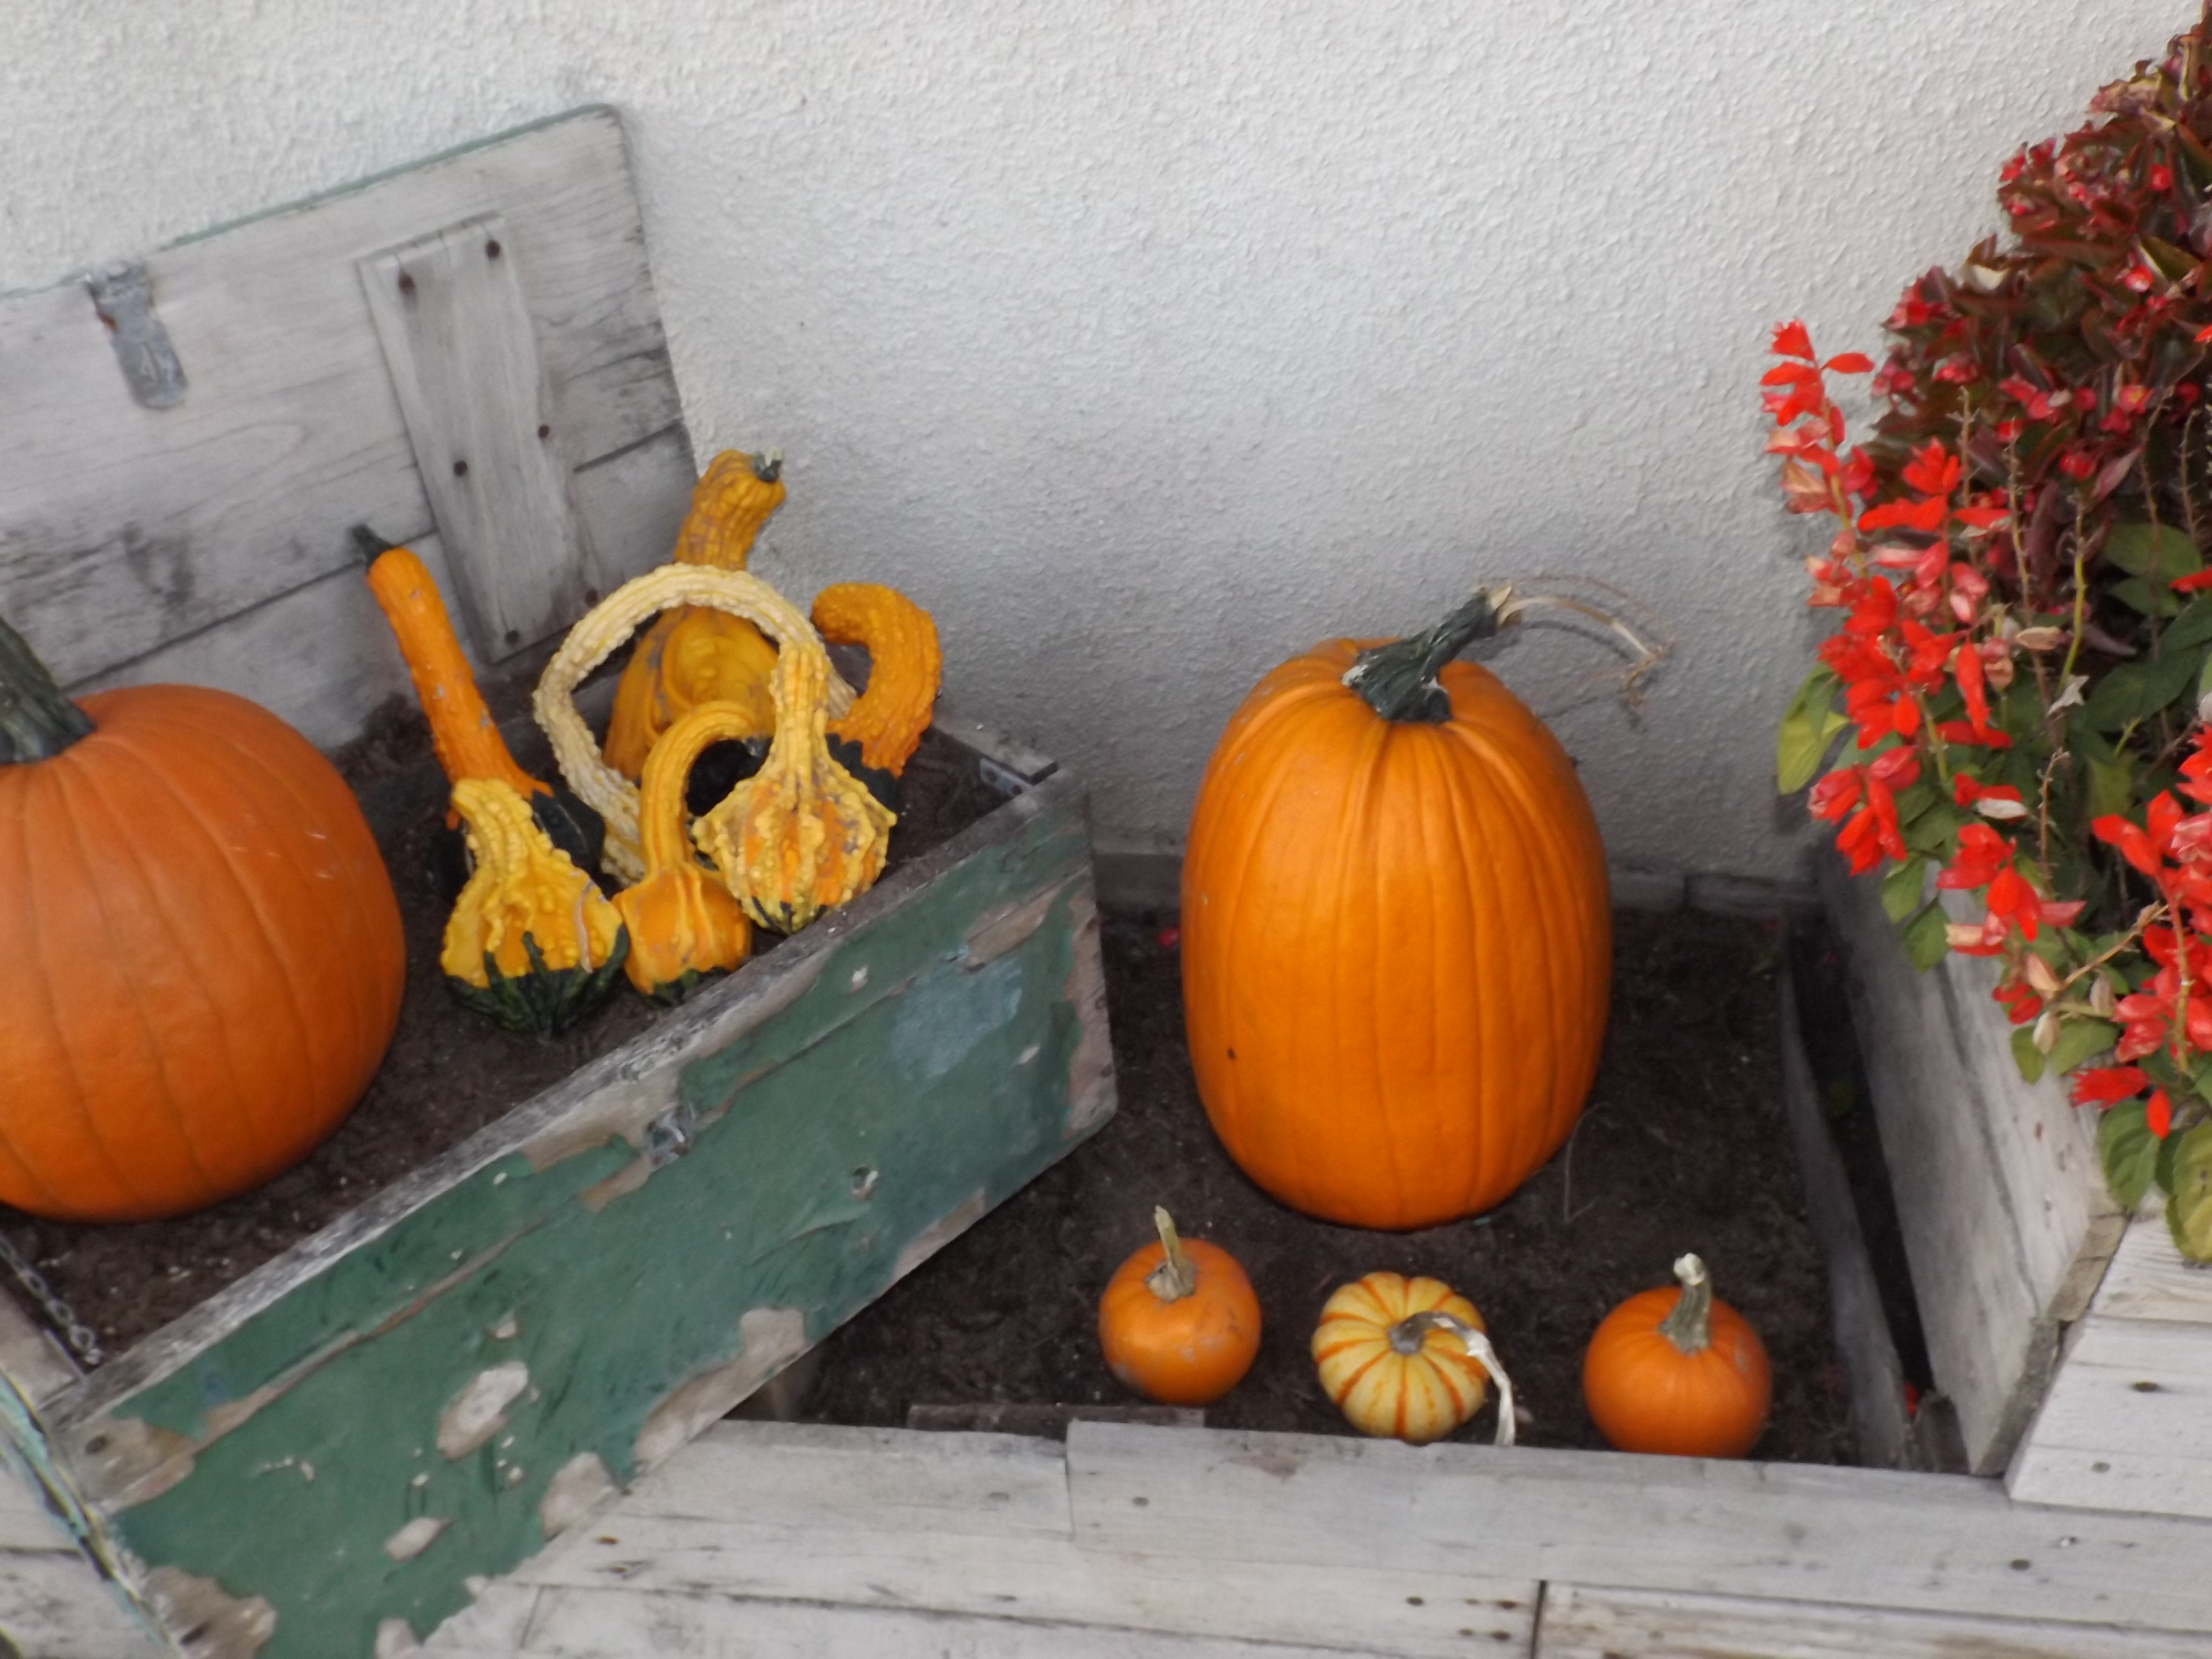
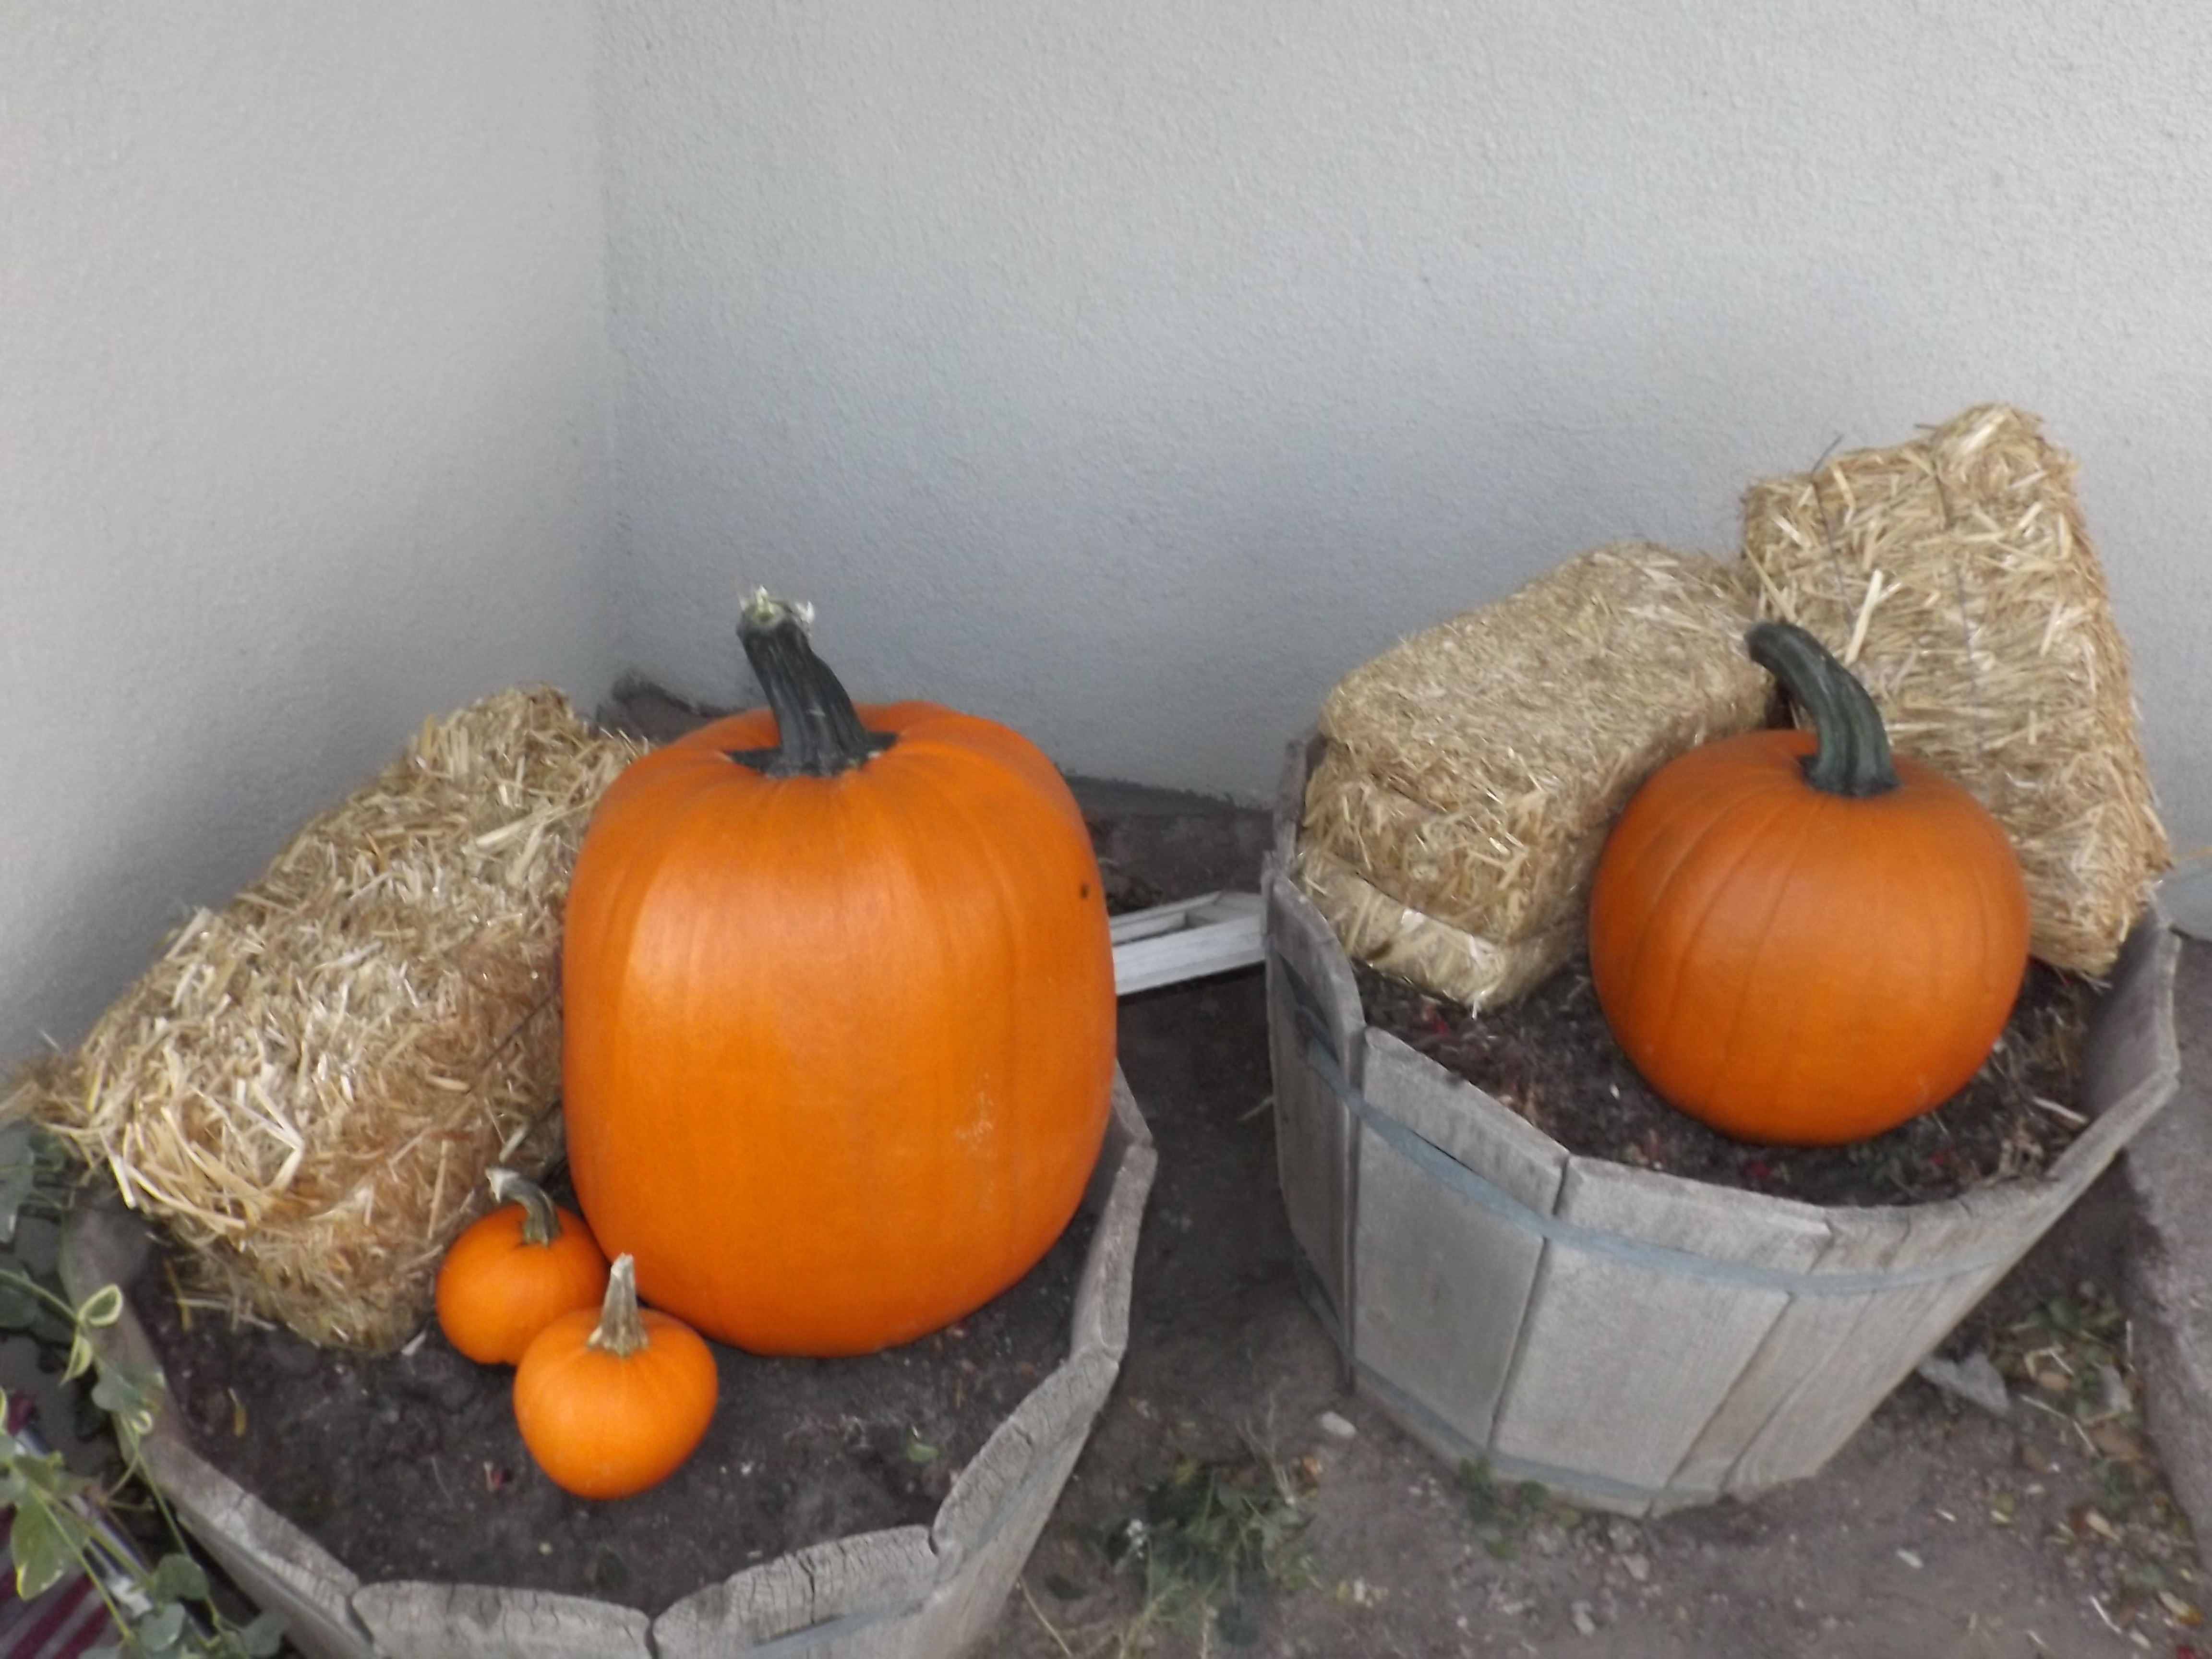
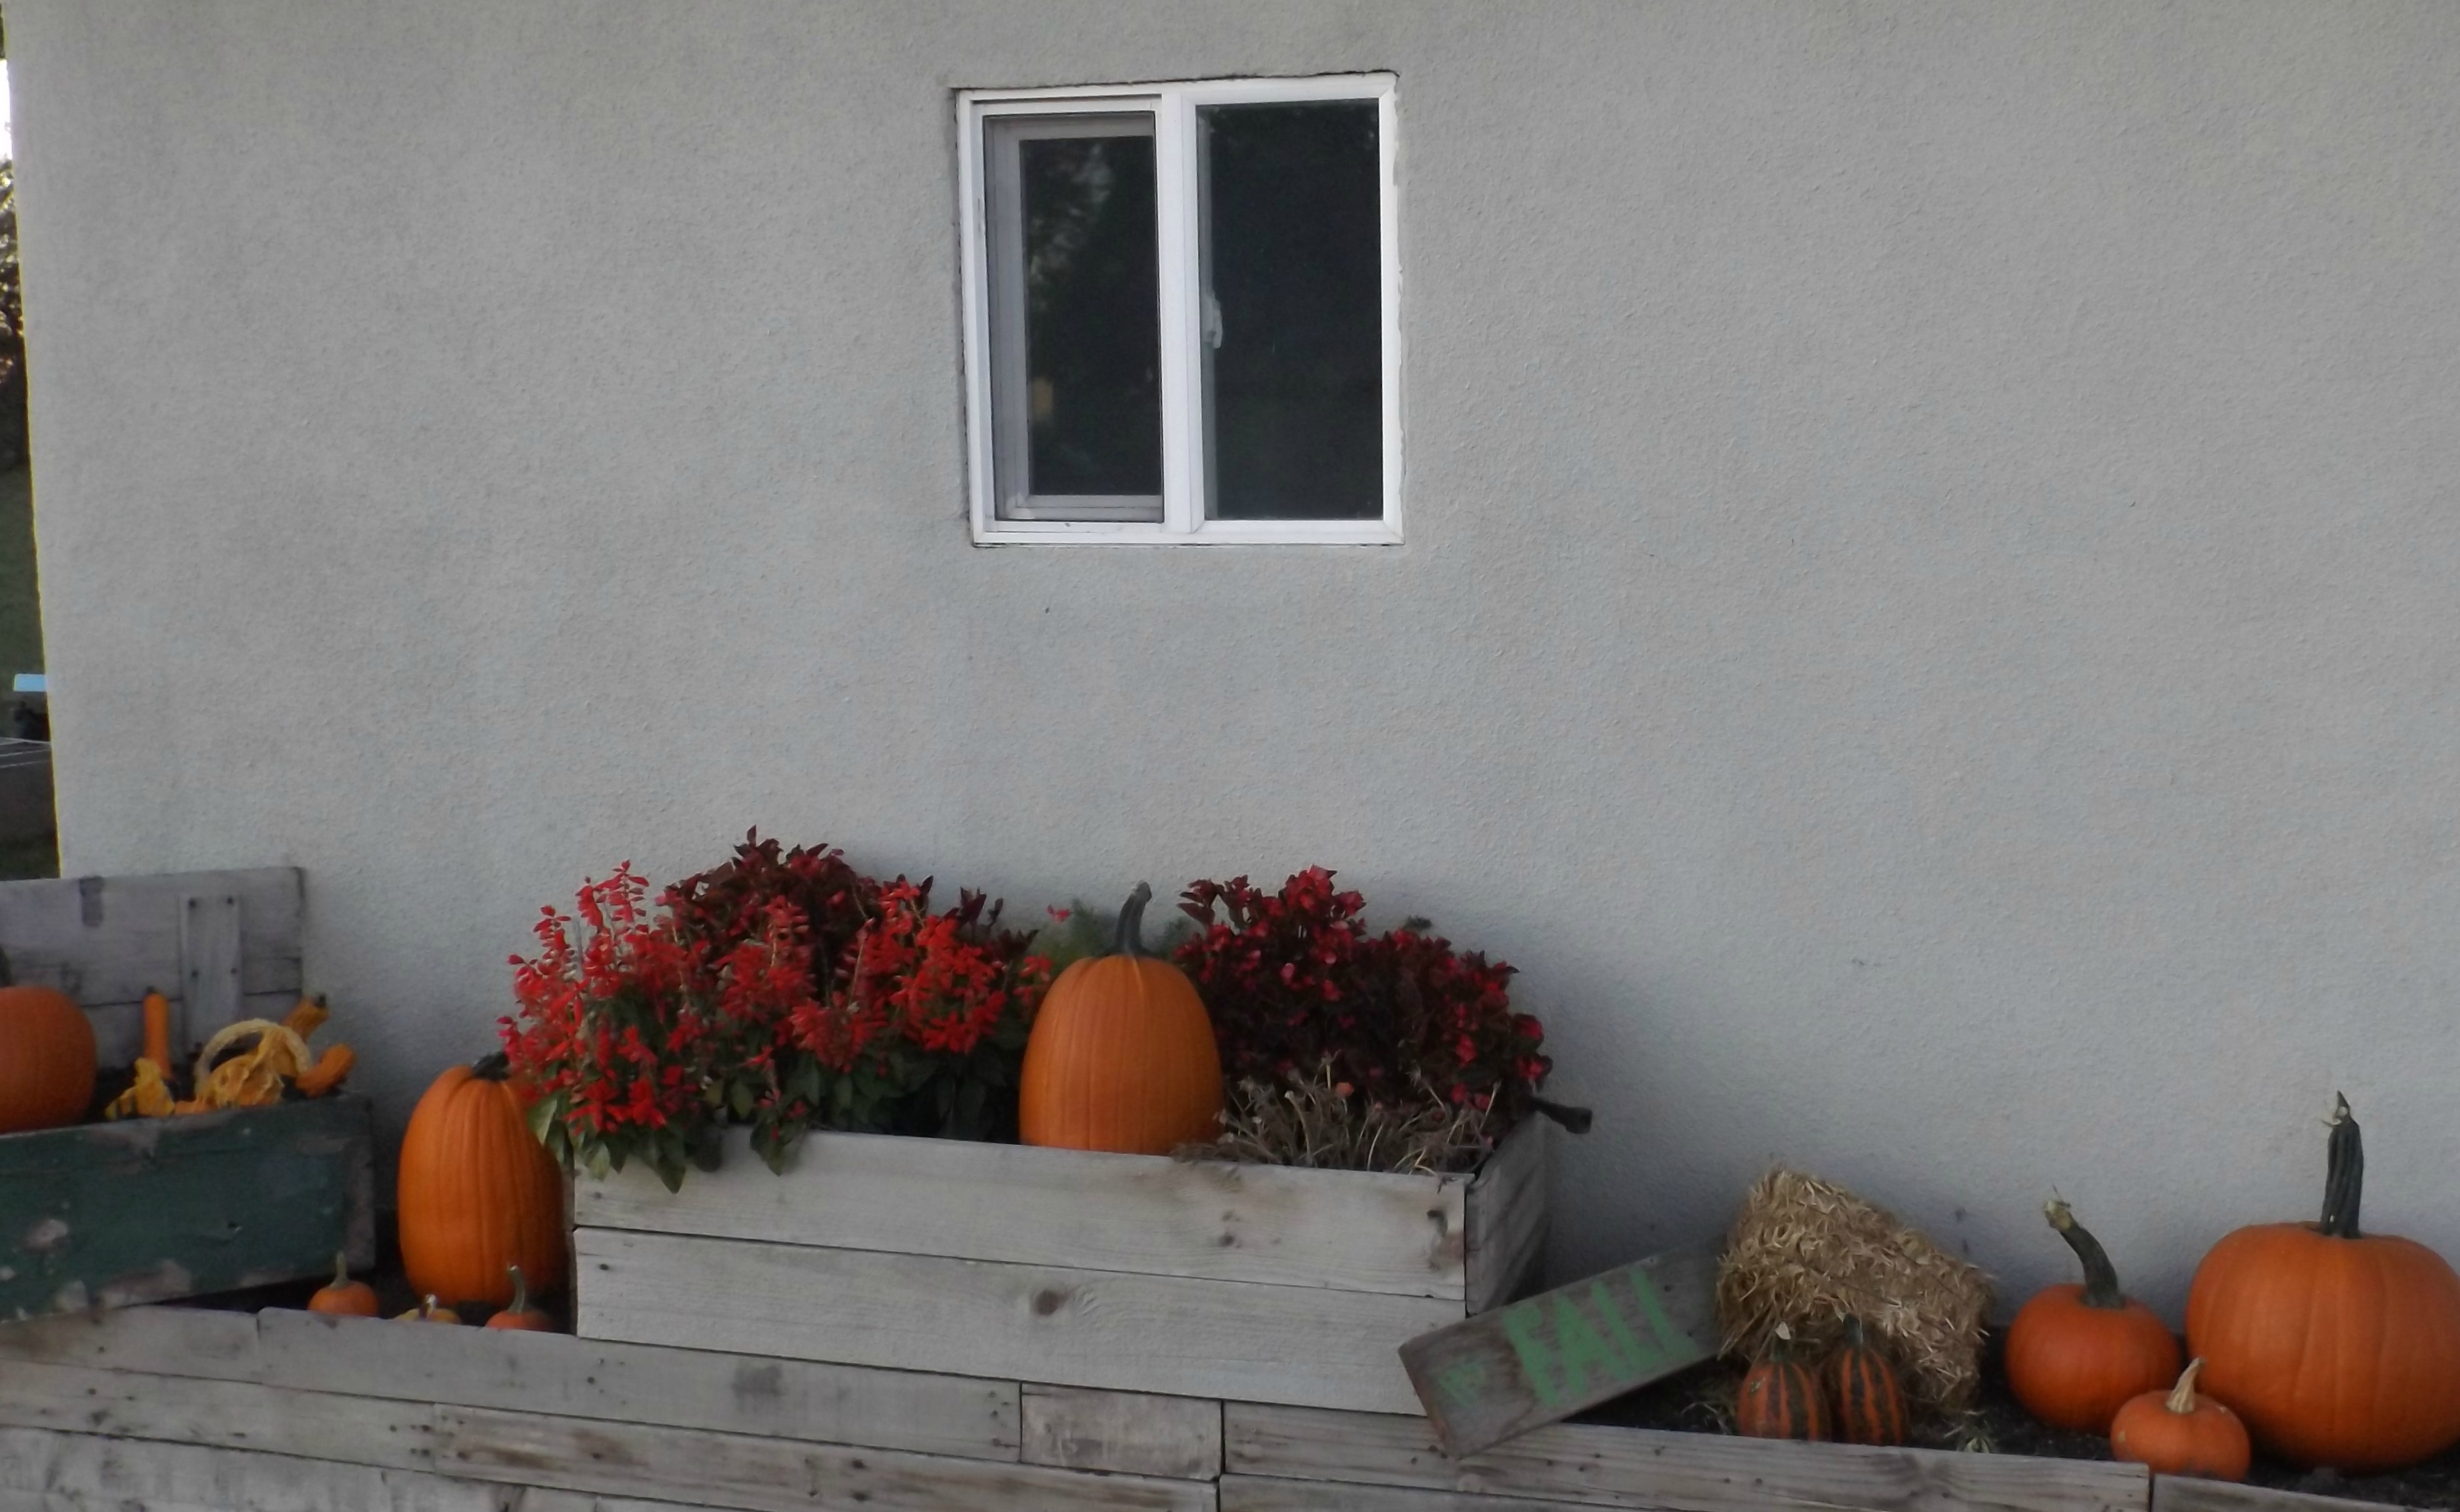
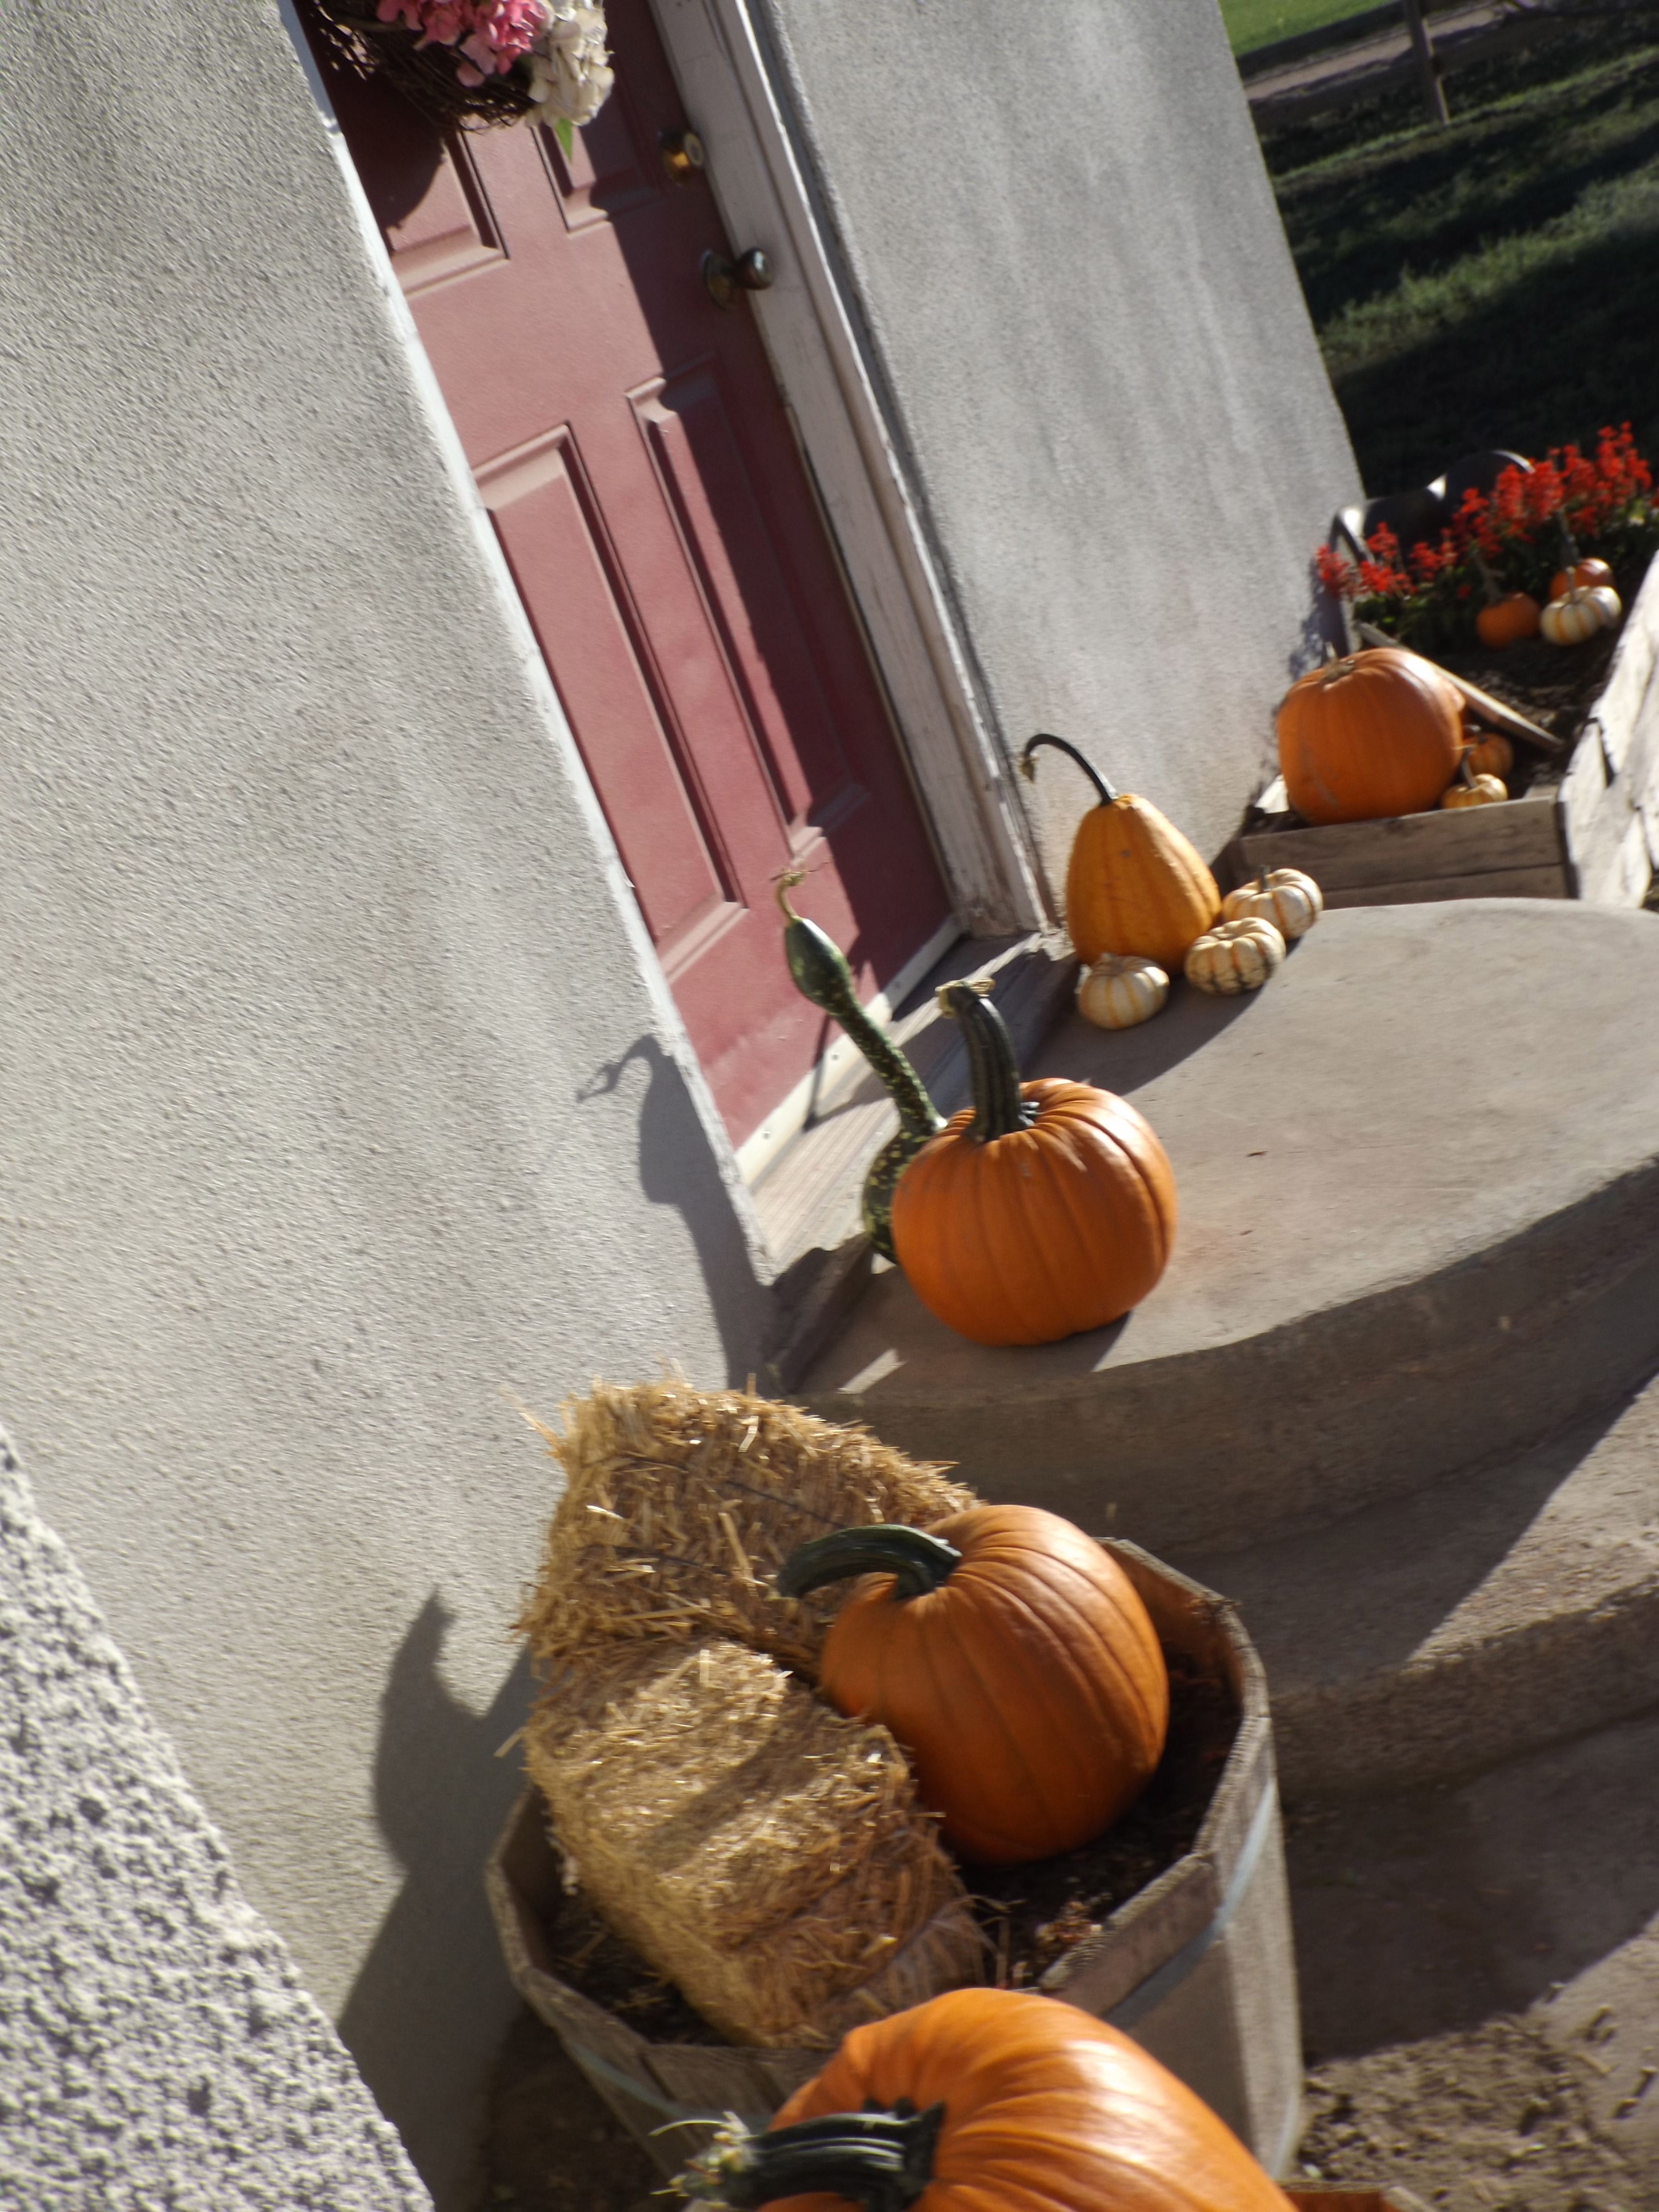
After our post-church pumpkin patch excursion, we came home and cleaned out our flower beds and set out our newest finds. A few of our plants are still flowering and thriving, so we left them in to pretty up the place until a hard freeze hits.
I love those stripey guysA little bit of spring mixed with the fallThis little green box was Wrexy’s first show box. Love.Hay hay hayOh yes, we have a few of thoseThe long viewAnd down the other side
Sawyer had fun helping arrange all of the pumpkins and gourds! I’m just wondering how long it will stay looking like this. 1.) I’m hoping the chickens don’t help themselves to any of my decor and 2.) Little Miss likes to REarrange them every time she walks out the door.
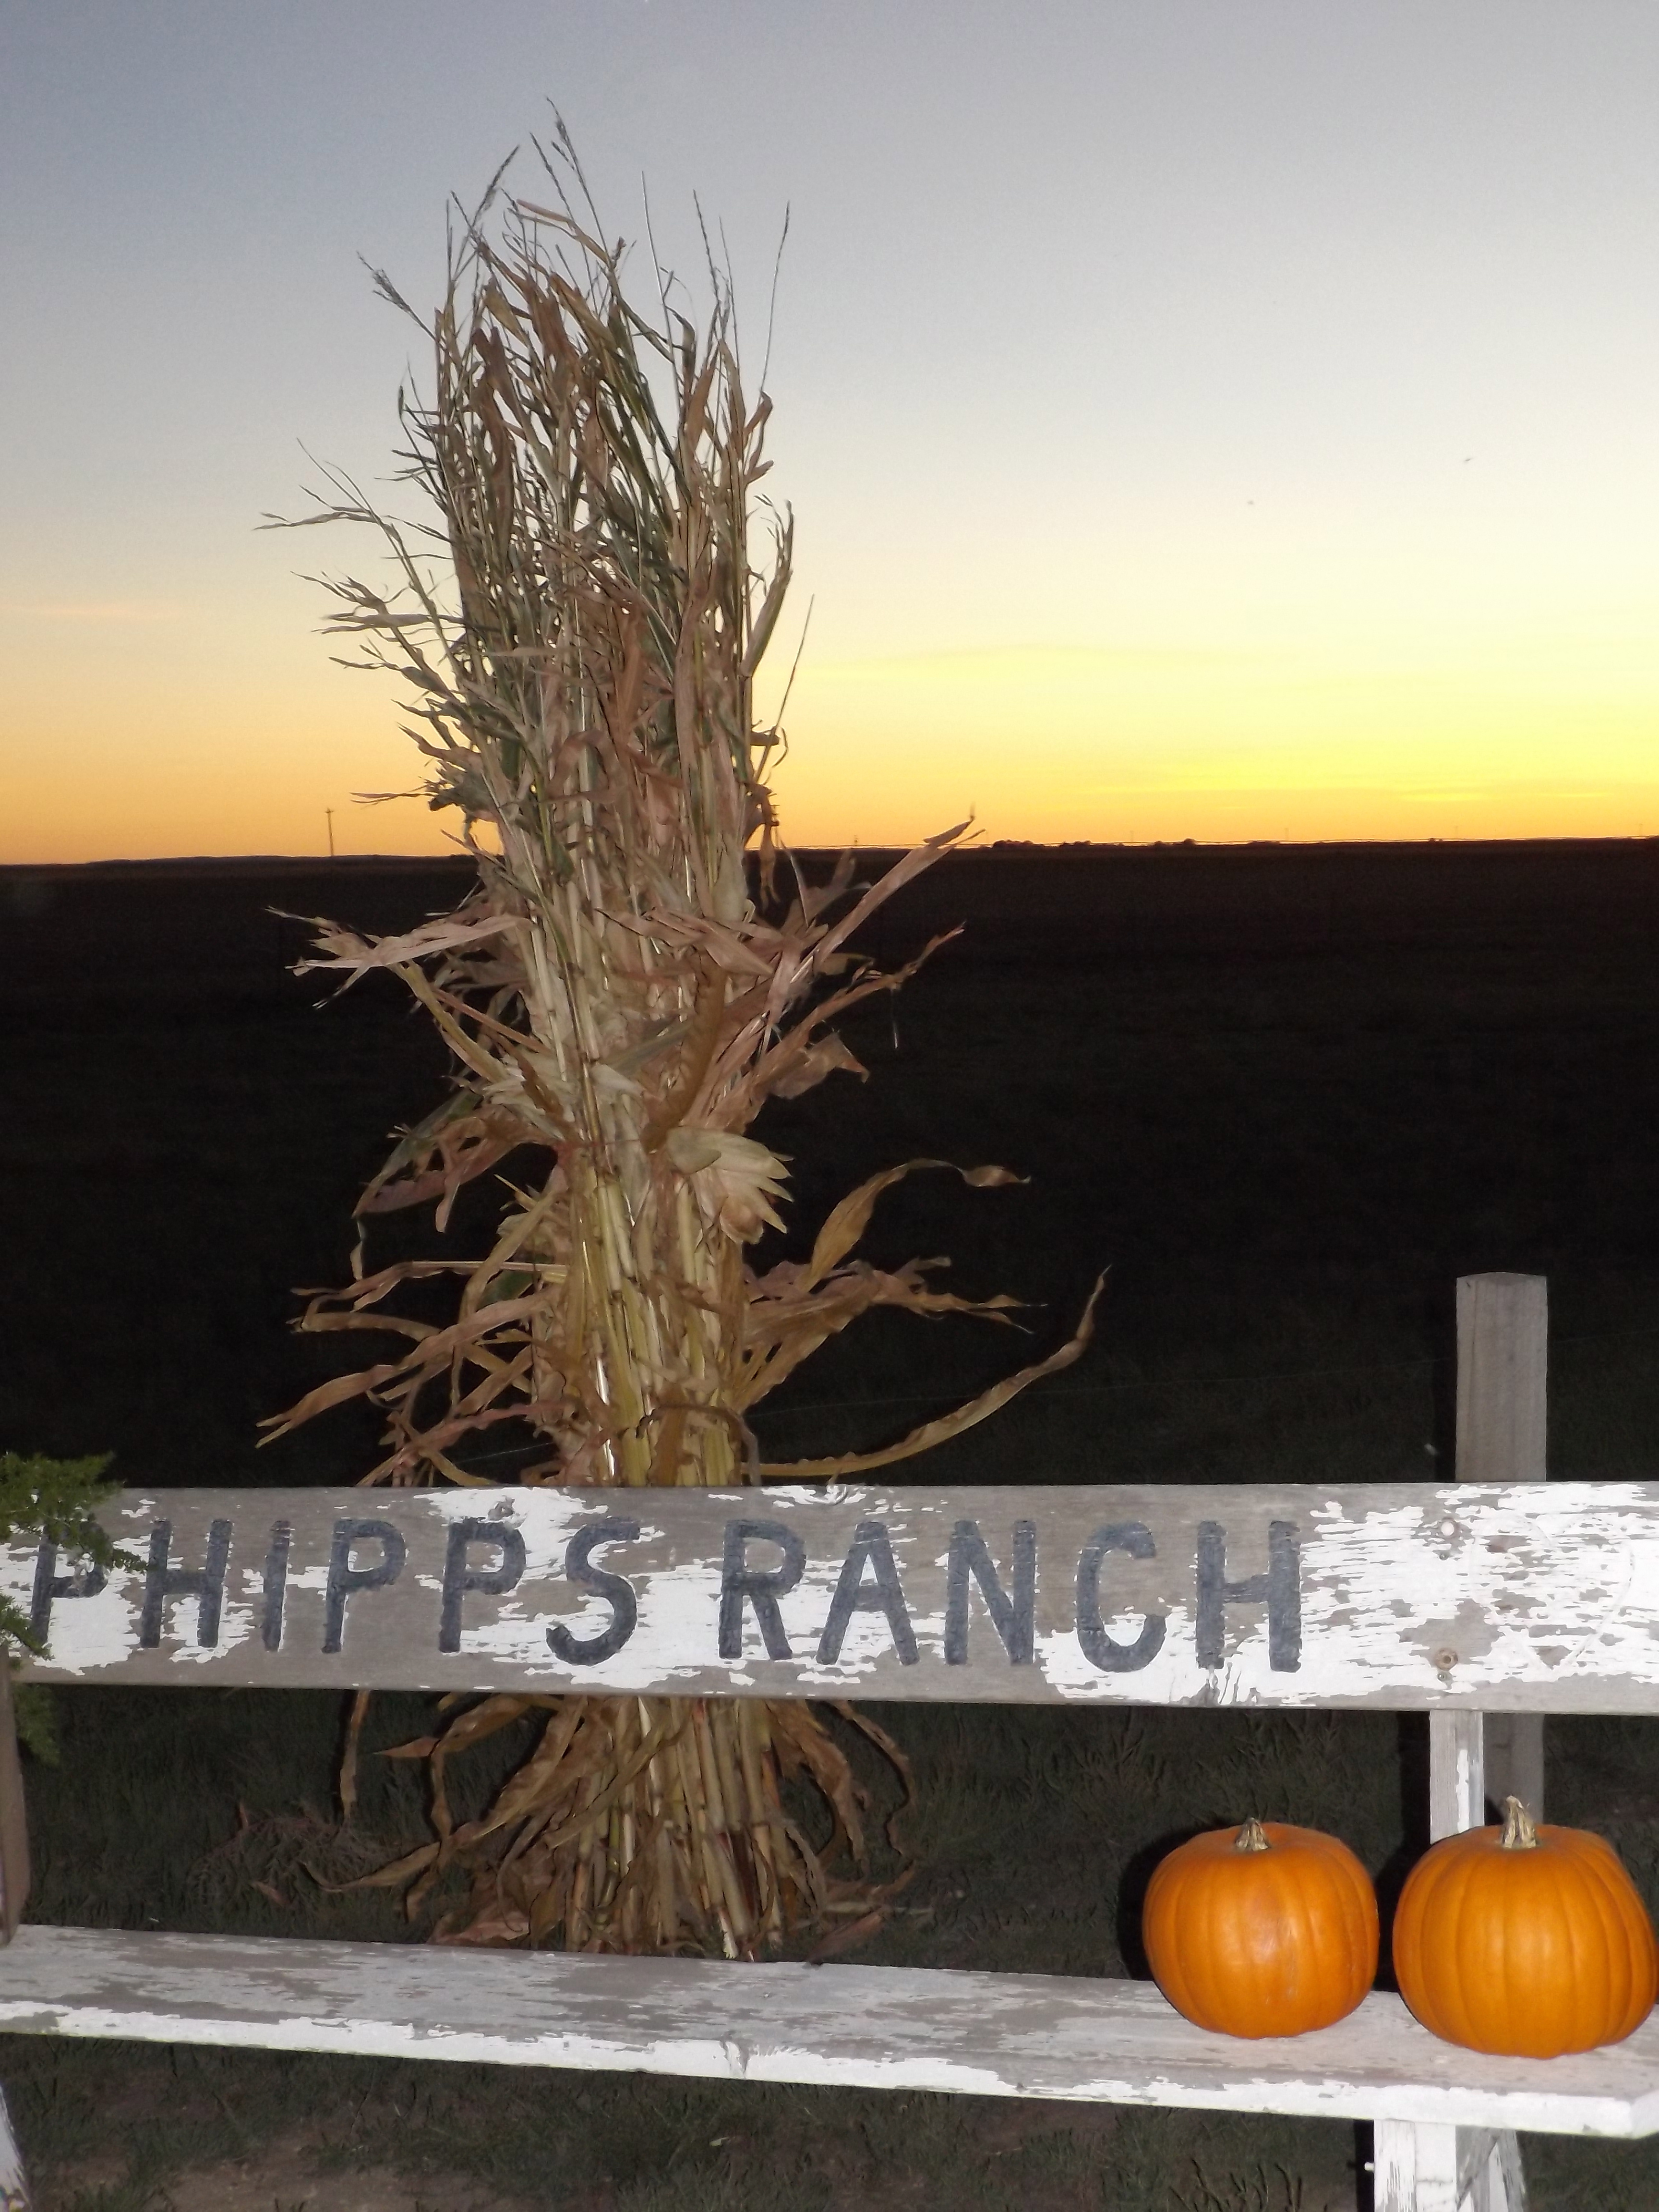
Setting sun, pre-corn stalksFrom the roadFrom the road, again
Sawyer thoroughly enjoyed helping us carry the corn “sticks.”
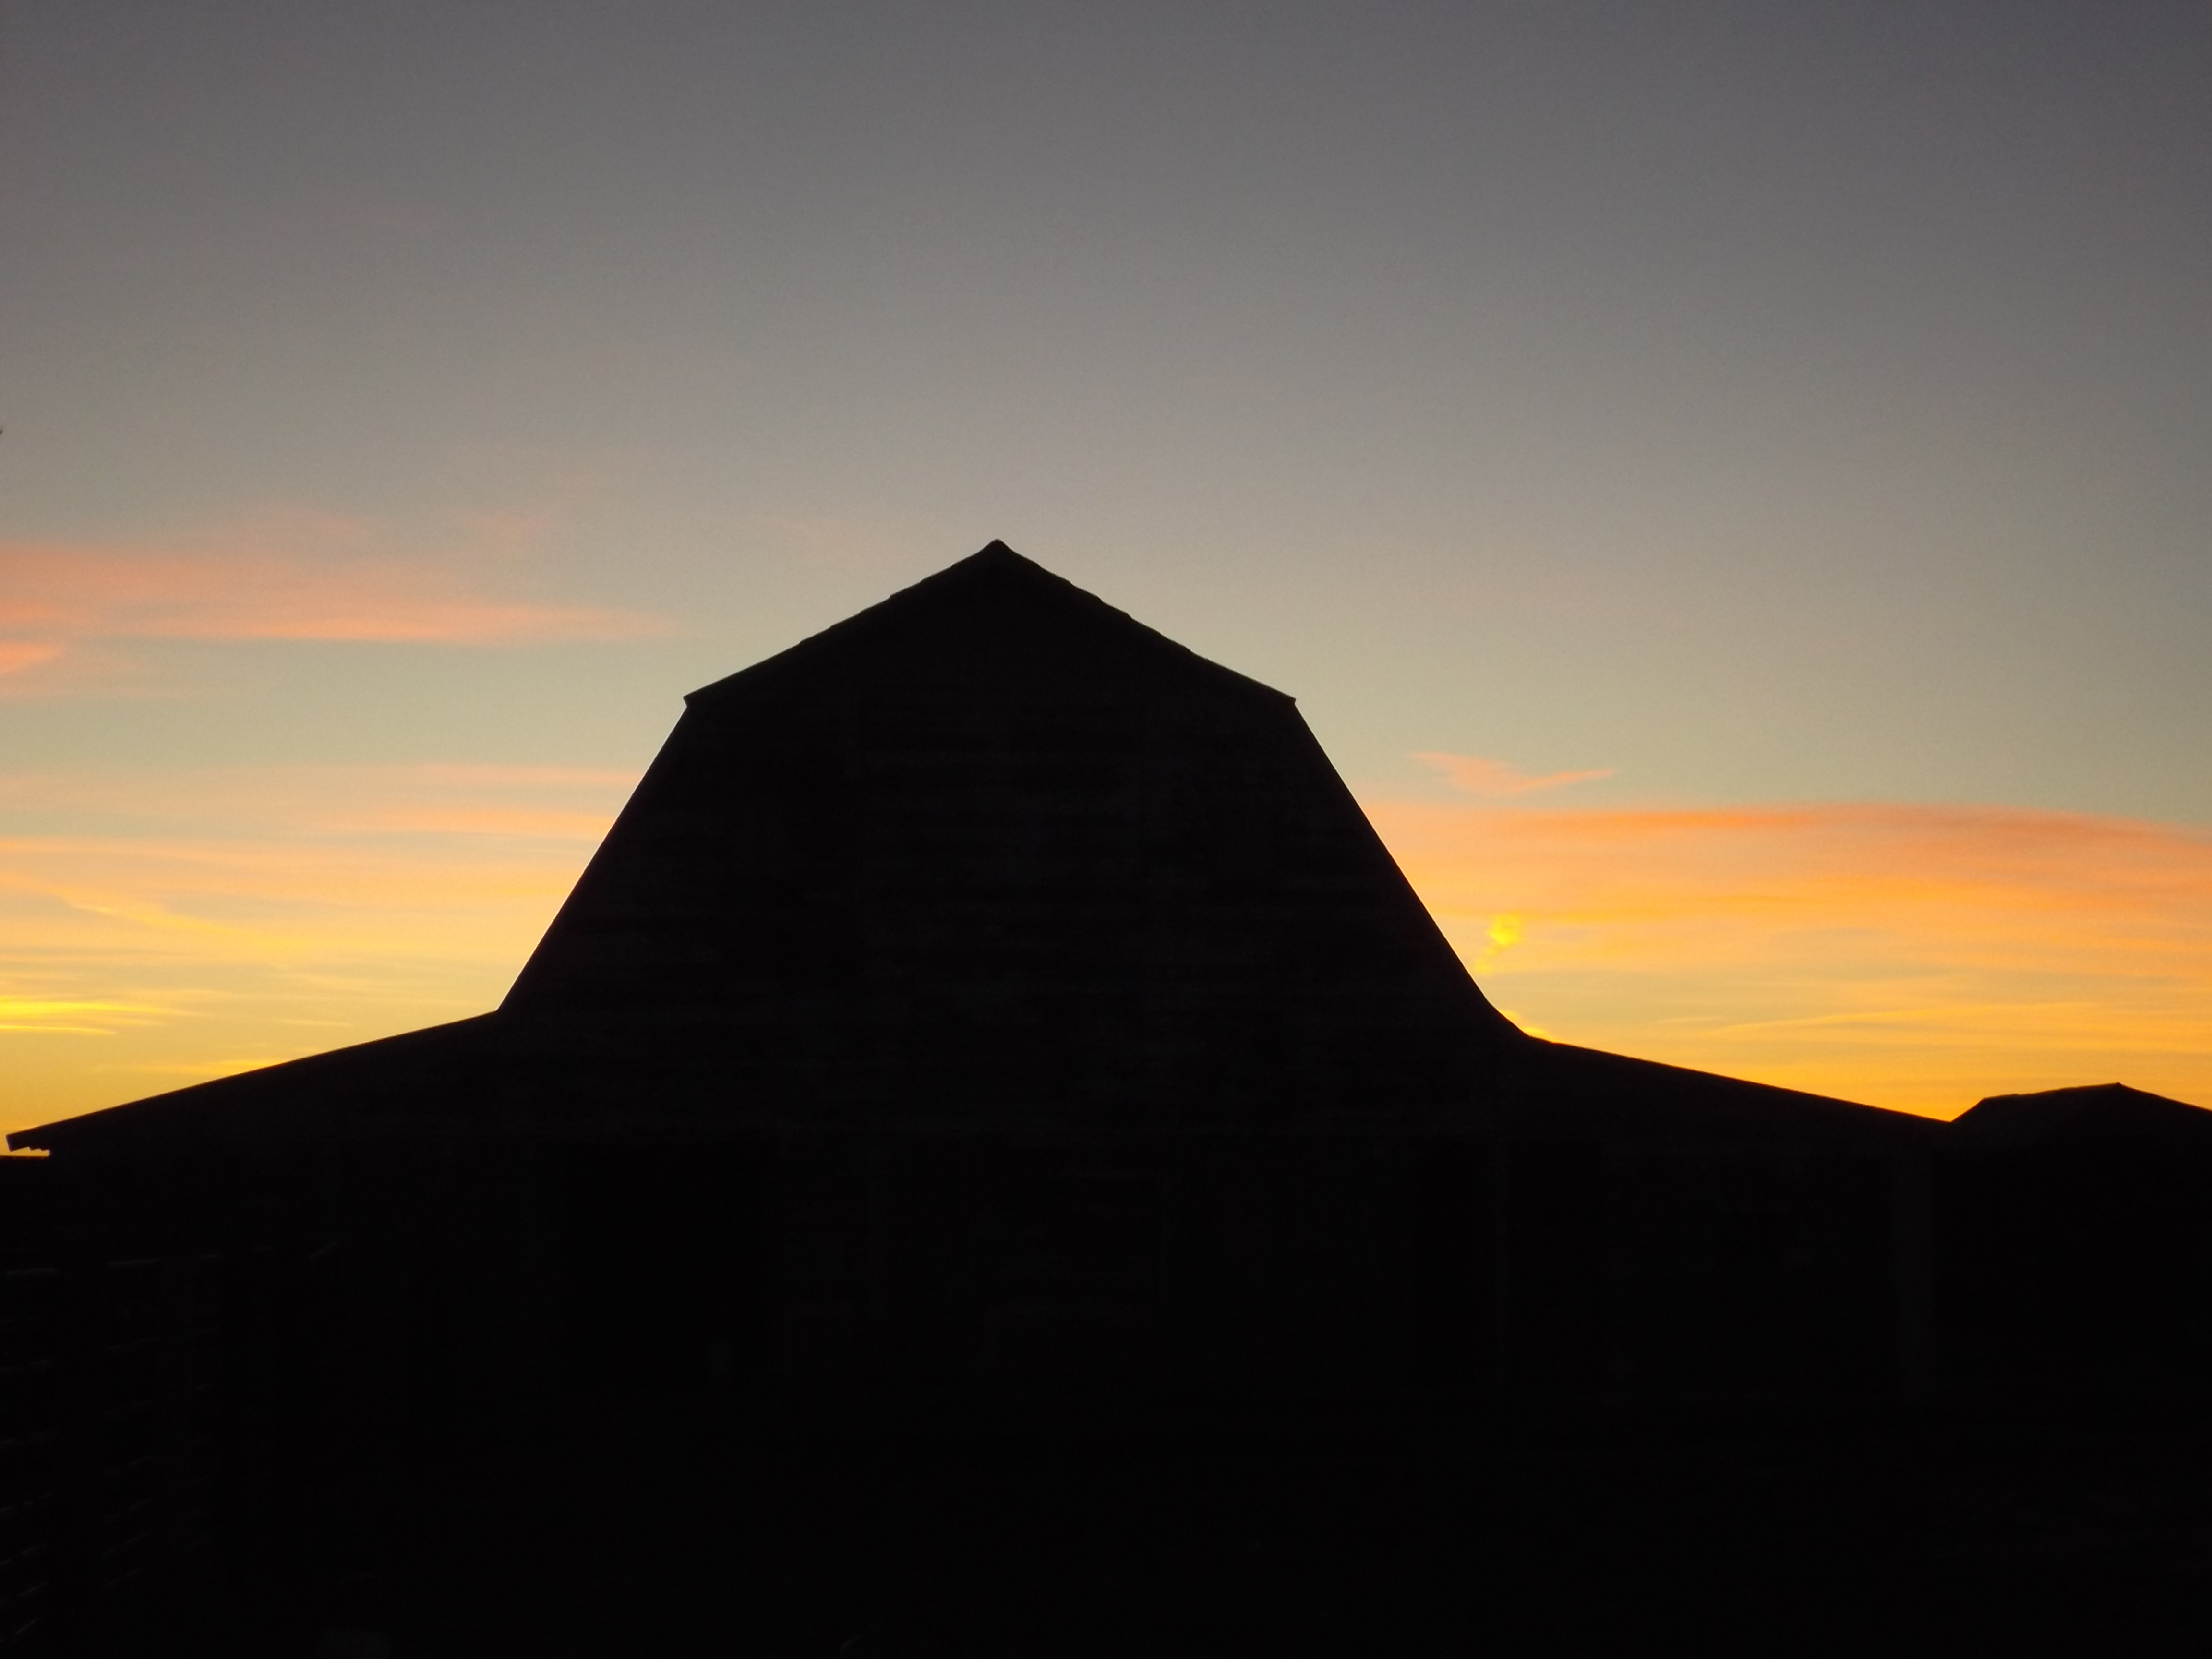
Gorgeous sunset behind the barnAnd a pretty cool moon, tooThe heavens declare the glory of the LORD!
Indeed. As we prayed tonight, we thanked Him for all of the beautiful things He made that point man to Him…including pumpkins…and especially, our pumpkins. And I don’t mean the orange ones.
As my About Me page dictates, I looooooooooooooooooove fall! I love everything about it!
I’m a snuggler – fall’s good for that!
I love pumpkin – fall’s good for that!
I love football – fall’s good for that!
I love overcast weather – fall’s good for that!
I love all things cozy – fall’s good for that!
I love hot coffee – well, anytime’s good for that but – fall’s good for that!
With this chilly, overcast day making it REALLY feel autumnal, I decided to take you on a little living room tour, fall style. Here are a few things I love that make it feel cozy in our family room.
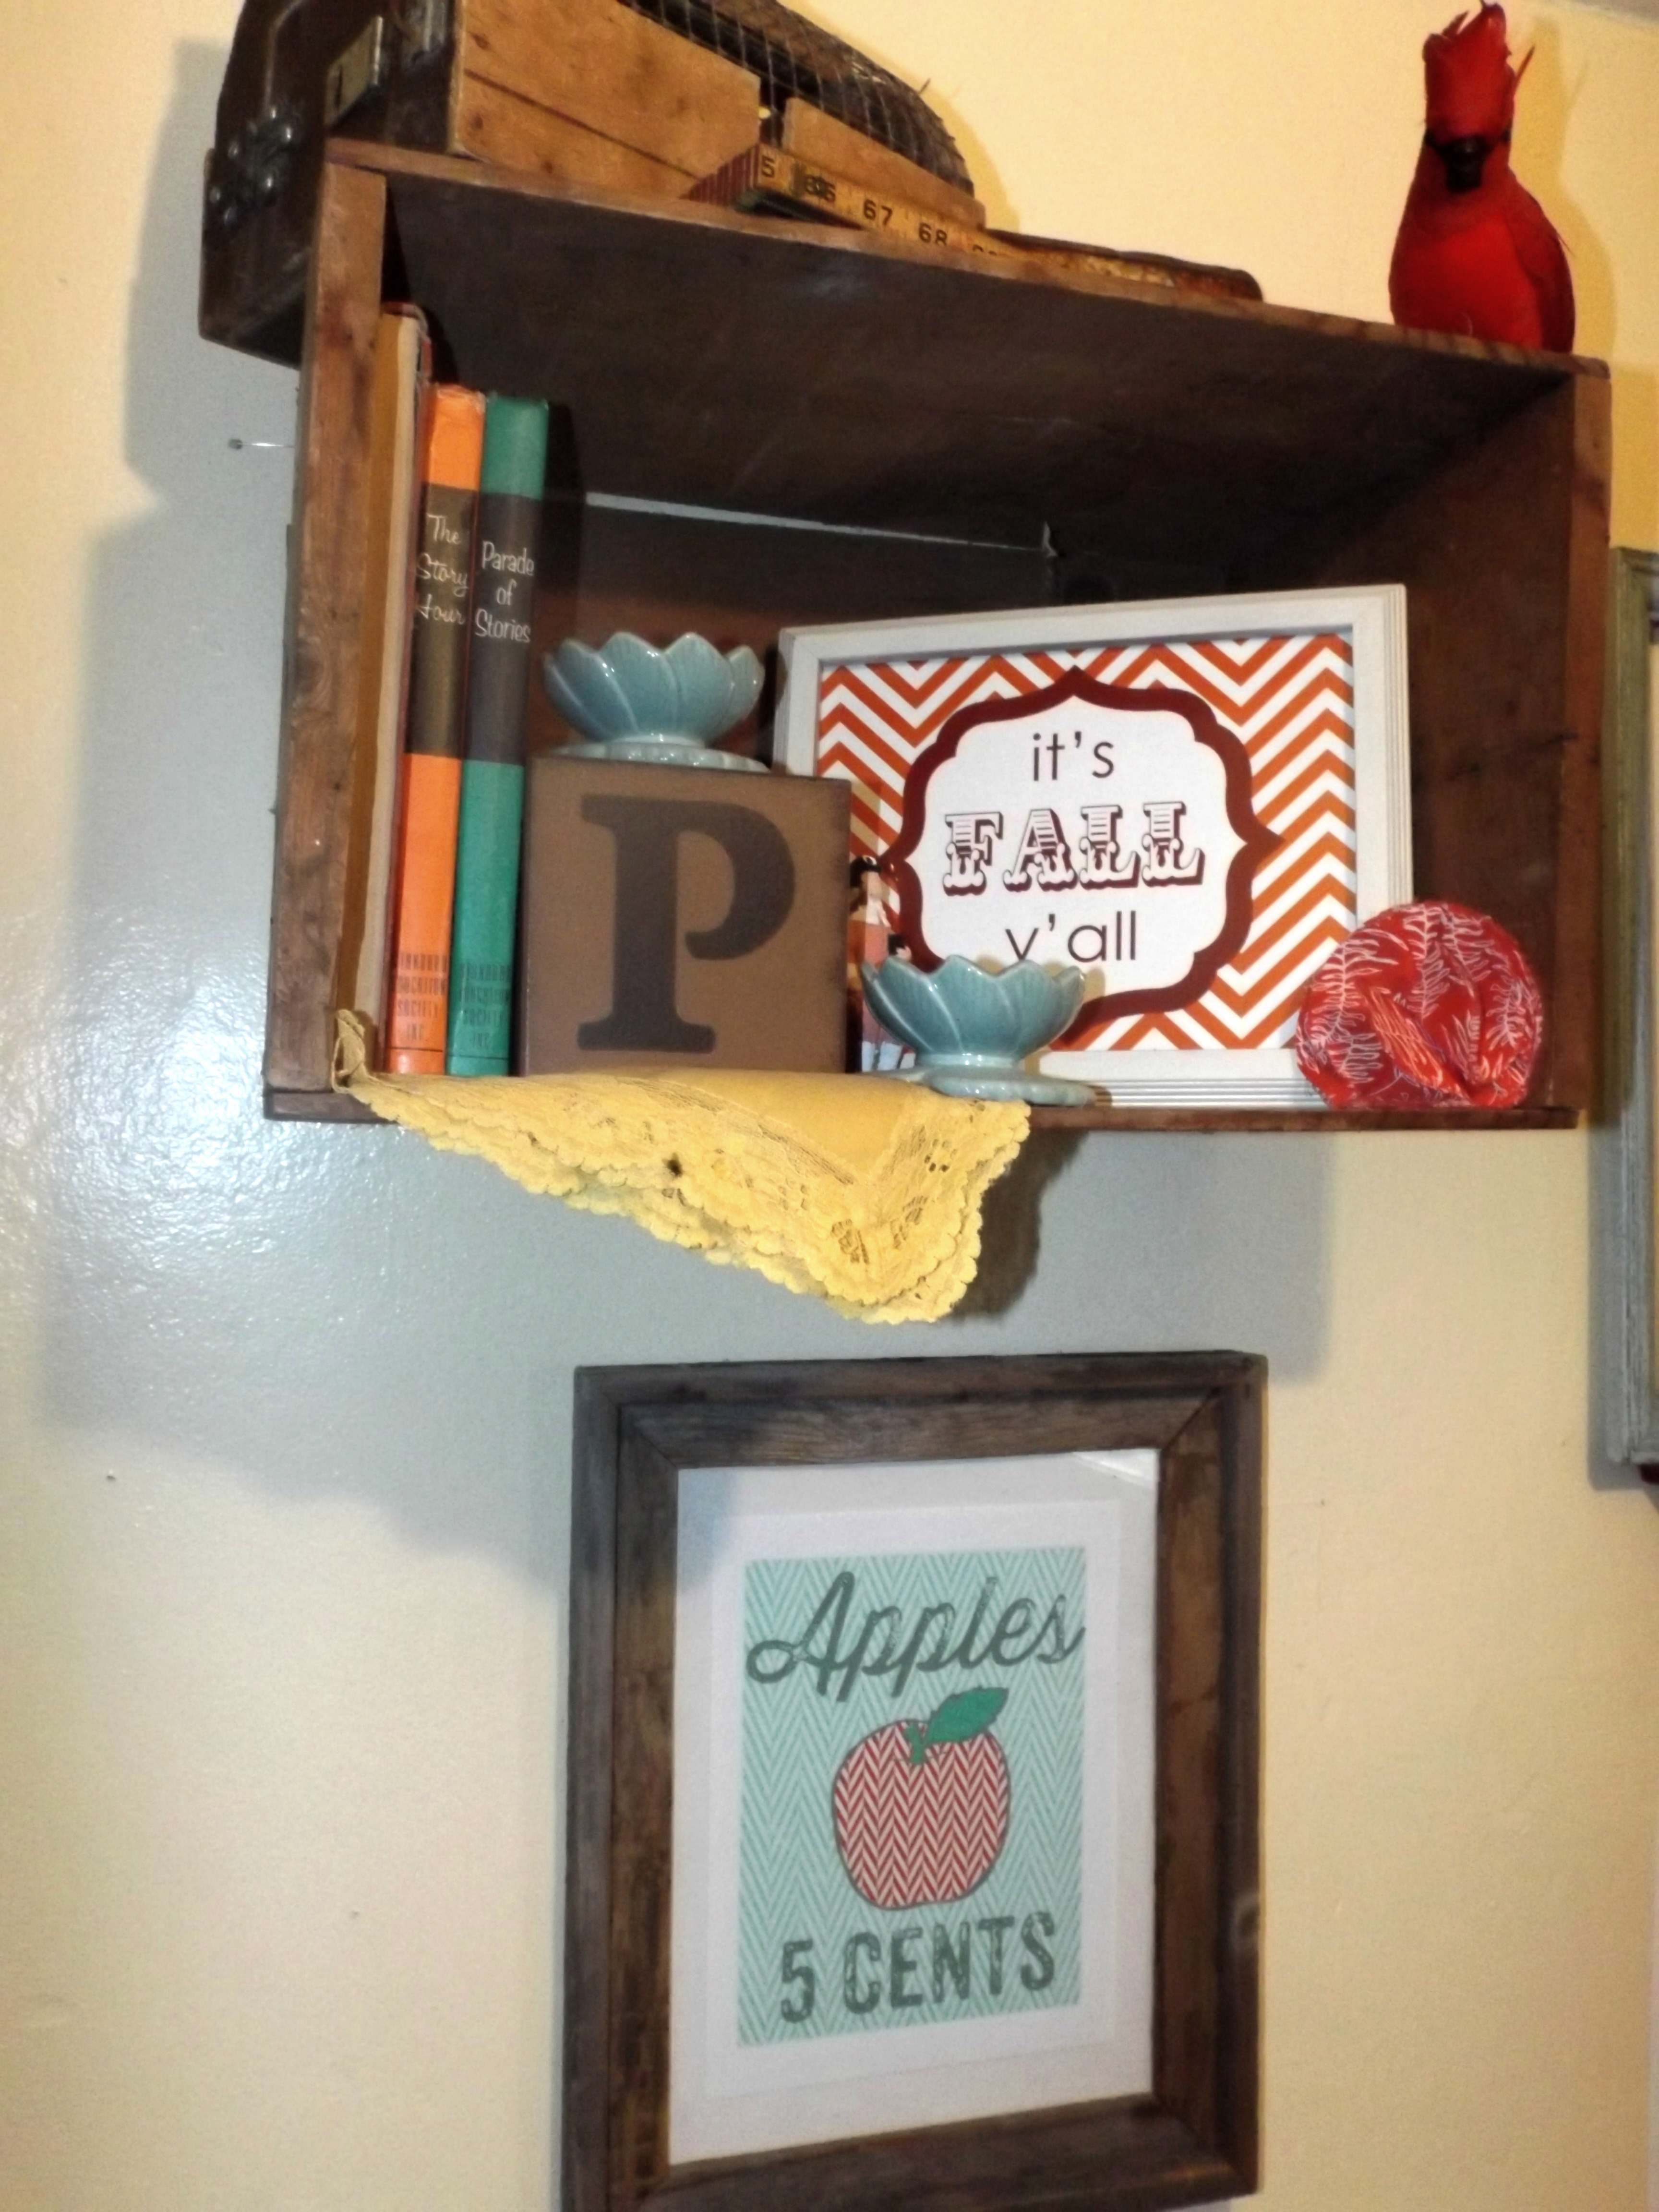
I am a lover of words so I have a few fun, chatty prints scattered about our living space.
It’s fall ya’ll
I don’t know why I’m so drawn to that apples one, but I have quite an affinity for it. It might just stay up post-Christmas, too.
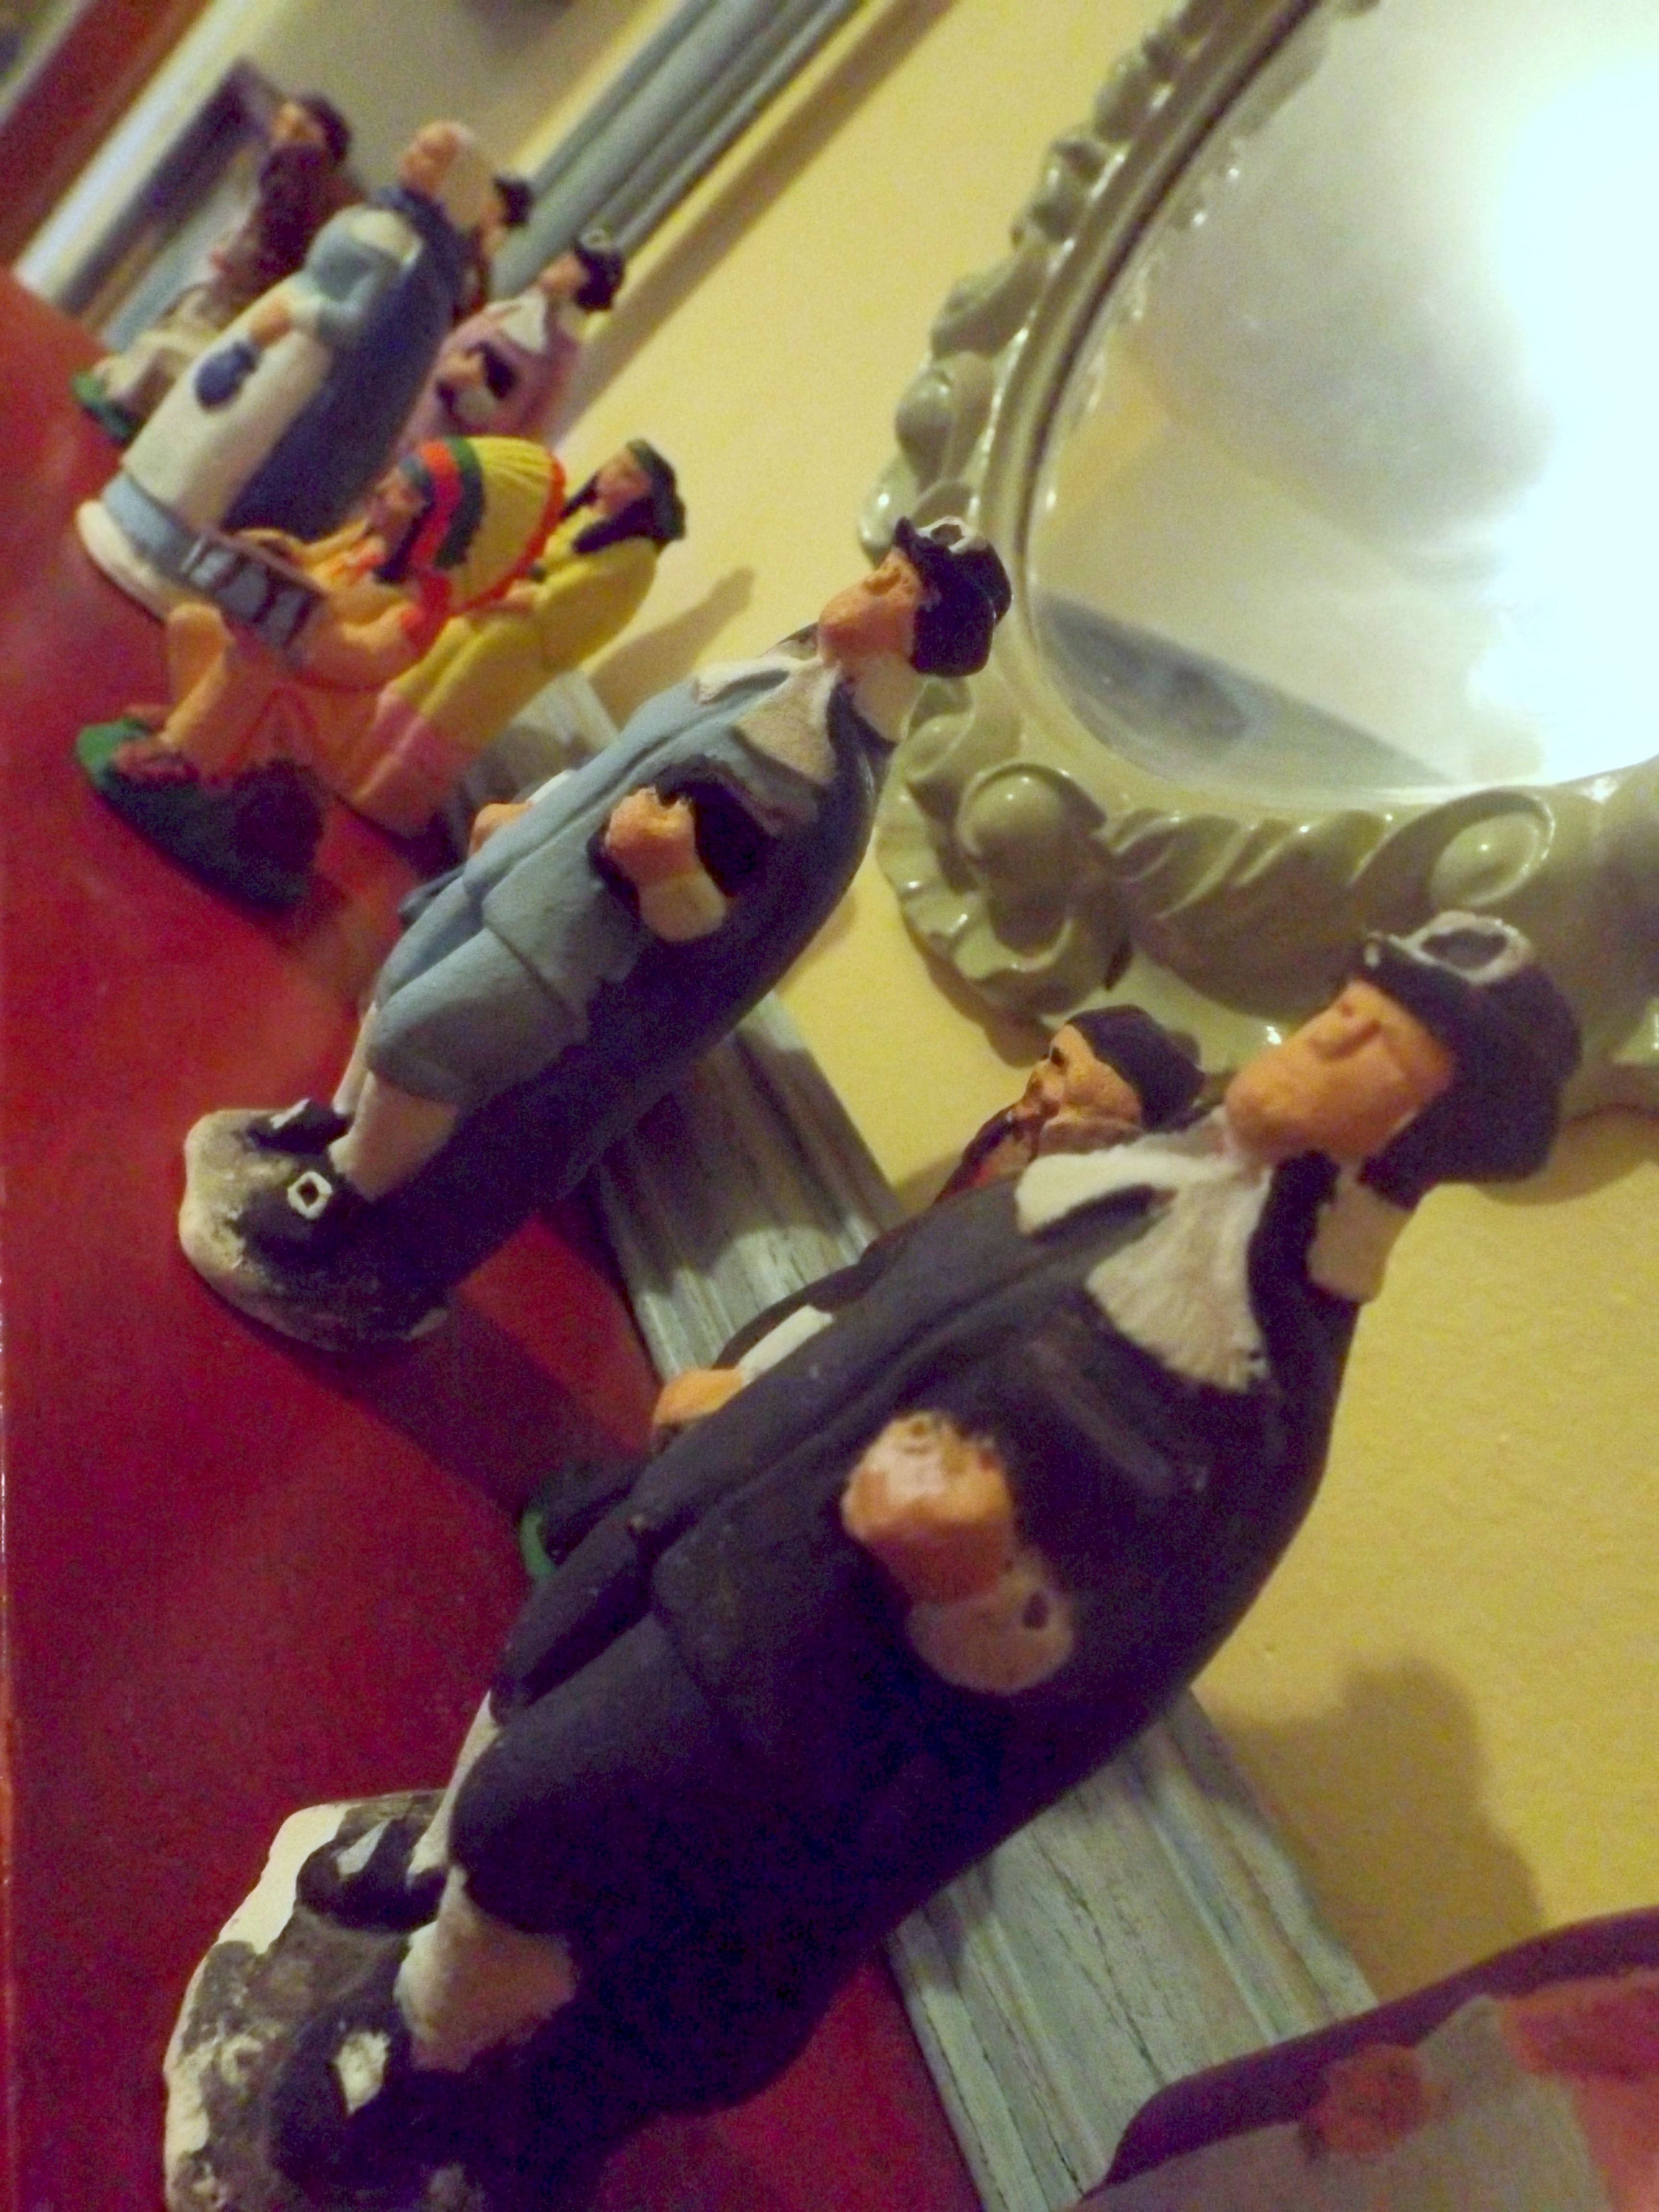
Wrexy hand-painted these pilgrims and indians when he was around 9 years old and I think they’re adorable (like him).
The first Thanksgiving on a single shelf
I put them out last year but had them on our coffee table. I’m thinking they work better up high so little hands aren’t too tempted. This one is my favorite…
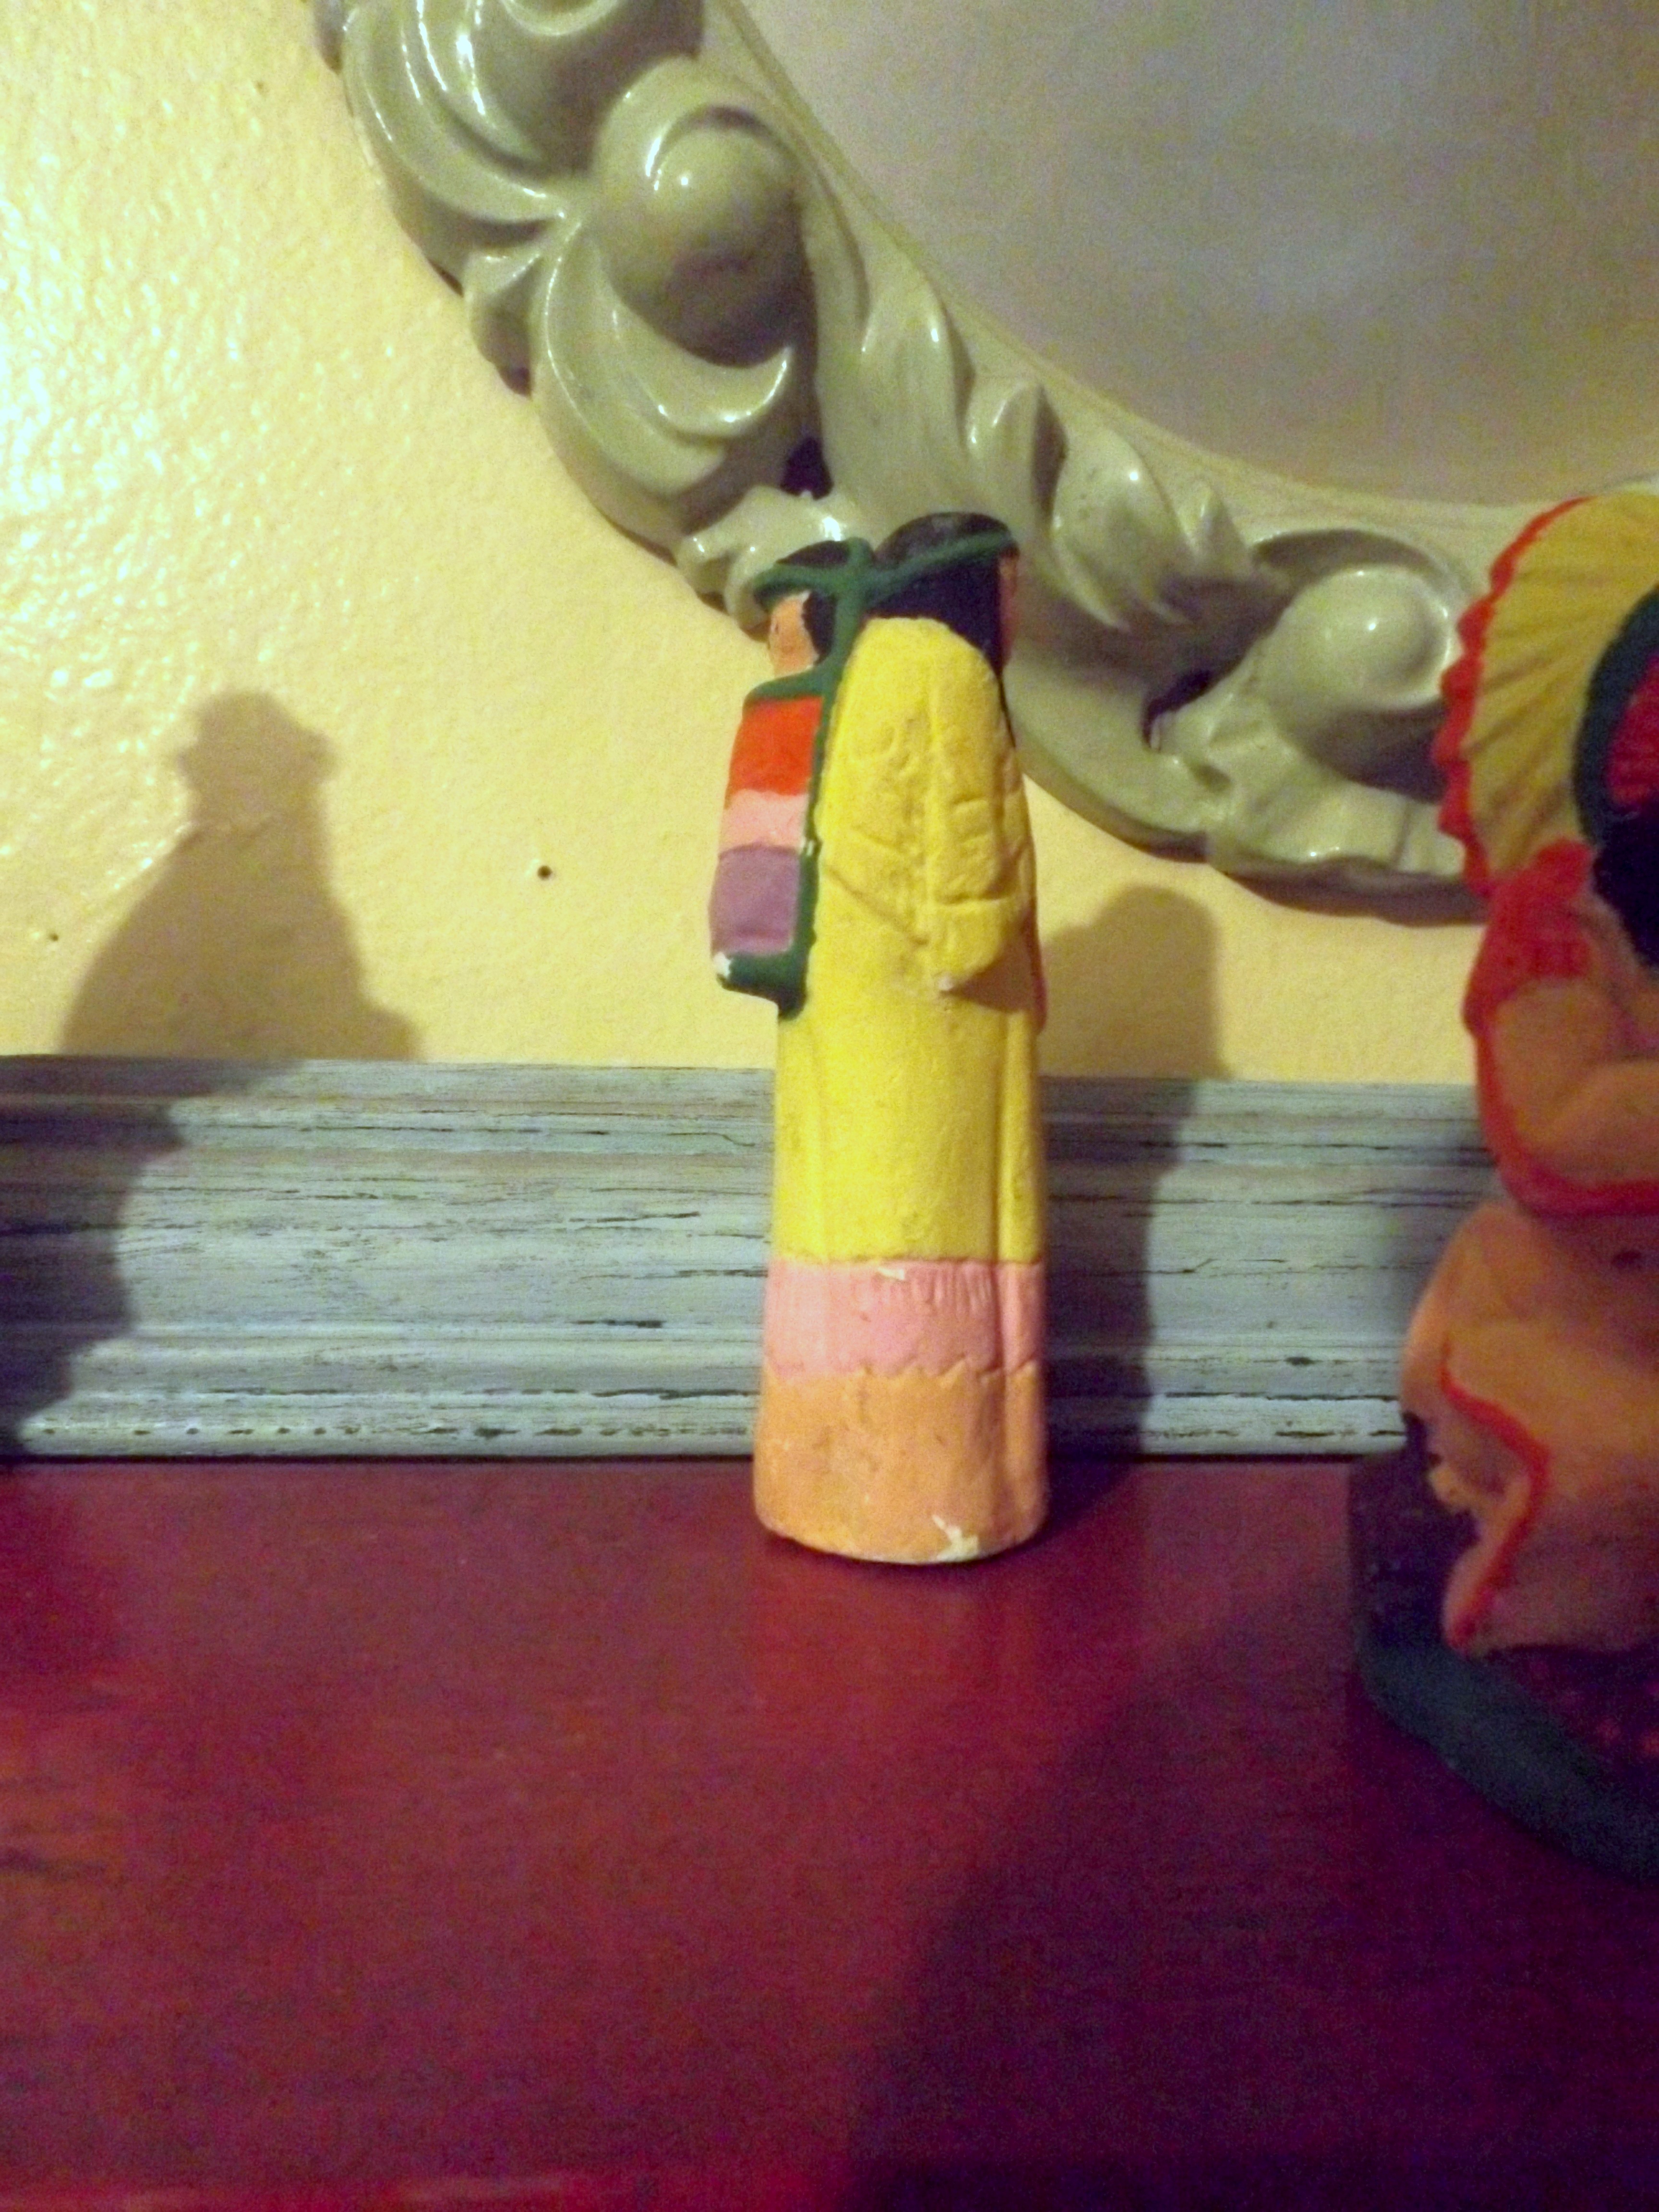
Papoose
the indian momma with her little papoose baby. Aren’t they sweet?
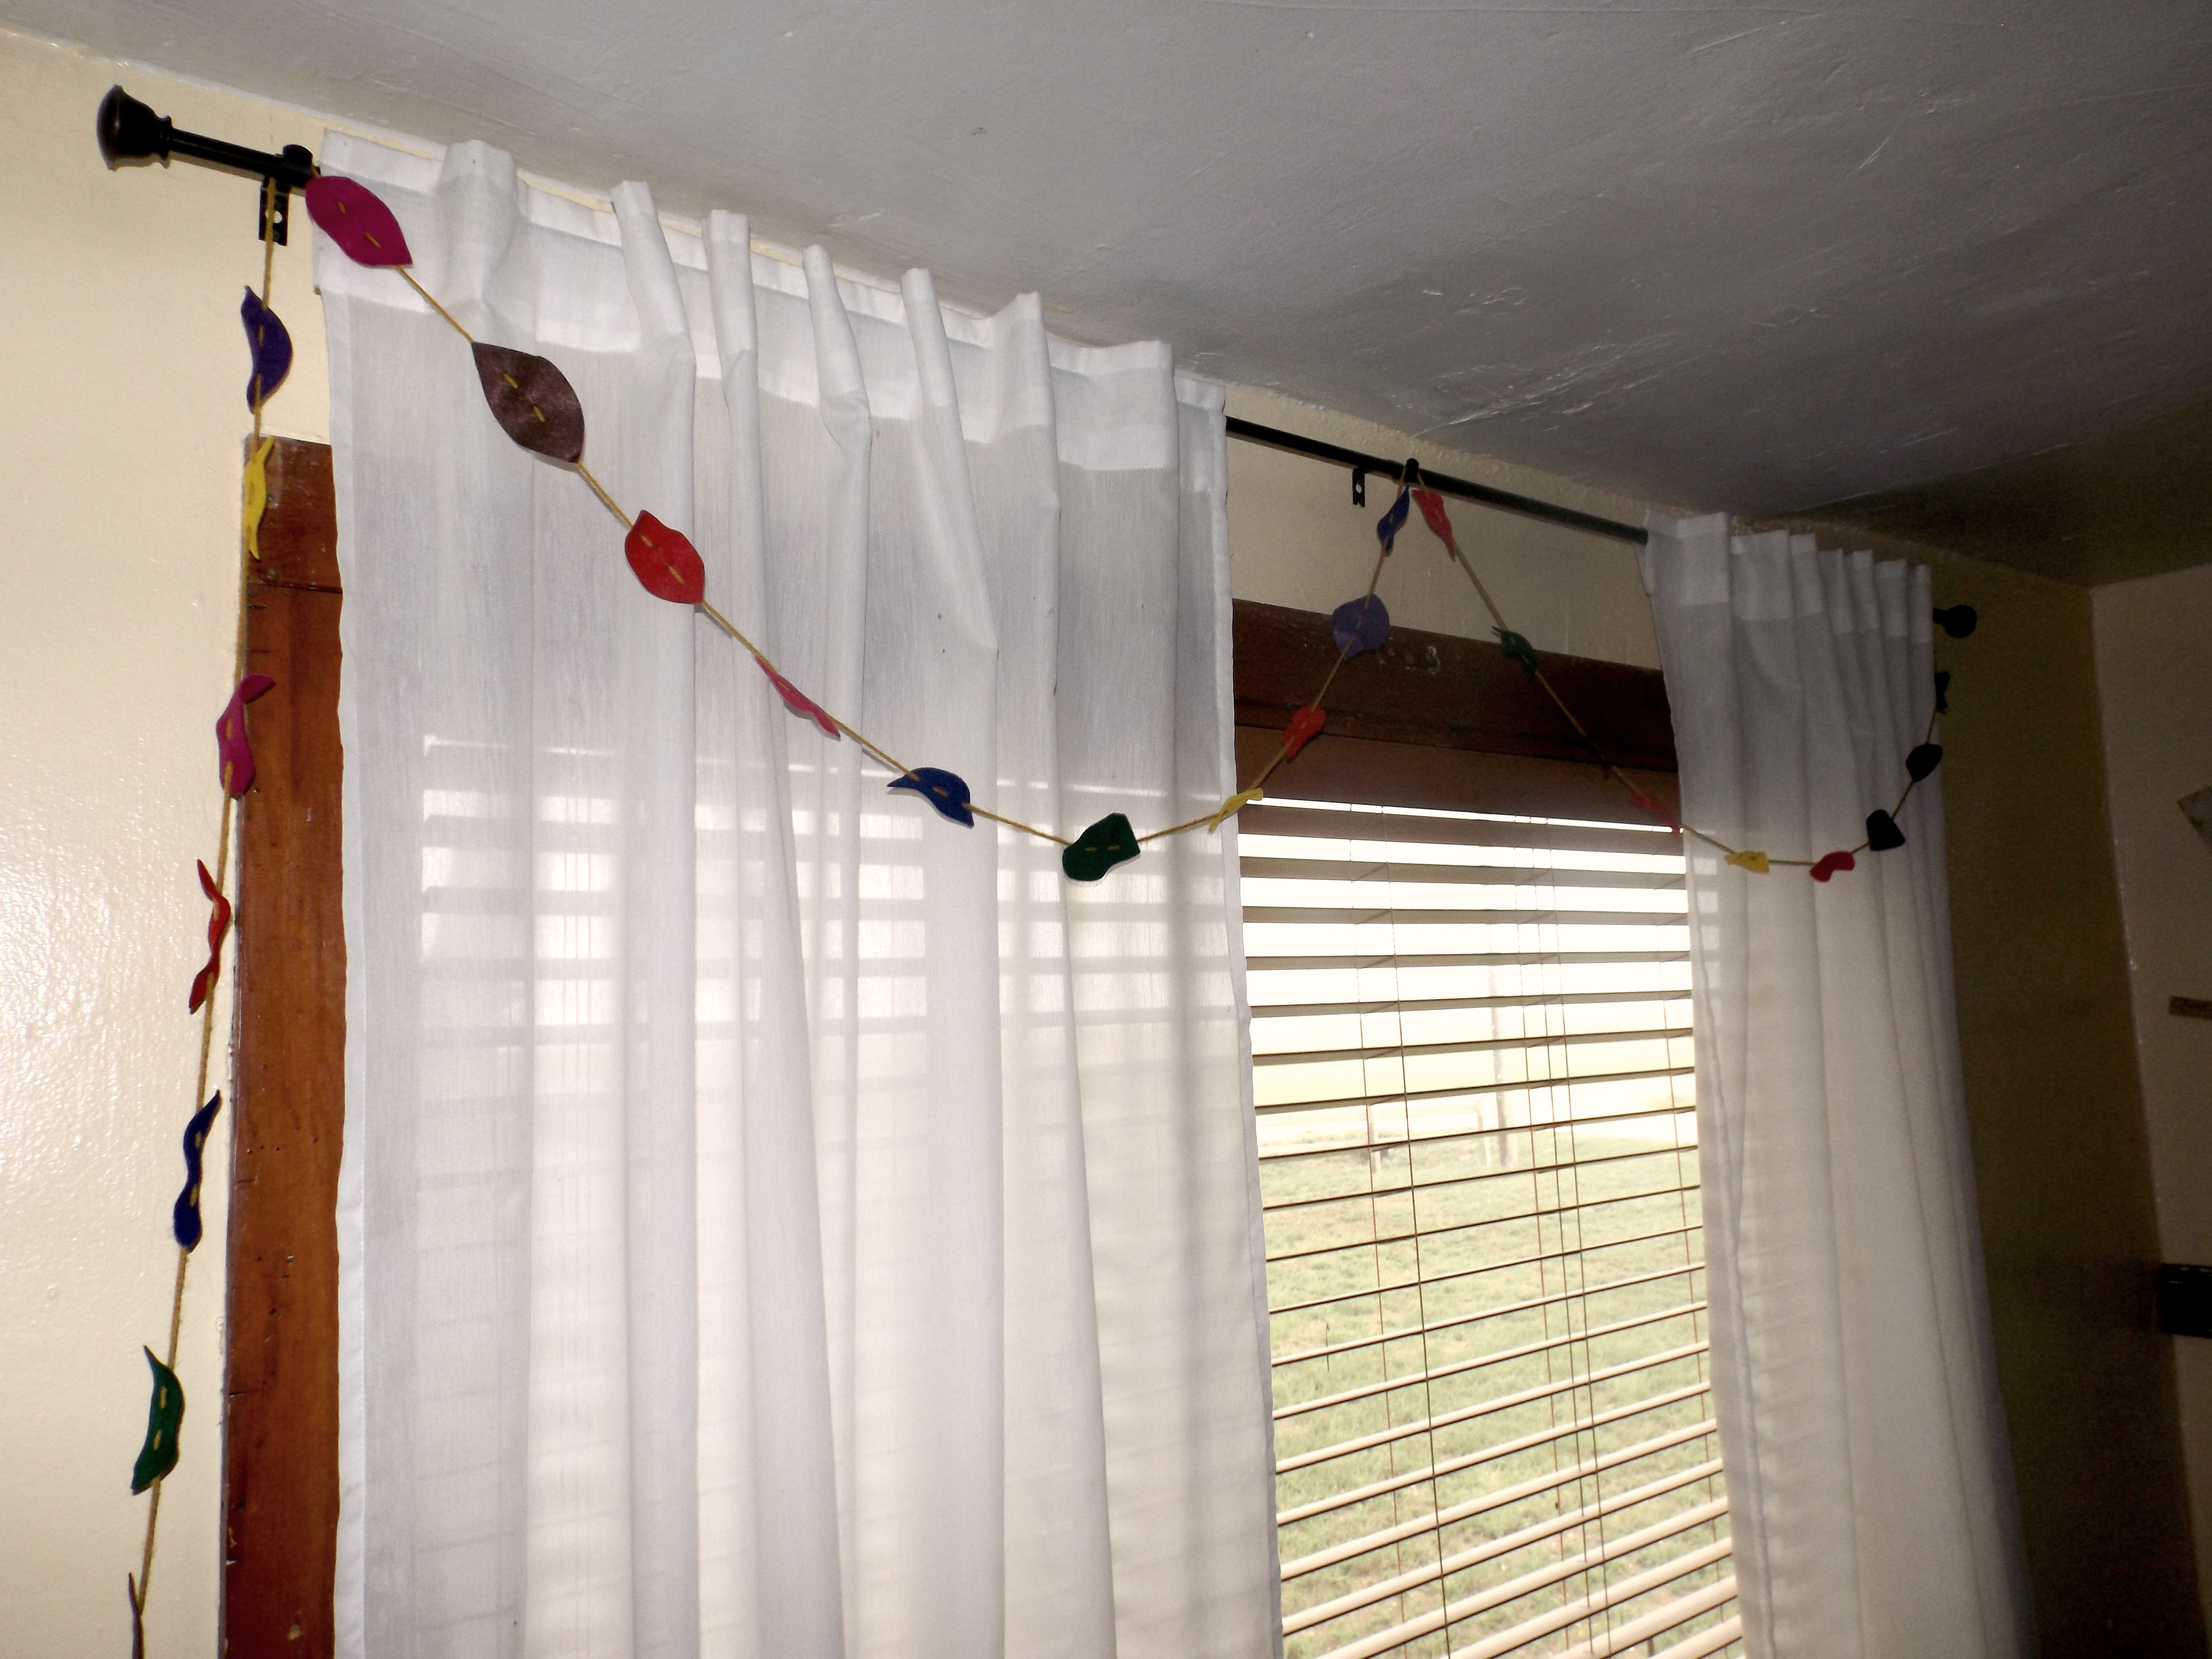
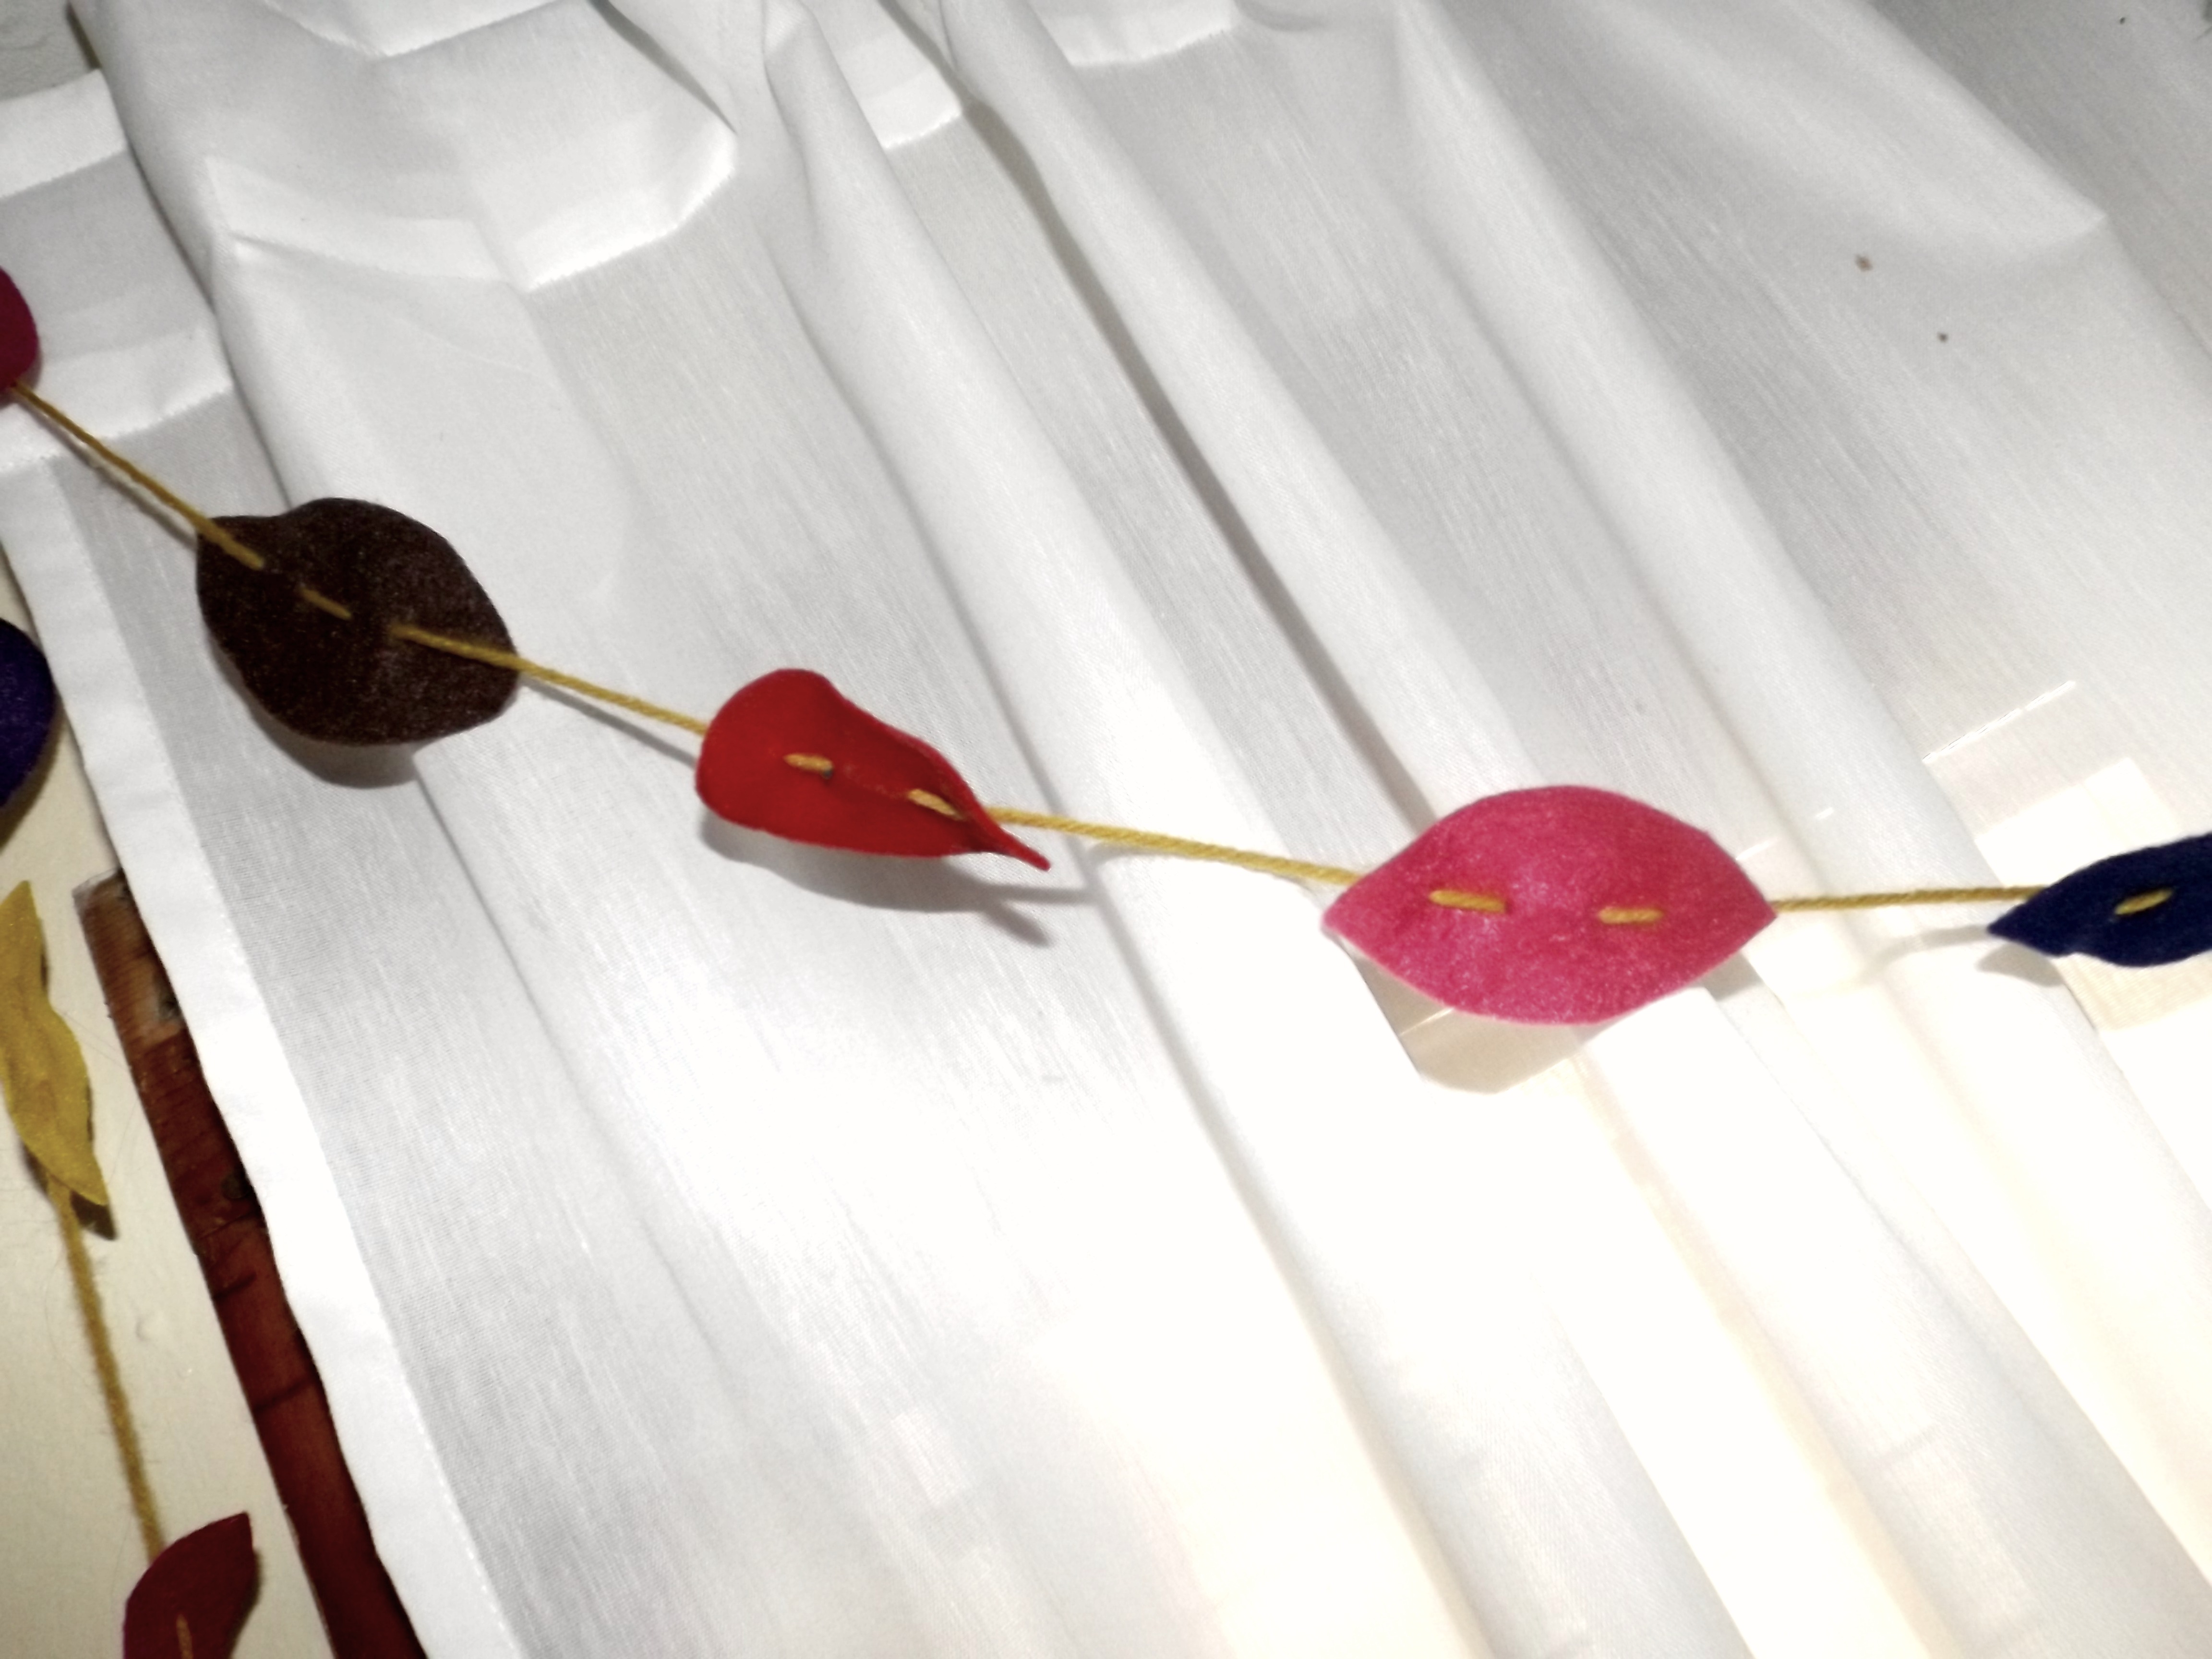
Our picture window needed a little color (color is GOOD!) so I made this felt leaf garland that I think turned out pretty cute.
See that overcast goodness outside?!
These were super simple to make! I just free-handed a leaf shape, traced it onto multiple colors of felt and cut them out. Then, I had Wrex thread the yarn through the leaves (that felt can be kinda tough to poke through.) Told ya it was simple! 😉
Thankful for the hubs
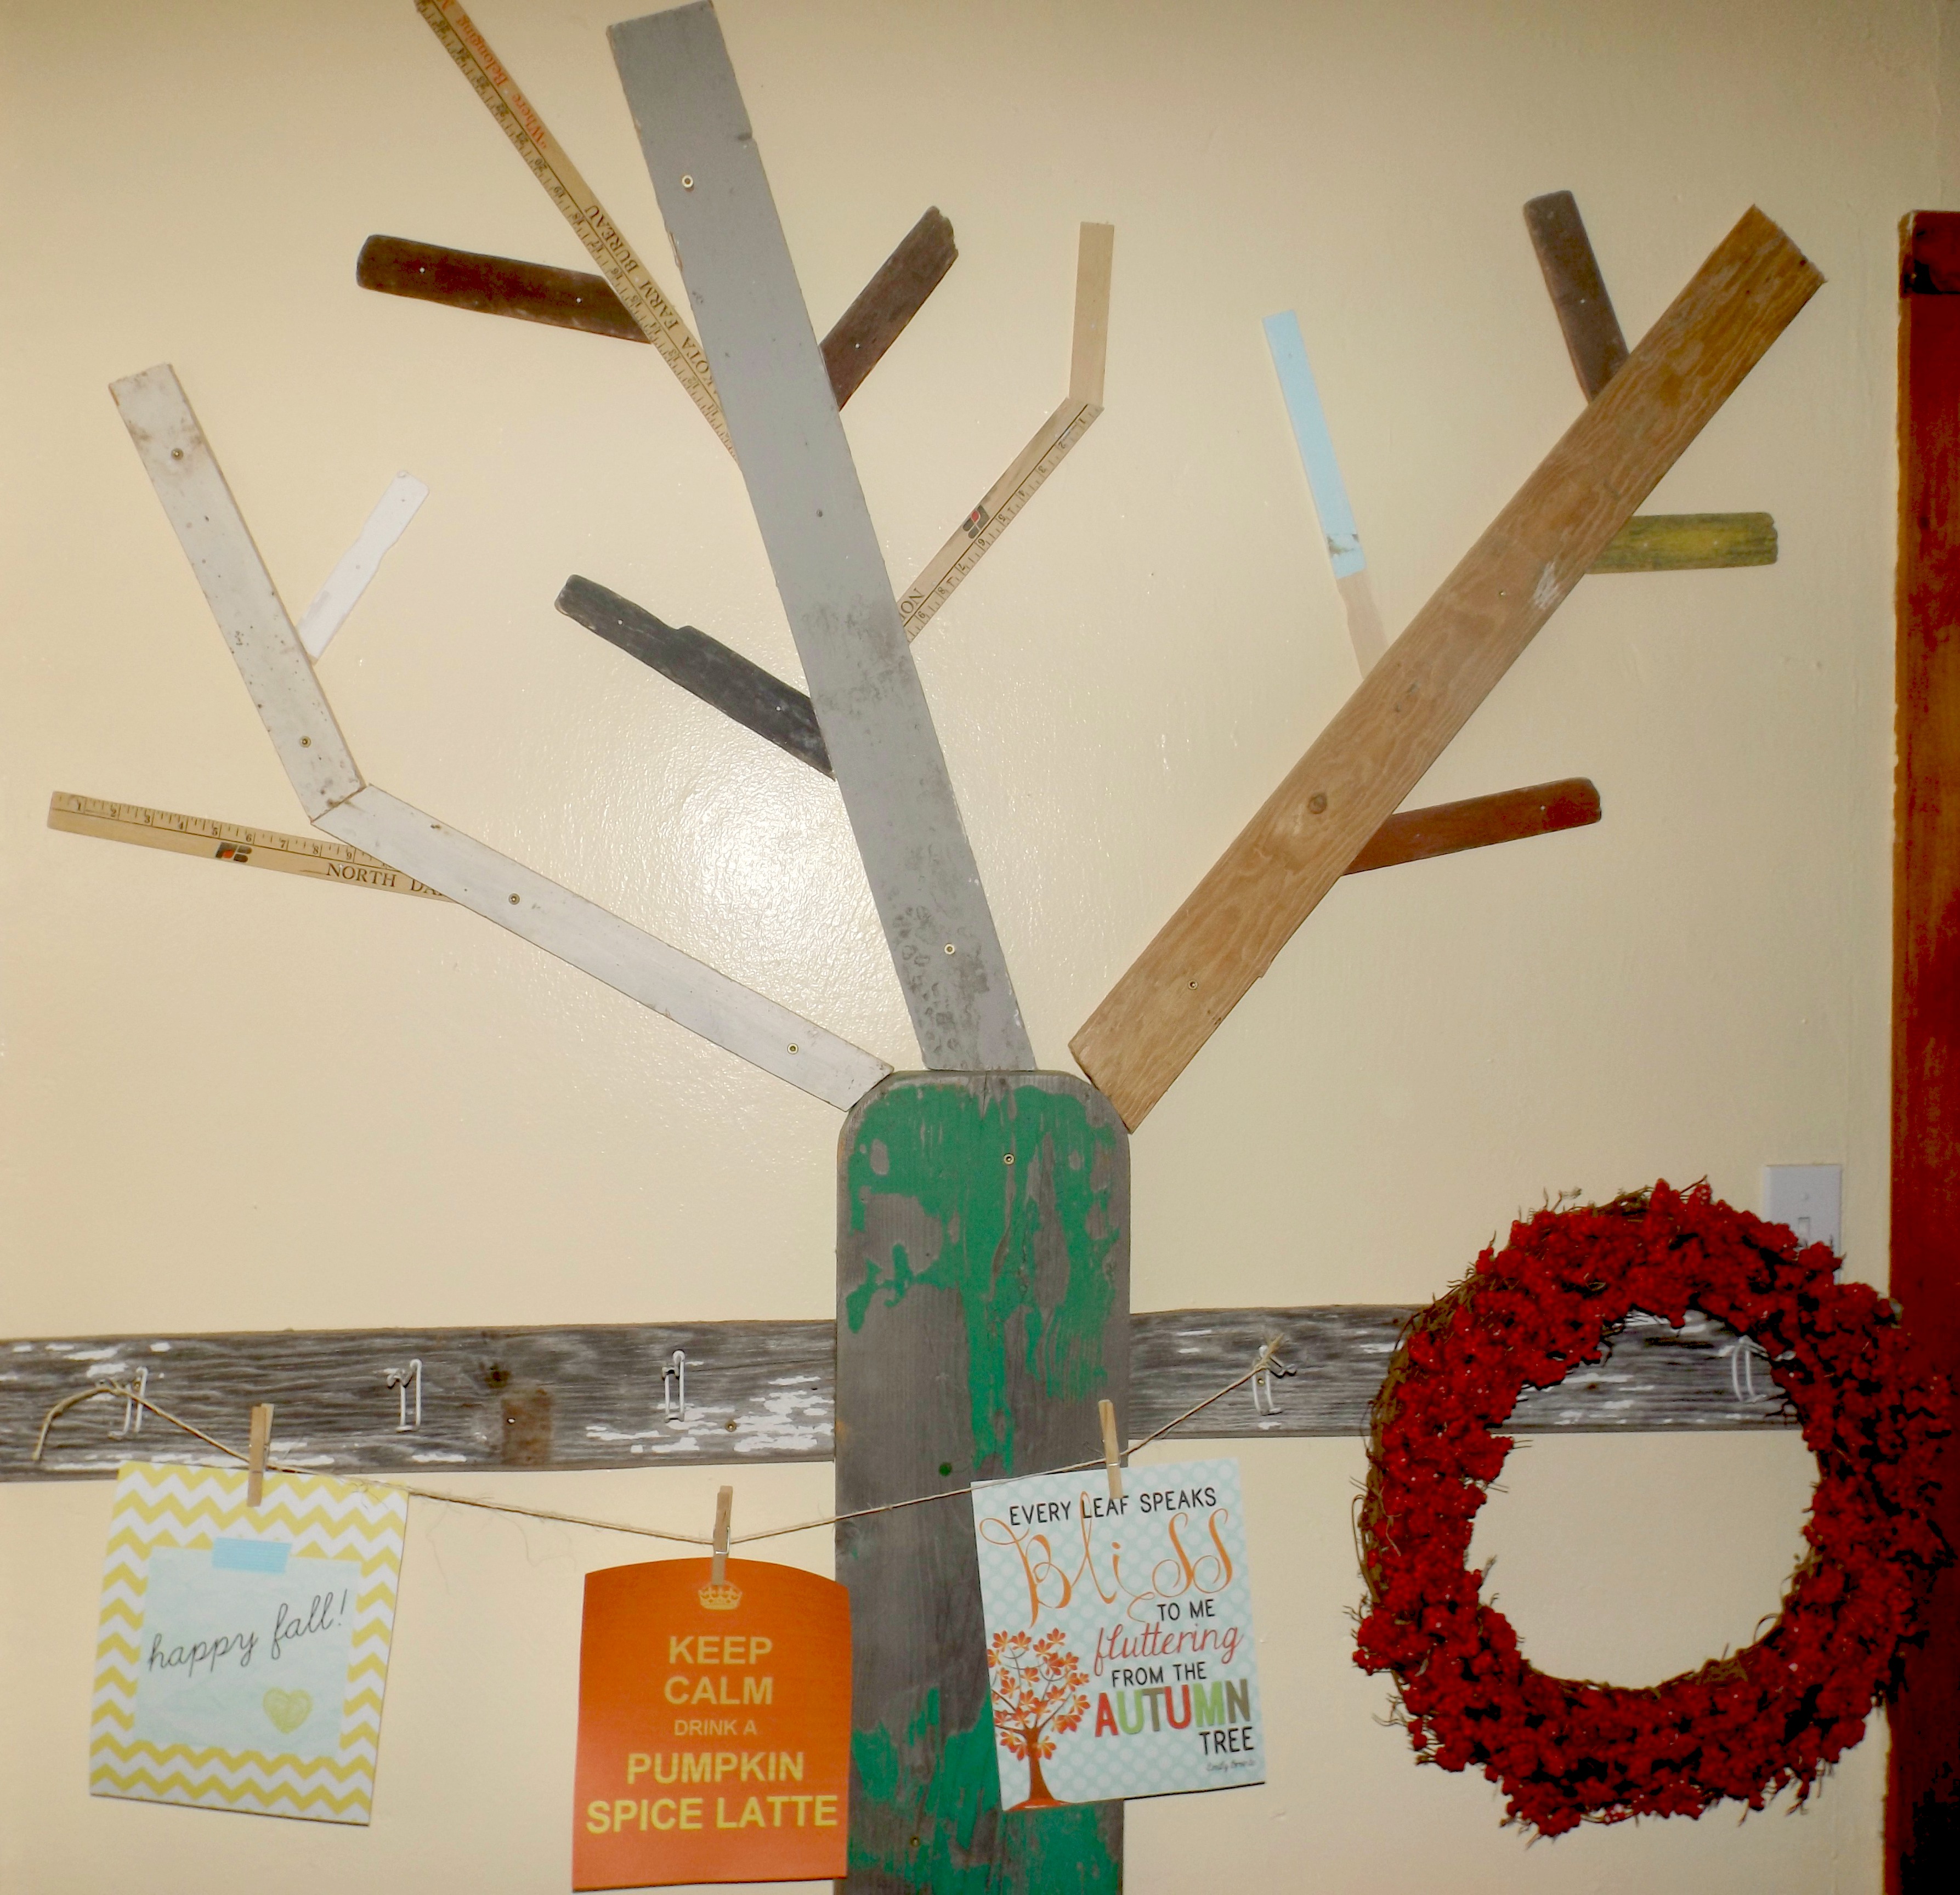
I really dig reclaimed wood and I think this tree is so fun. I always have something hanging from the hooks and the twine, so for fall, I just did a berry wreath and a few more seasonal prints (that I’m betting little Wryder will attempt to pull down as he’s in his circle of neglect jumper.) We’ll use the actual branches come November when we add leaves to make a thankful tree.
If a tree grows in a living room…
Yes, yes indeed.
This is above Sawyer’s and my desk where we do our preschool and computer work. I think the girl in the leaves is super cute; she’s just kinda whimsical and trendy and nonchalant all rolled into one. Plus, she has curly hair – who doesn’t love a girl with curly hair? Sawyer is in love with that little jack-o-lantern, so I put it where she can see it during our lessons.
Inspiration
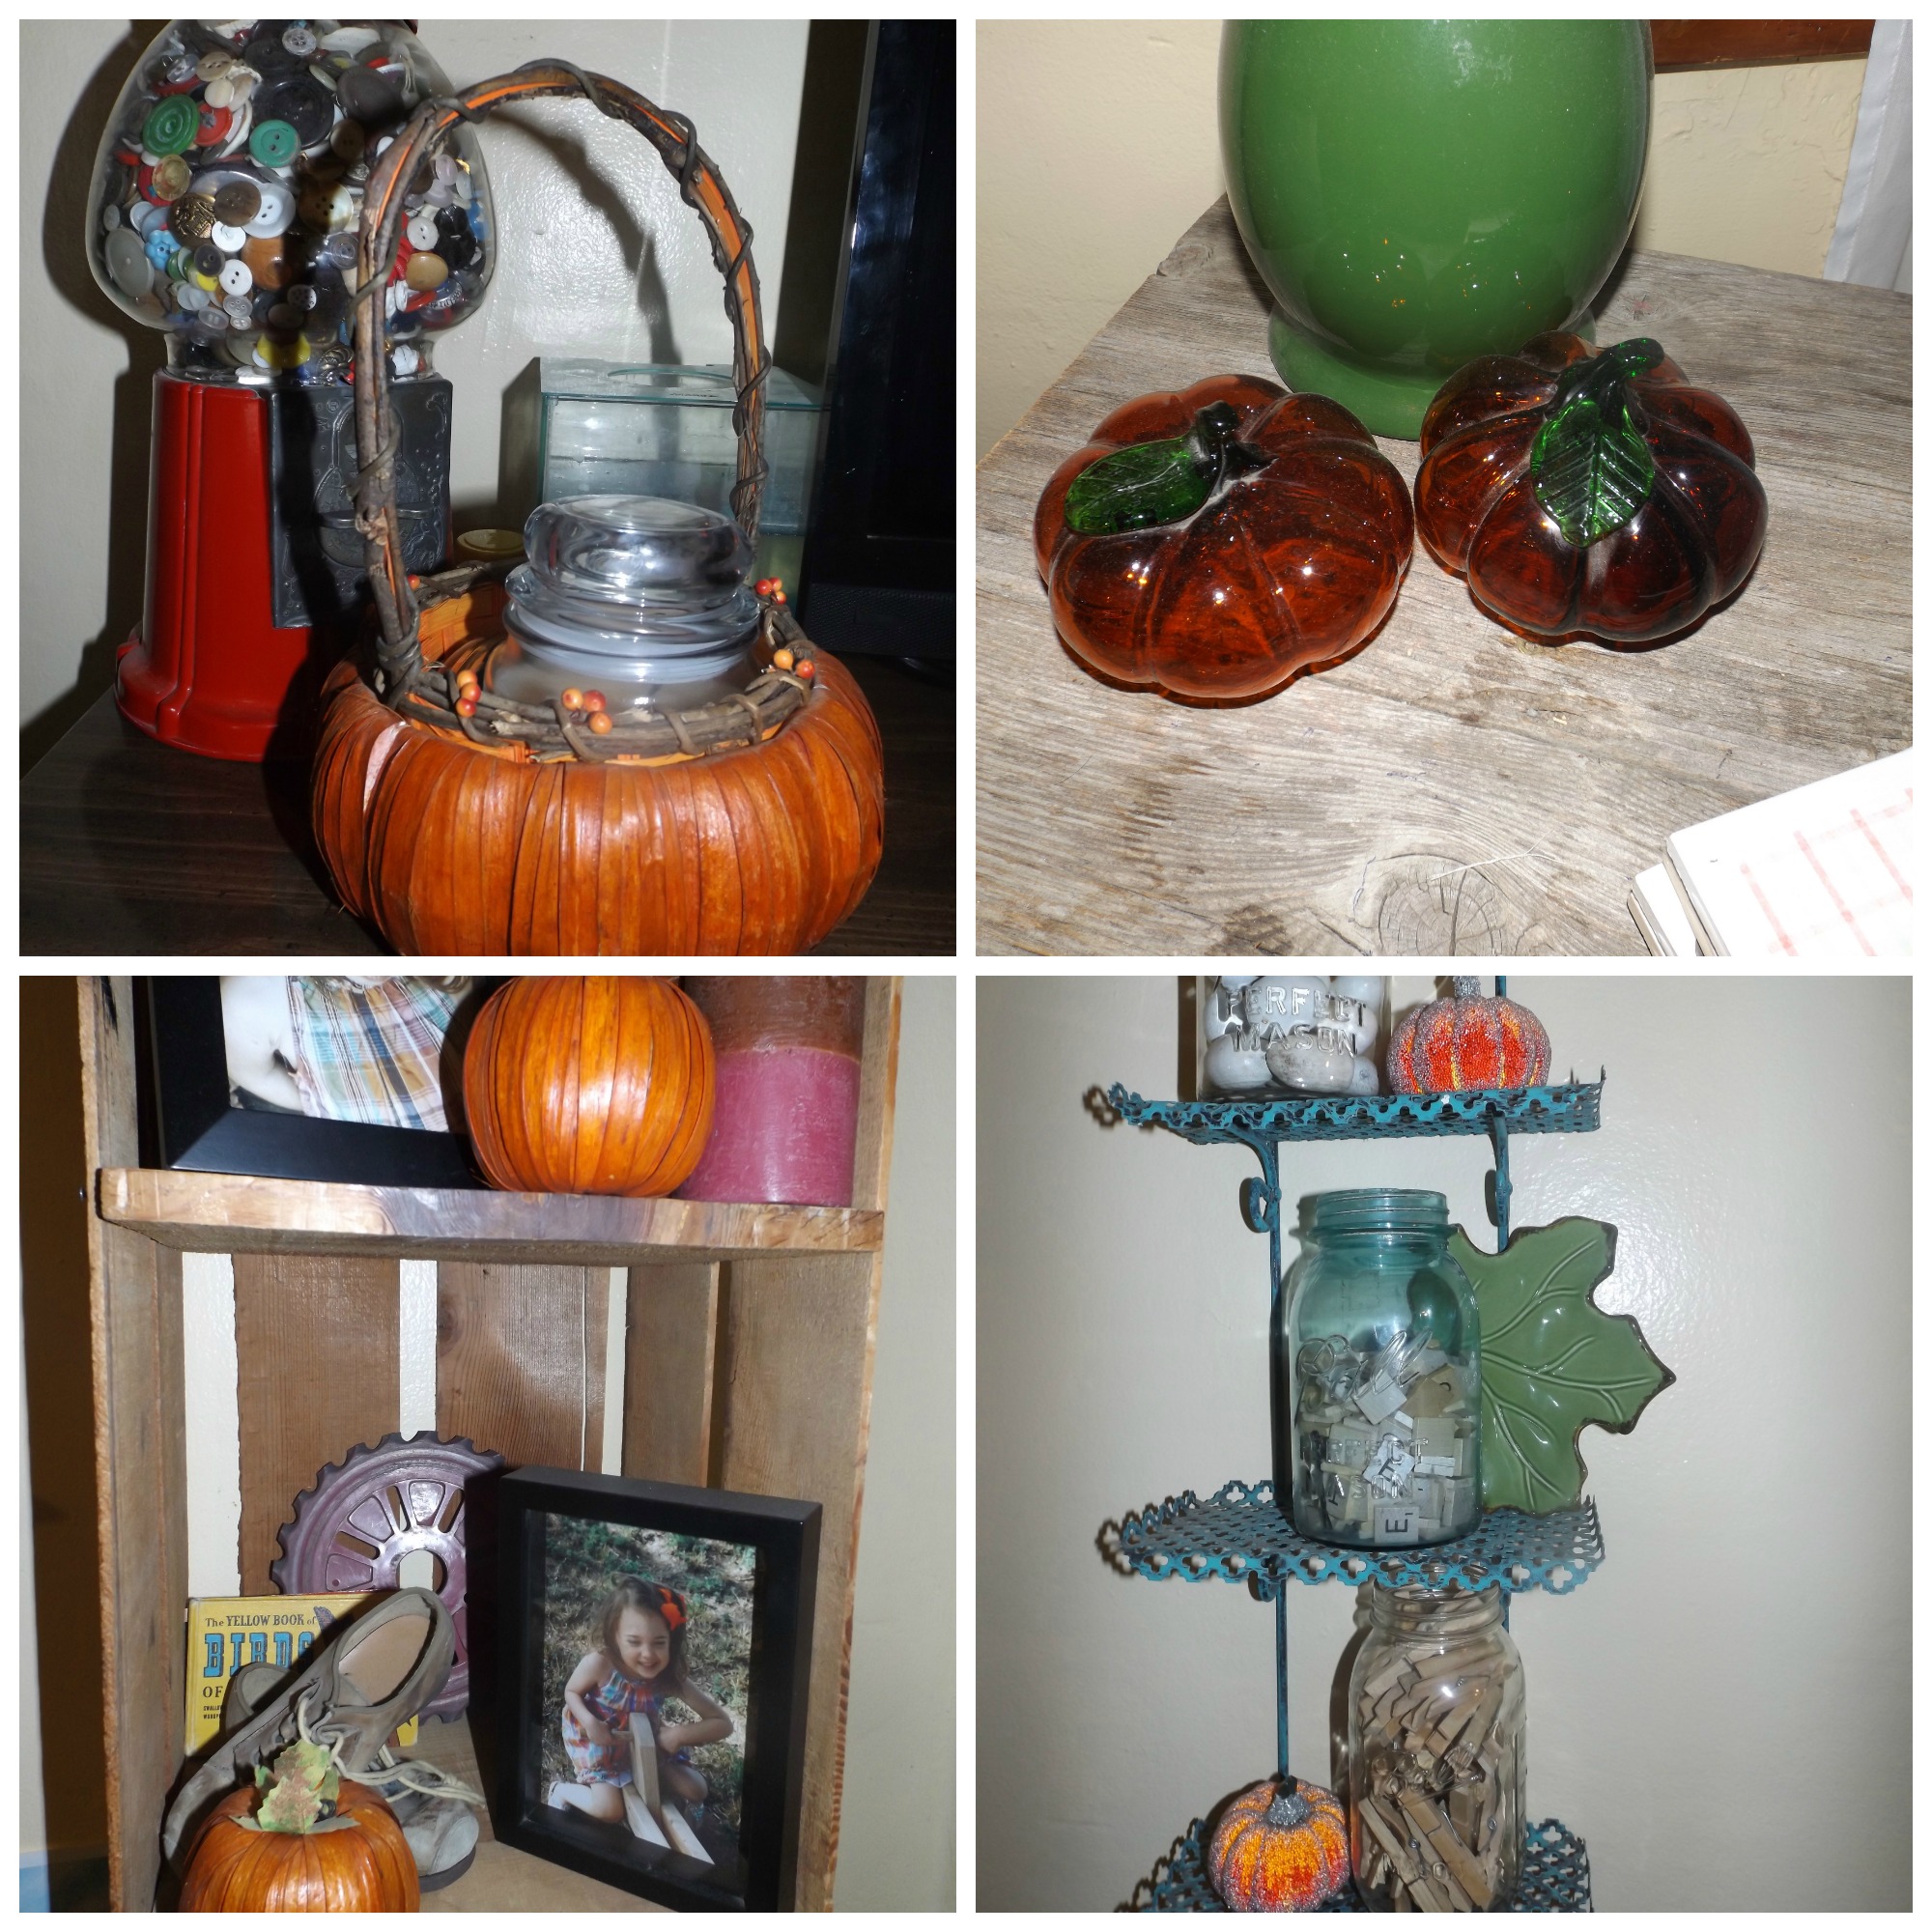
There are other random pumpkins in a few more nooks and crannies around the room, too.
You can’t have fall without pumpkins
All of these warm oranges and reds make it feel extra cozy in here. Now if only I had a fireplace…and some Red Raider football on TV……….